This is really the final step in setting up TKGs, testing the deployment. We will create a simple 2 pod deployment and use the Avi load balancer as the load balancer.
Deploy the Blue Application in Tanzu Guest Cluster
Login to the guest cluster and enable privileges
Run the following commands to login to the vSphere Tanzu cluster, and switch context to the new guest cluster that was created. By default Tanzu has a fair amount of Pod security, and we will be restricted in what we can create, unless we open up the access. Since this is a lab environment, it should not be an issue. The last command will essentially provide full access for creating services, deployments, pods, etc. More info: https://docs.vmware.com/en/VMware-vSphere/7.0/vmware-vsphere-with-tanzu/GUID-4CCDBB85-2770-4FB8-BF0E-5146B45C9543.html
kubectl vsphere login --vsphere-username administrator@vsphere.local --server=https://10.10.4.50 --insecure-skip-tls-verify --tanzu-kubernetes-cluster-namespace=dev --tanzu-kubernetes-cluster-name=tkg-cluster-01
kubectl config use-context tkg-cluster-01
kubectl create clusterrolebinding psp:authenticated --clusterrole=psp:vmware-system-privileged --group=system:authenticated
Create file blue-deployment-l4.yaml
Use nano/vi/vim or your favorite editor and create this file.
apiVersion: apps/v1
kind: Deployment
metadata:
  name: blue
spec:
  selector:
    matchLabels:
      app: blue
  replicas: 2
  template:
    metadata:
      labels:
        app: blue
    spec:
      containers:
      - name: blue
        image: mattadam07/bluegreen:latest
        ports:
        - containerPort: 5000
        env:
        - name: app_color
          value: "blue"
---
apiVersion: v1
kind: Service
metadata:
  name: blue
spec:
  type: LoadBalancer
  ports:
  - name: http
    port: 80
    targetPort: 5000
    protocol: TCP
  selector:
    app: blue
Apply the blue-deployment-l4.yaml file
kubectl apply -f blue-deployment-lb.yaml
deployment.apps/blue created
service/blue created
Run “kubectl get pods” to see the status. You will see the following if done correctly
deployment.apps/blue created
service/blue created
kubectl get pods
NAME                   READY   STATUS    RESTARTS   AGE
blue-c967796c6-p24kc   1/1     Running   0          76s
blue-c967796c6-sfk7s   1/1     Running   0          76s
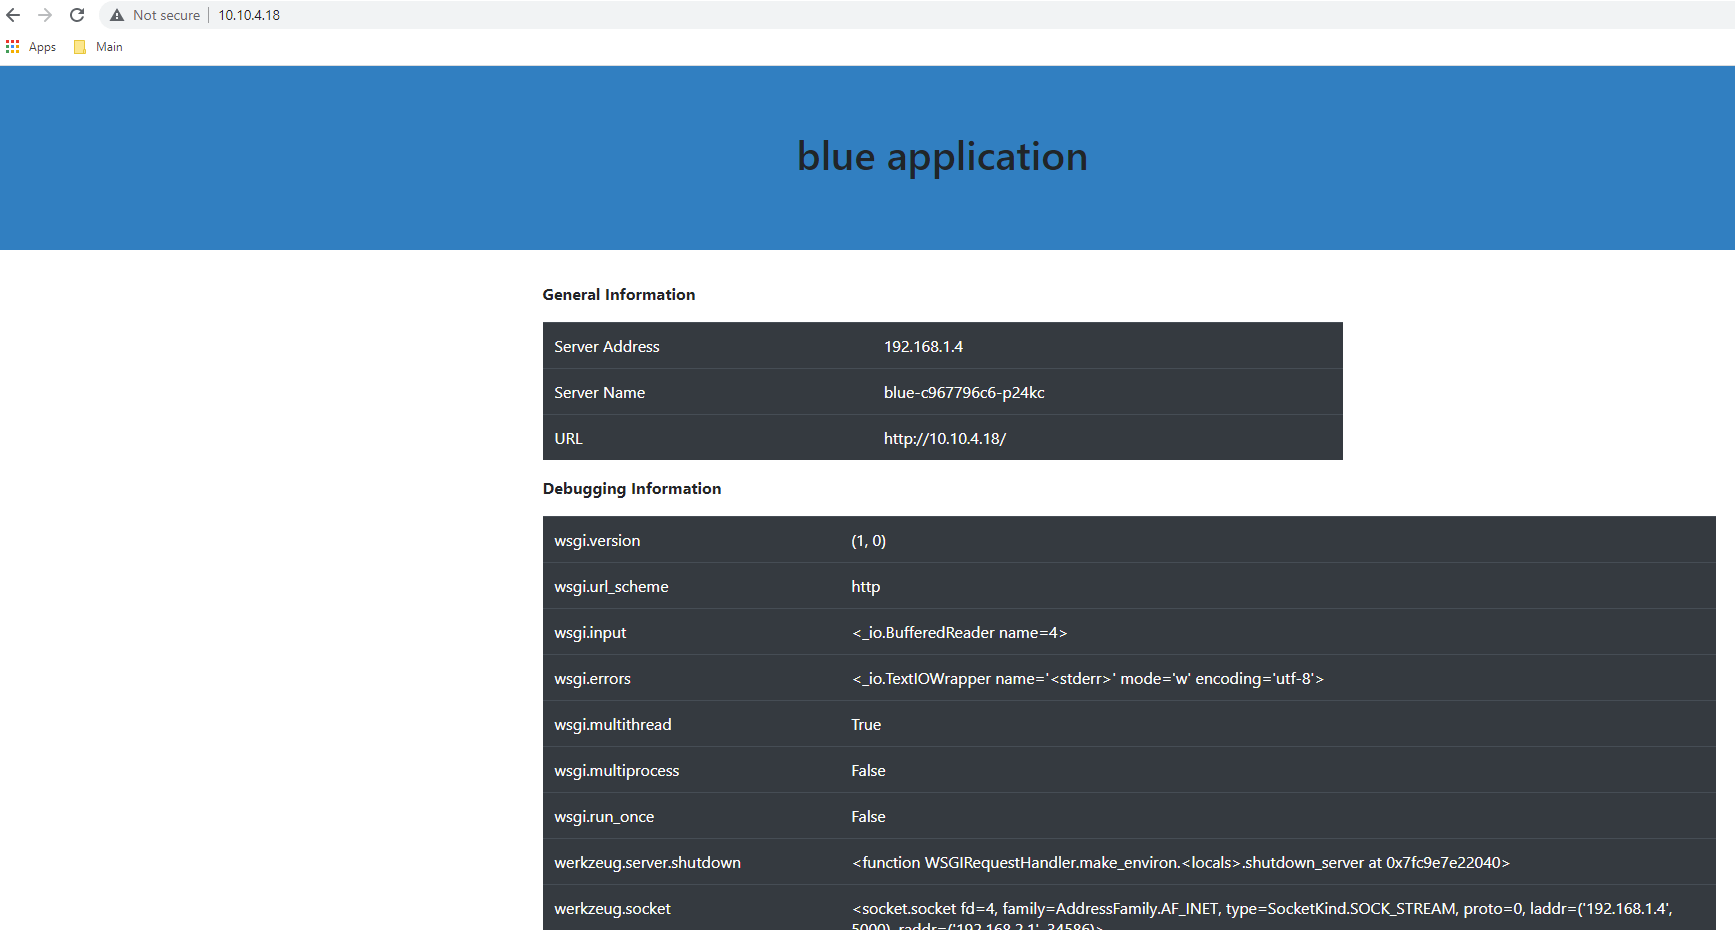
Check the services and see if the LoadBalancer endpoint was created successfully. The IP 10.10.4.18 should now be accessible and you should be able to test it.
kubectl get services
NAME         TYPE           CLUSTER-IP       EXTERNAL-IP   PORT(S)        AGE
blue         LoadBalancer   10.109.206.160   10.10.4.18    80:32242/TCP   4m4s
kubernetes   ClusterIP      10.96.0.1        <none>        443/TCP        4h47m
supervisor   ClusterIP      None             <none>        6443/TCP       4h47m
Validate the Avi LB VirtualService

Here is the newly created VirtualService. This was auto created through the built in AKO from TKGs. Note the IP address 10.10.4.18
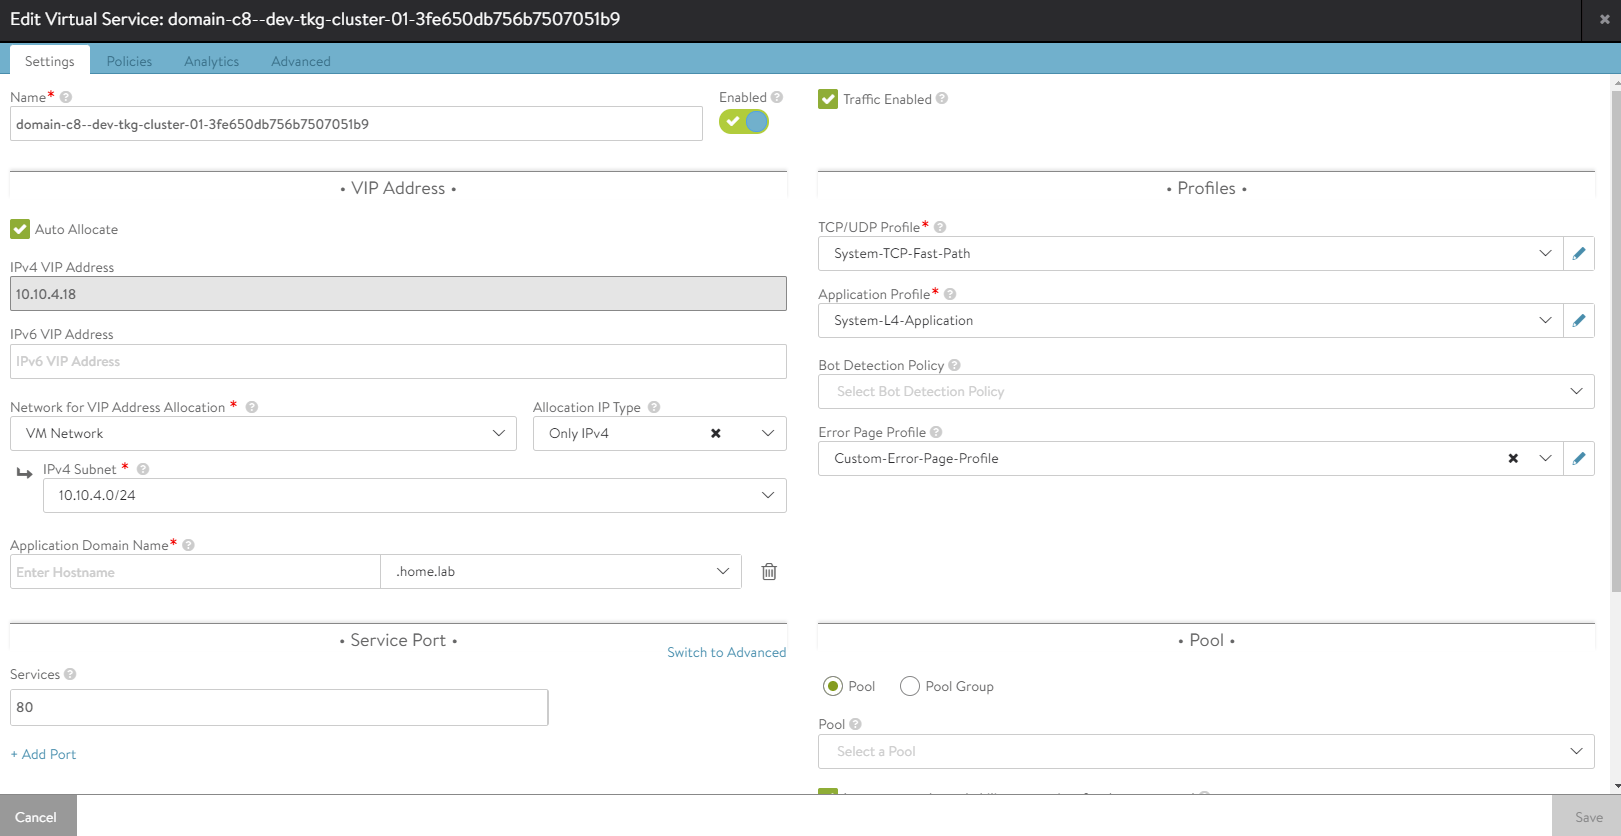
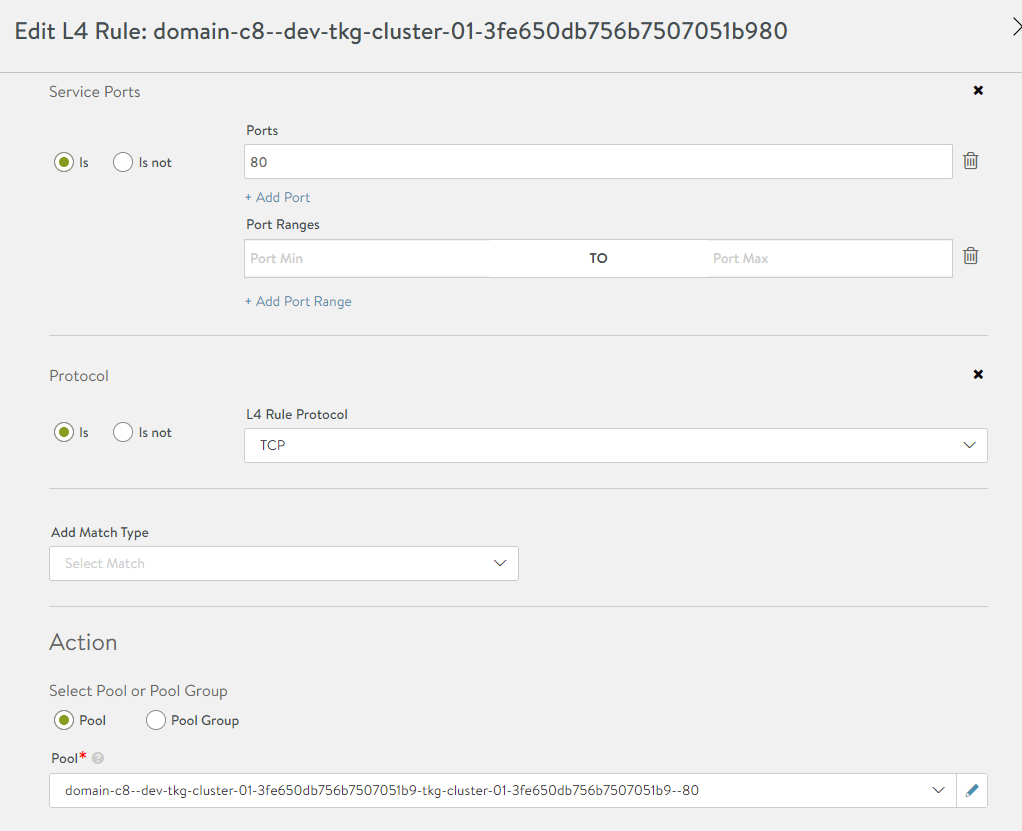
Click edit on the Virtual Service and we can see that Application Profile is set for “System-L4-Application”, indicating this is an L4 vip. Additionally note that there is no Pool set at the bottom. This is actually done through an L4 Policy Set as shown below.
And lastly let’s test the URL: http://10.10.4.18