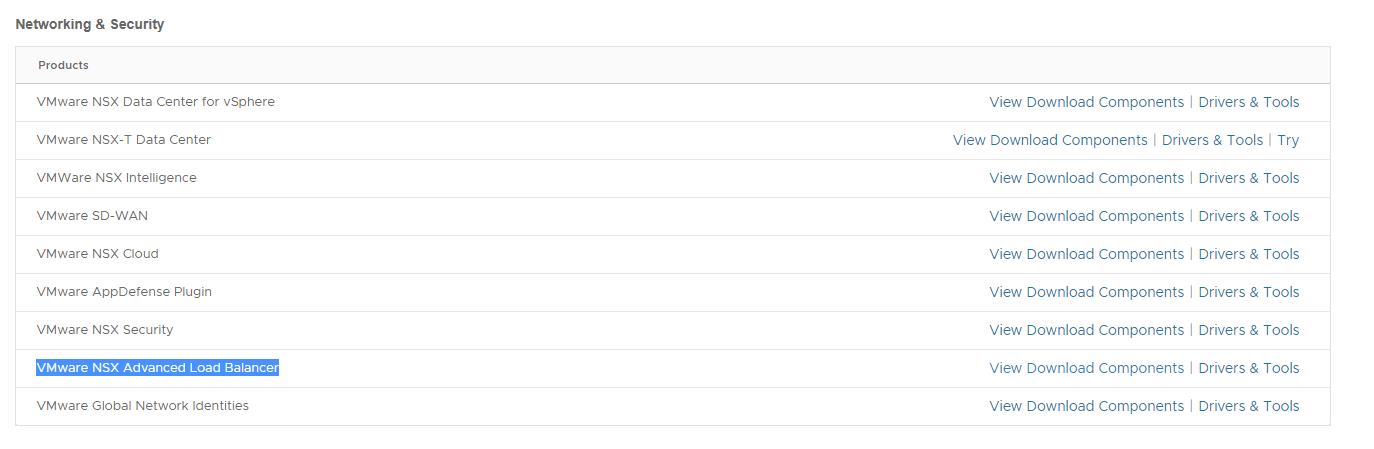
Login to your account at https://my.vmware.com/ and go to Products and Accounts ->Products -> All Products
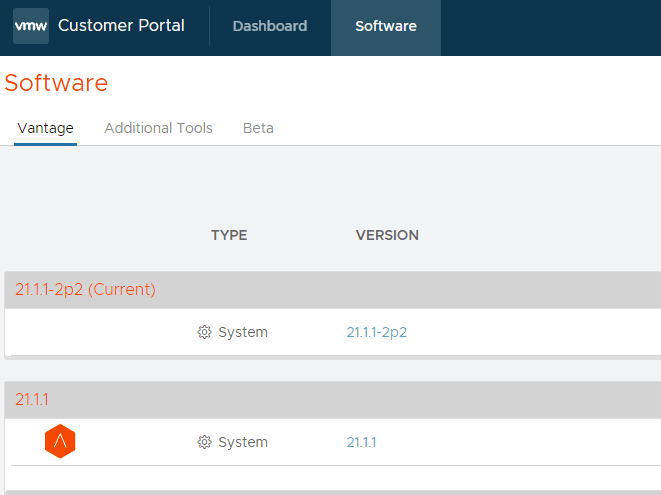
Select VMware NSX Advanced Load Balancer, and click View Download ComponentsThen click Go to DownloadsThen Download Now.Under Software you will see the latest versions, at the time of writing we are currently on 21.1.1.Select the version and the VMware file type (ova) and click download on the right side.
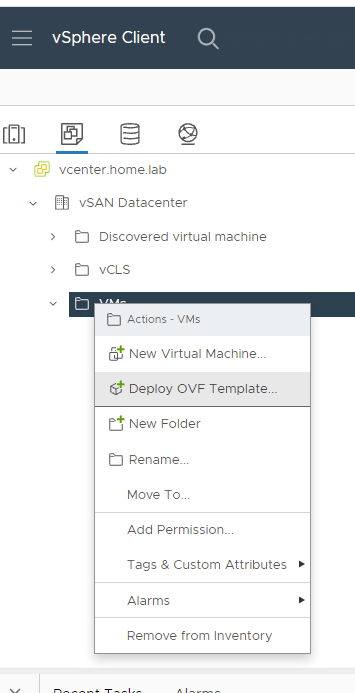
Deploy the OVA template in vCenter
This step is pretty easy, but i’ll include a few pictures.
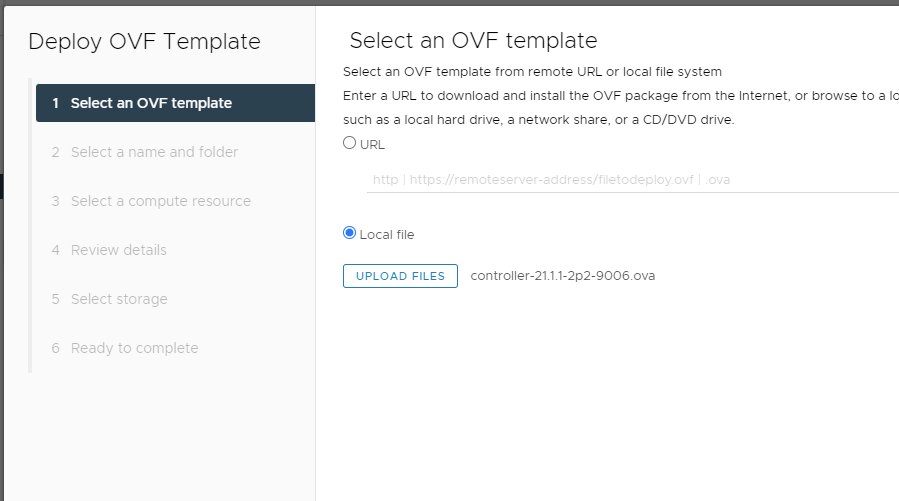
Right click on your VM folder and select Deploy OVF TemplateSelect the avi controller ova fileClick next a few times until you get to the Customize Template. It’s not required but I would suggest adding a static IP address here for the Avi controller. I’m using 10.10.4.5. Add the mask and gateway, and no other settings are required. Click next and deploy the ova.
Configure Avi Controller
There’s only a few steps here required to configure the controller, then we can move into the tanzu side of the house.
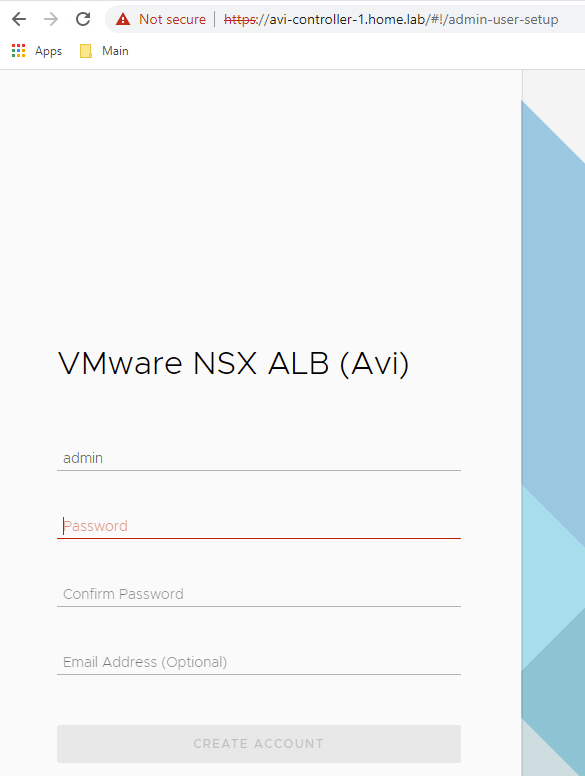
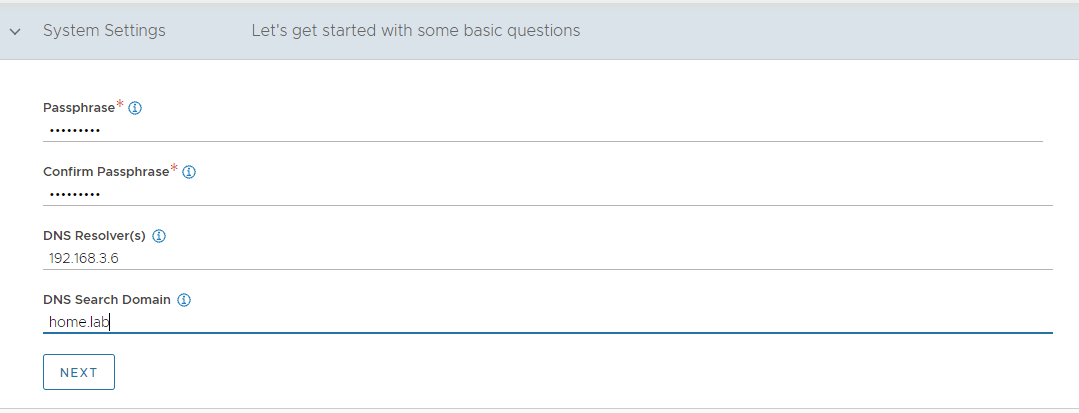
Access the Avi controller by fqdn, and set a new password.Set some additional System Settings, backup passphrase, dns resolver, dns search domain. Leave everything else default and Submit.This is the screen you should be seeing now.
Configure Cloud
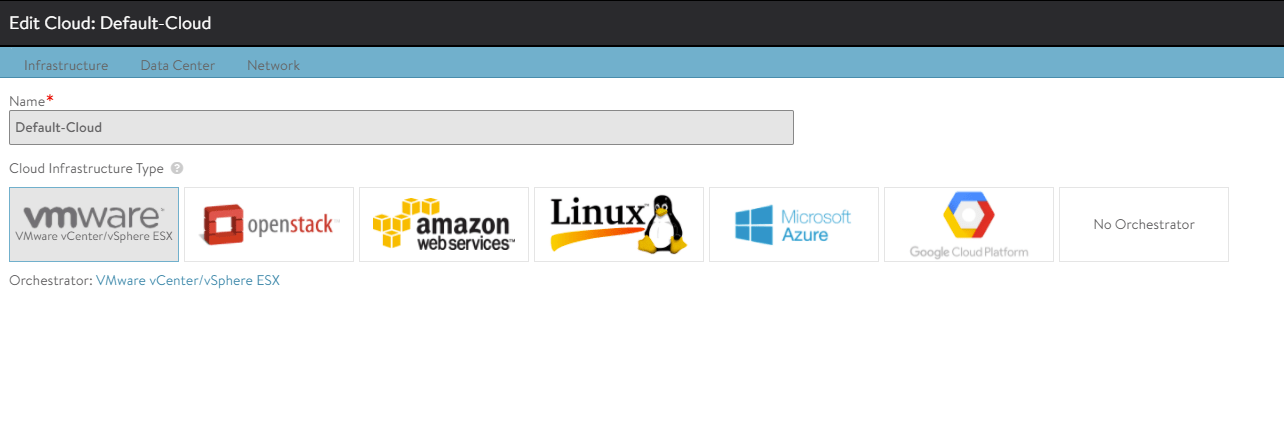
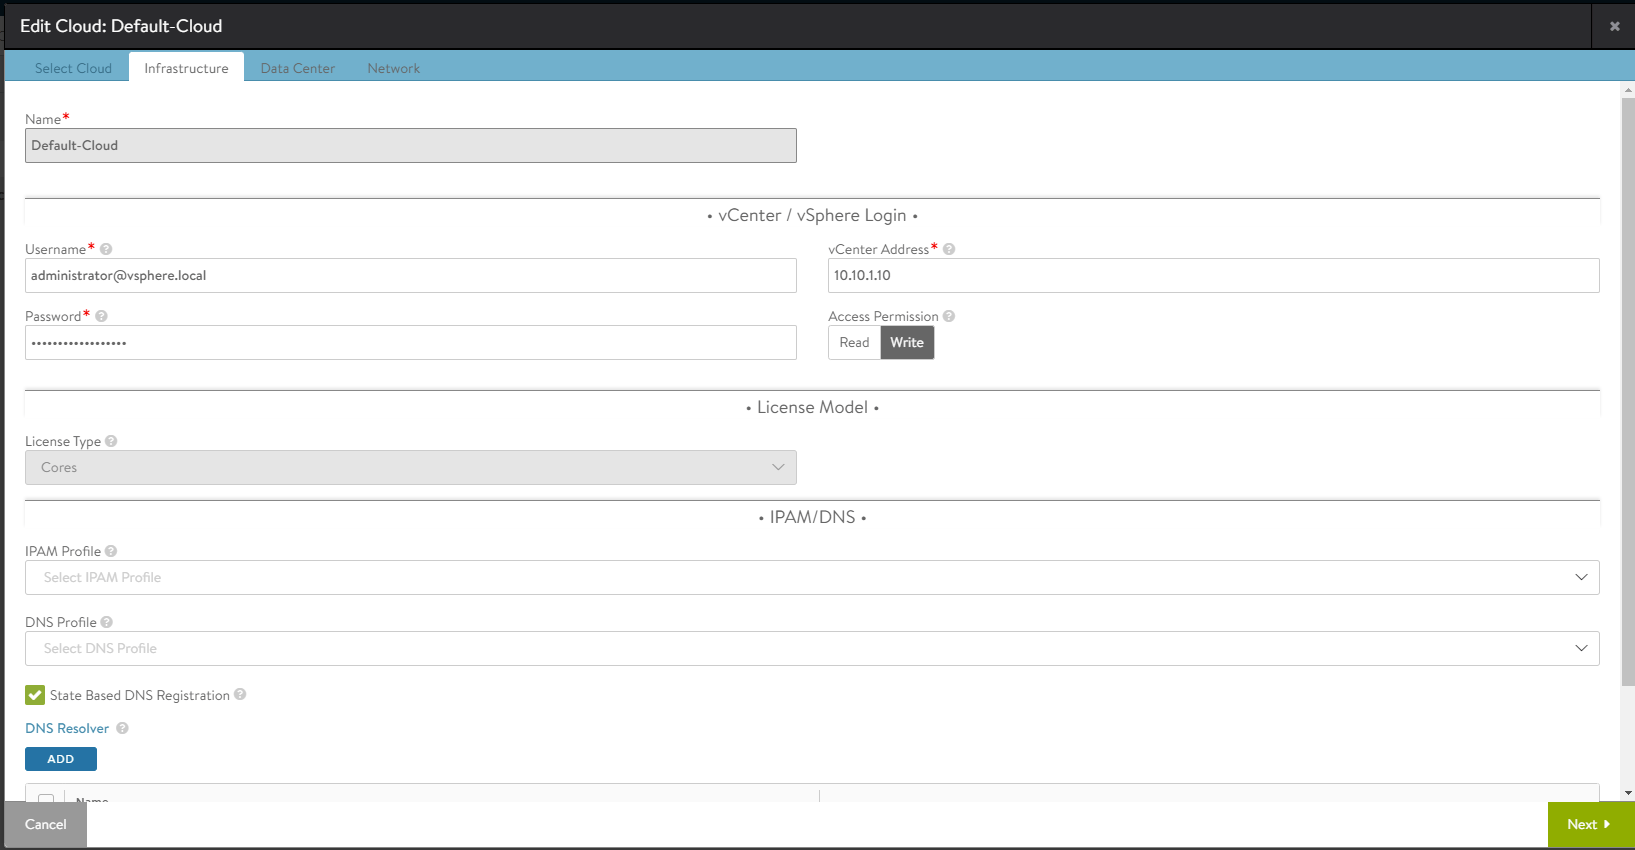
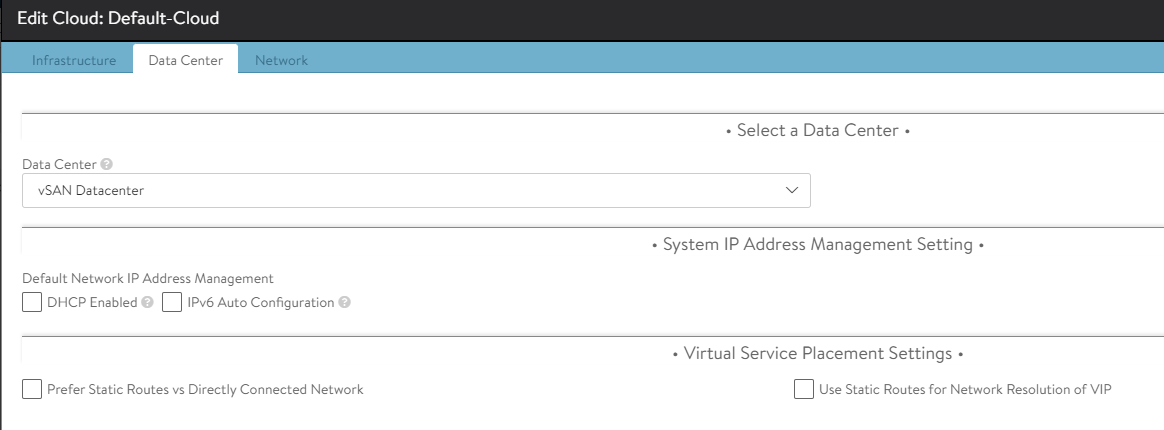
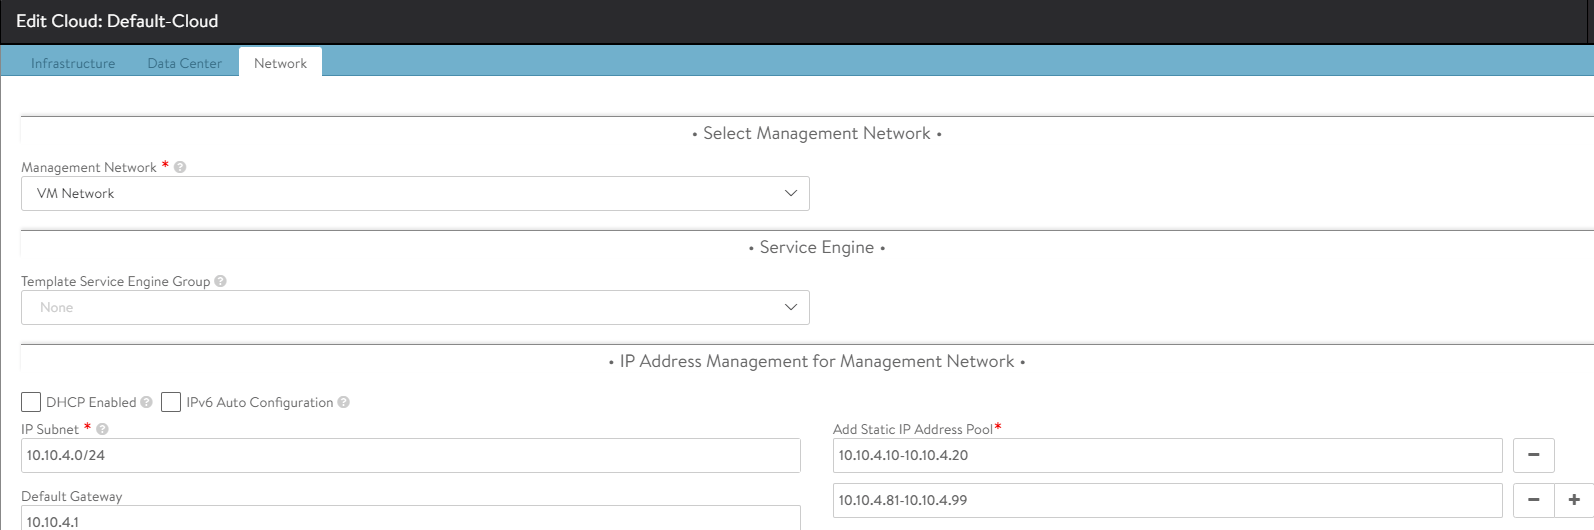
Navigate to Infrastructure -> Clouds and select the pencil “Edit” on Default-CloudSelect VMware CloudAdd in the credentials for vCenter and the IP address, select Next.Select the vSAN Datacenter, click NextLastly configure the management network and static IP ranges.Wait a few moments and your cloud should turn green.
Configure PodNetwork
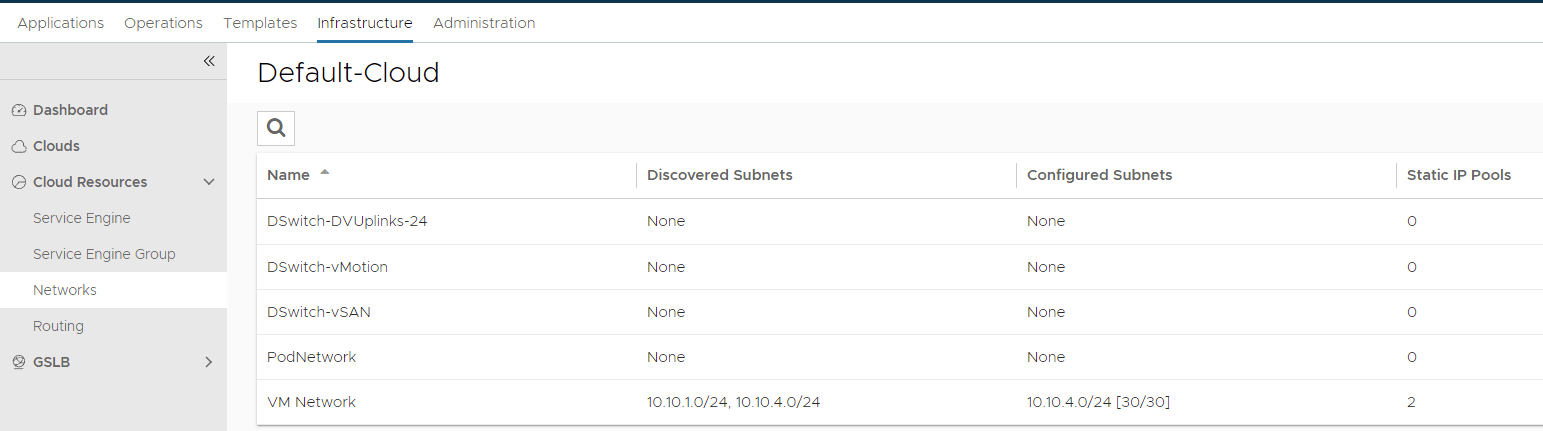
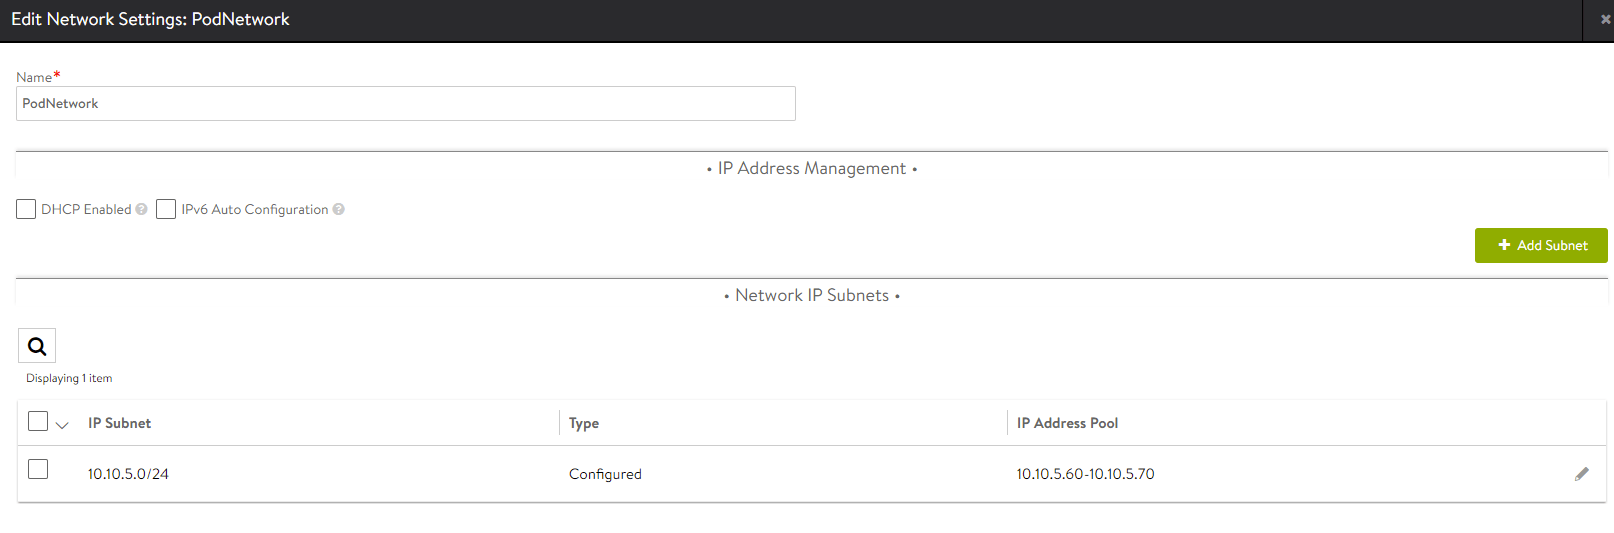
Navigate to Infrastructure -> Networks and select PodNetwork. (If this does not exist, go back to vCenter and under the Networks tab, add a Distributed Port Group called “PodNetwork” under DSwitch.Click edit on the PodNetwork and add the subnet and static range as listed above.
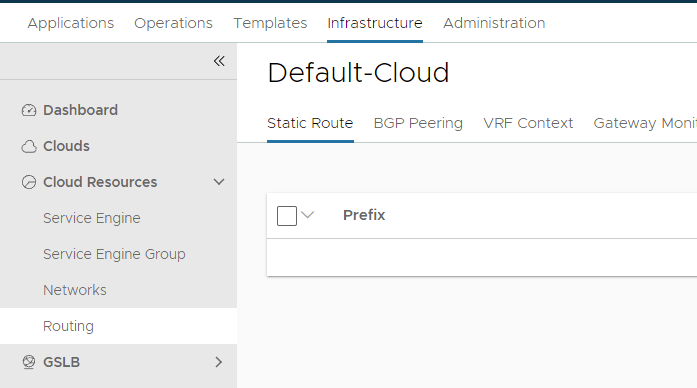
Configure Default route for SEs
Navigate to Infrastructure -> Routing and click Create.Add 0.0.0.0/0 and the next hop of 10.10.4.1
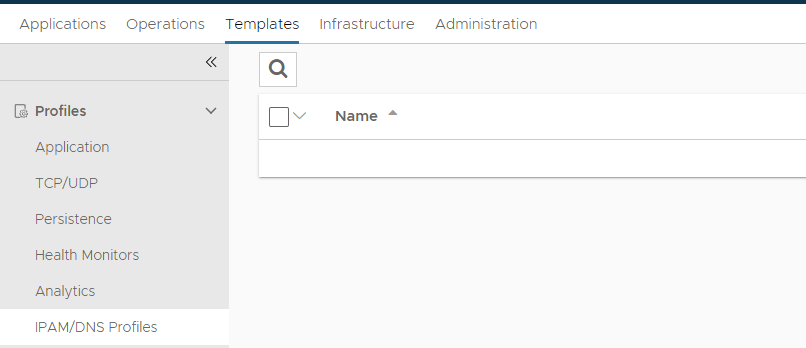
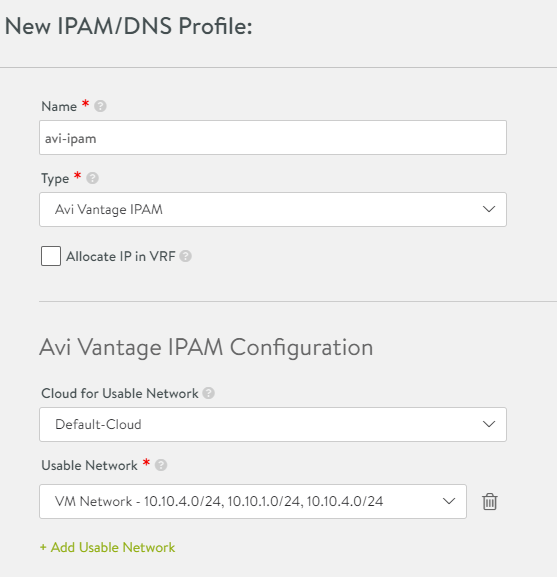
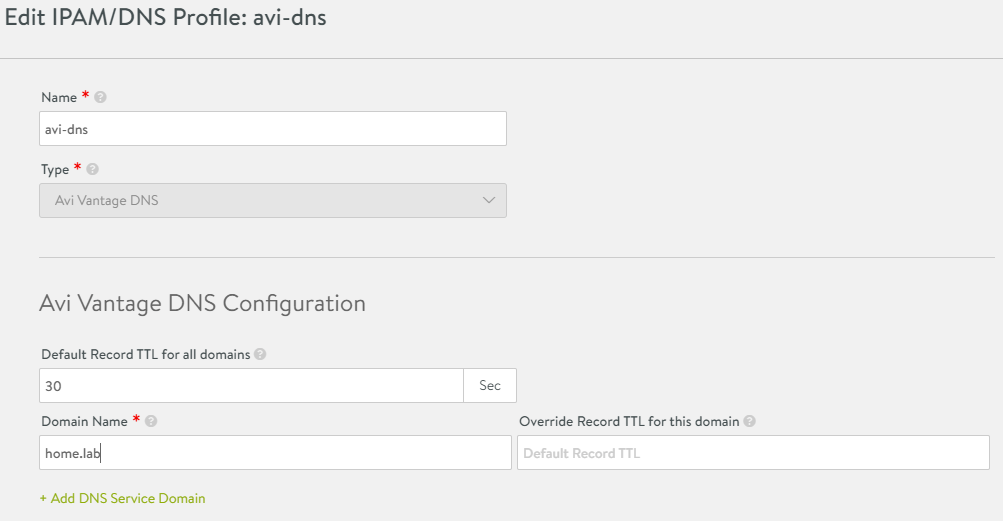
Create IPAM profile and DNS profile and add them to the Cloud
IPAM allows Avi to auto allocate IP addresses to newly created virtualservices.
Navigate to Templates -> IPAM/DNS Profiles and click Create IPAM Profile.Modify the settings to the above and click Save.Modify the Dns profile settings to the above and click Save.Lastly navigate back to the Infrastructure -> Clouds and click edit on the Default-CloudAdd the ipam profile and dns profile to the cloud and click Save.
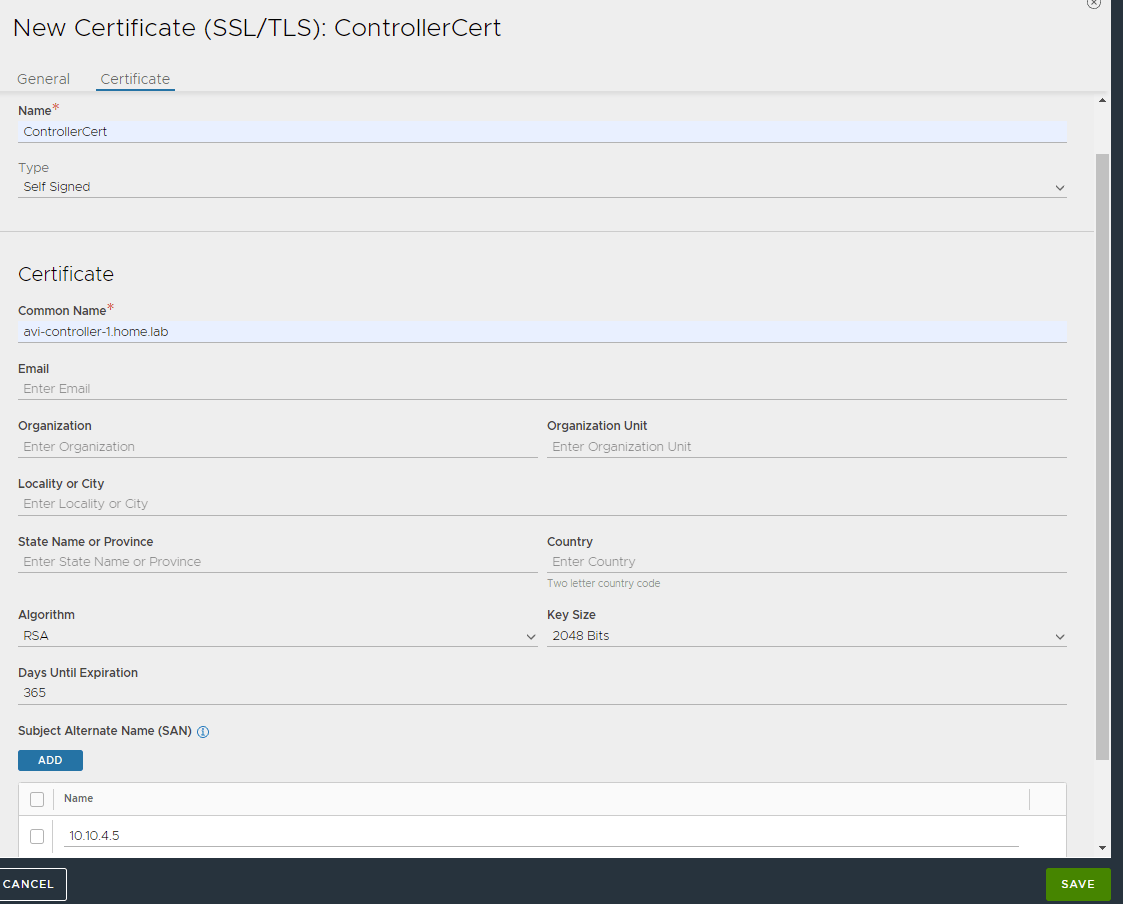
Create a controller certificate
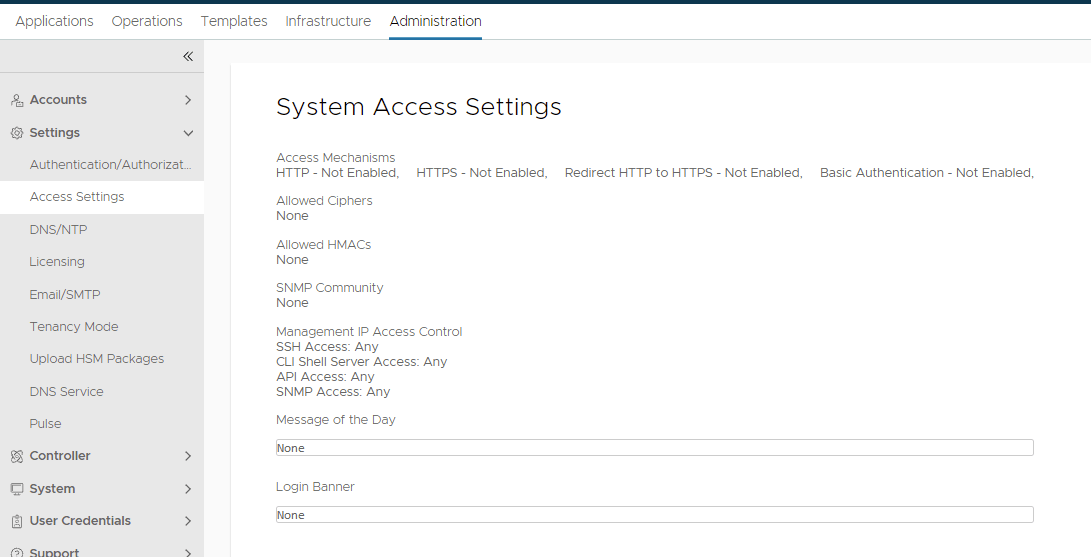
Navigate to Templates -> Security -> SSL/TLS Certificates and click Create Controller CertificateCreate a new certificate called ControllerCert with the fqdn as common name and the IP address as a SAN name. Everything else is default.Then navigate to Administration -> Settings -> Access Settings and click the pencil on the right to edit.Modify the SSL/TLS Certificate (for the controller) to the newly created certificate and save.
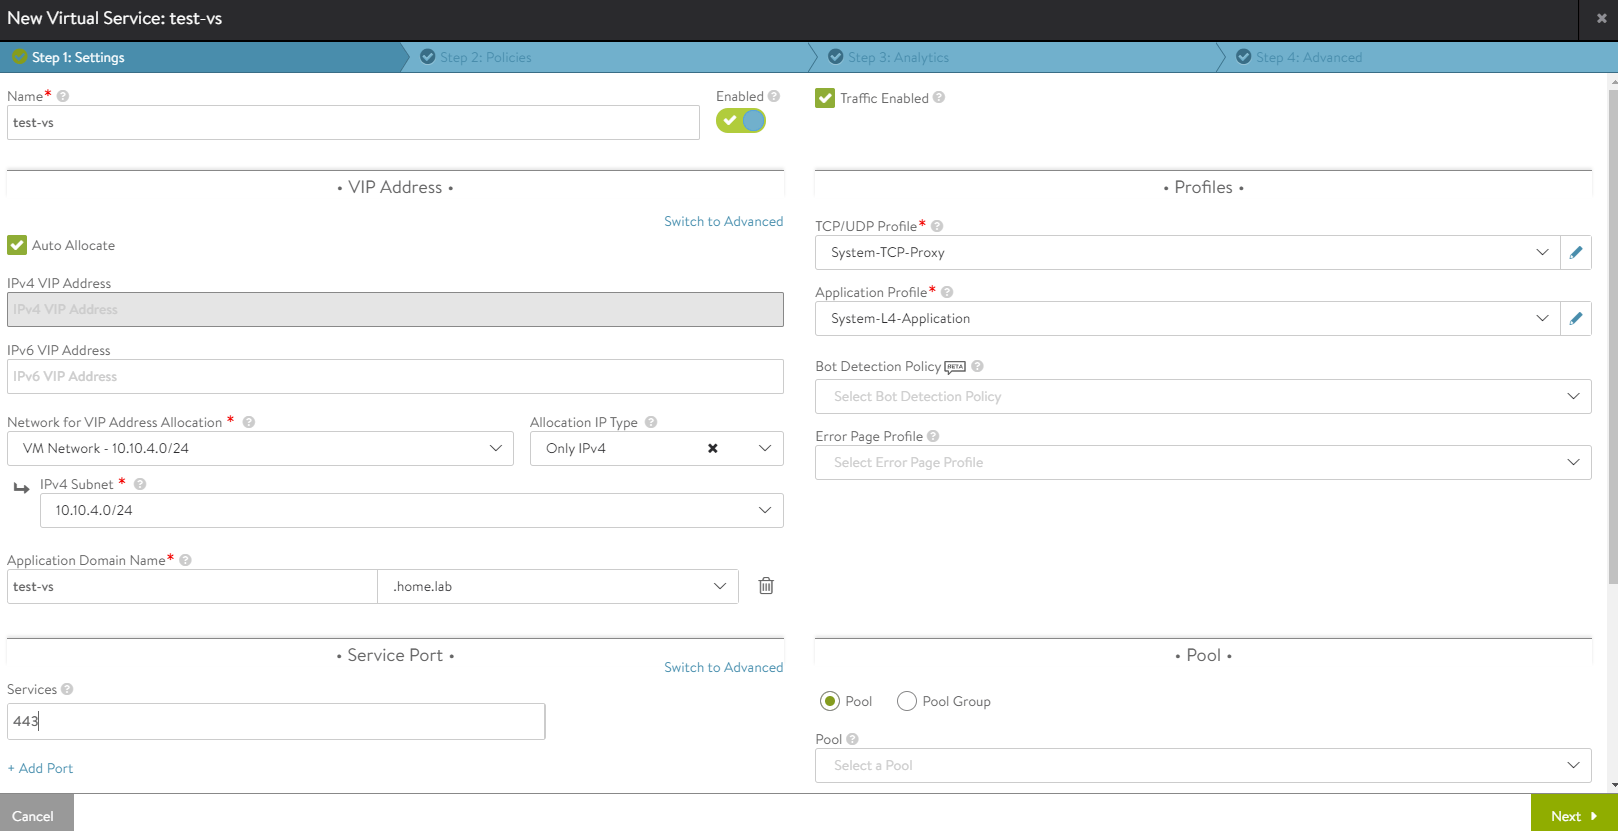
Create a test vs
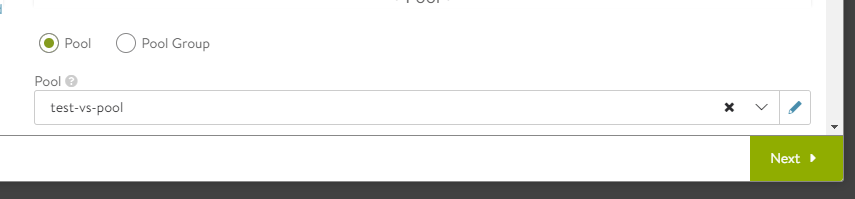
Add the name “test-vs” and set the Network by selecting VM Network, and the available subnet 10.10.4.0/24. Change Application Profile to “System-L4-Application” and the port to 443. Then on the bottom right, select Pool and in the drop down click Create Pool.The pool name will prefill. Change the port to 443 and select System-TCP health monitor. Click NextIf you already have a server in mind then add it here. I always add the avi controller (by fqdn) because it’s fast and I know it will have connectivity to itself 🙂 Click next and save the pool.You will now see the pool in the drop down. Click Next through all the screens and save and create the virtual.The virtual service will be marked down for a few minutes while Avi spins up some service engines to handle the traffic. Check back in 5 min or so.After a few minutes the virtualservice will show Green and Avi is configured and ready to go.