Ok so now we have the bootstrap vm ready, and photon is deployed as a template in vCenter. Additionally Avi is configured with either vCenter or NSX-T cloud, and a DNS and IPAM profile are configured on the cloud. Now it’s time to deploy the management cluster
There’s 2 ways you can deploy the management cluster, UI or CLI. The first time you do this, it makes the most sense to do it via UI, since it’s prettier than a yaml file. All times after that, it is way faster to do this via cli using the values from that same yaml file.
CLI Setup
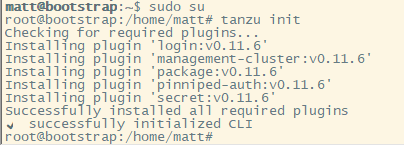
So let’s start by setting up Tanzu.

Run the following commands:
sudo su
tanzu init
We also need to get the ssh keys generated from the bootstrap vm. Run the following command and save the output.
cat ~/.ssh/id_rsa.pub
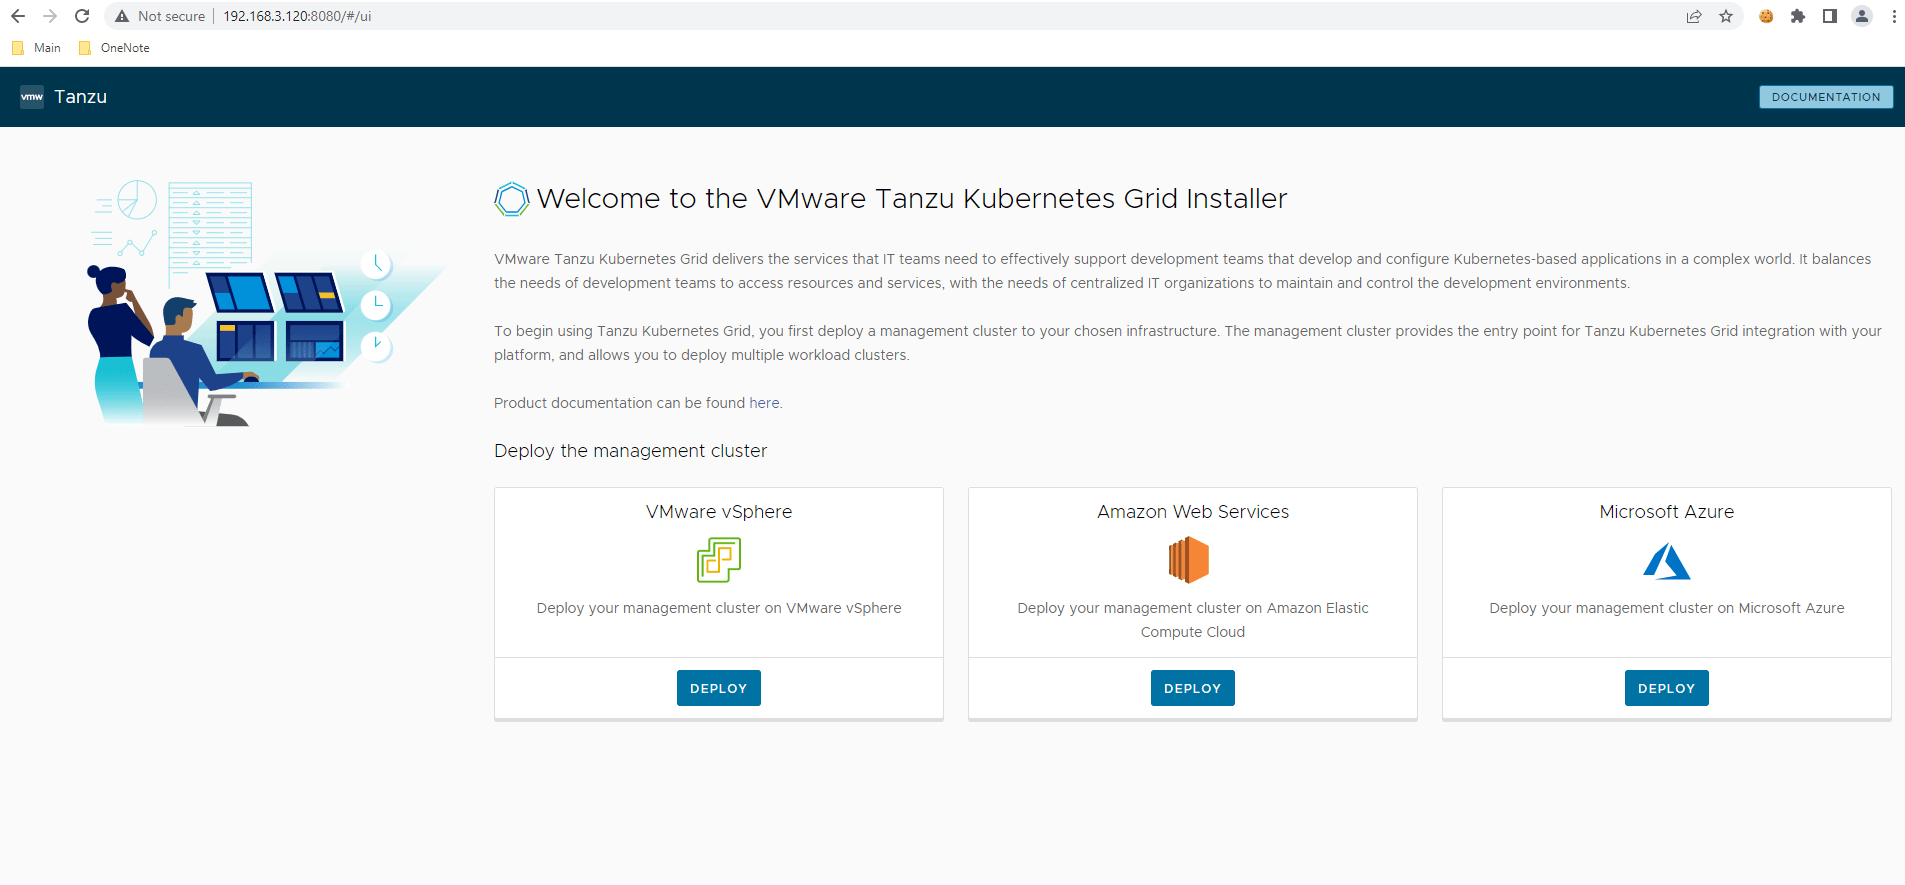
Deploy the Management Cluster via UI
To bring up the UI, run the following command:
tanzu management-cluster create --ui --bind "0.0.0.0:8080"

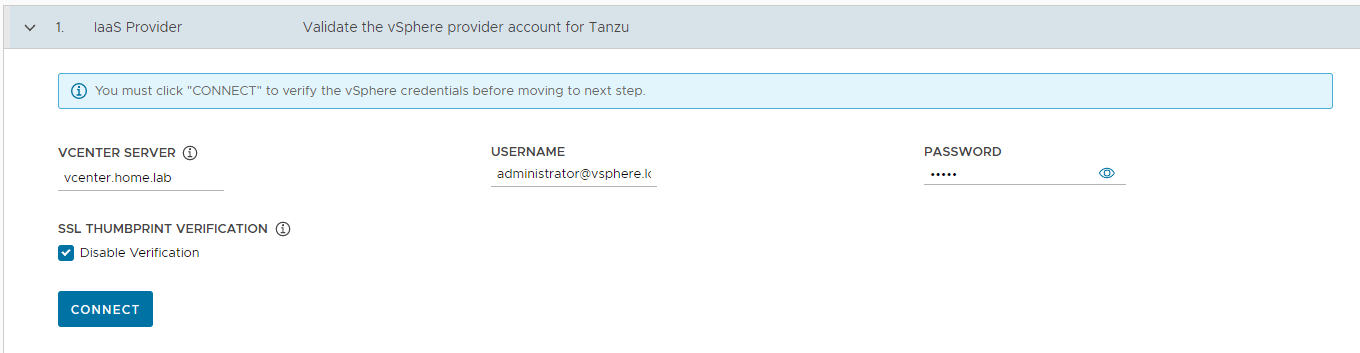
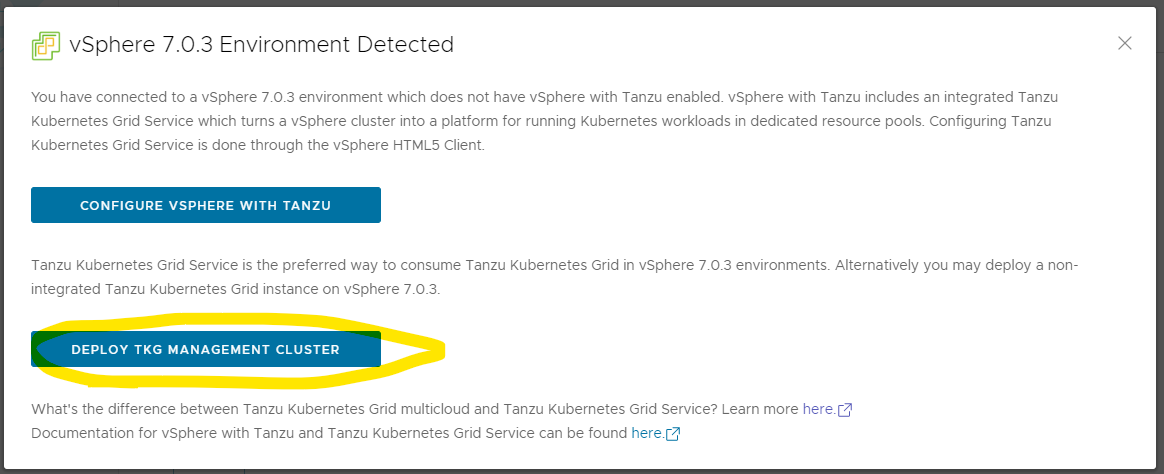
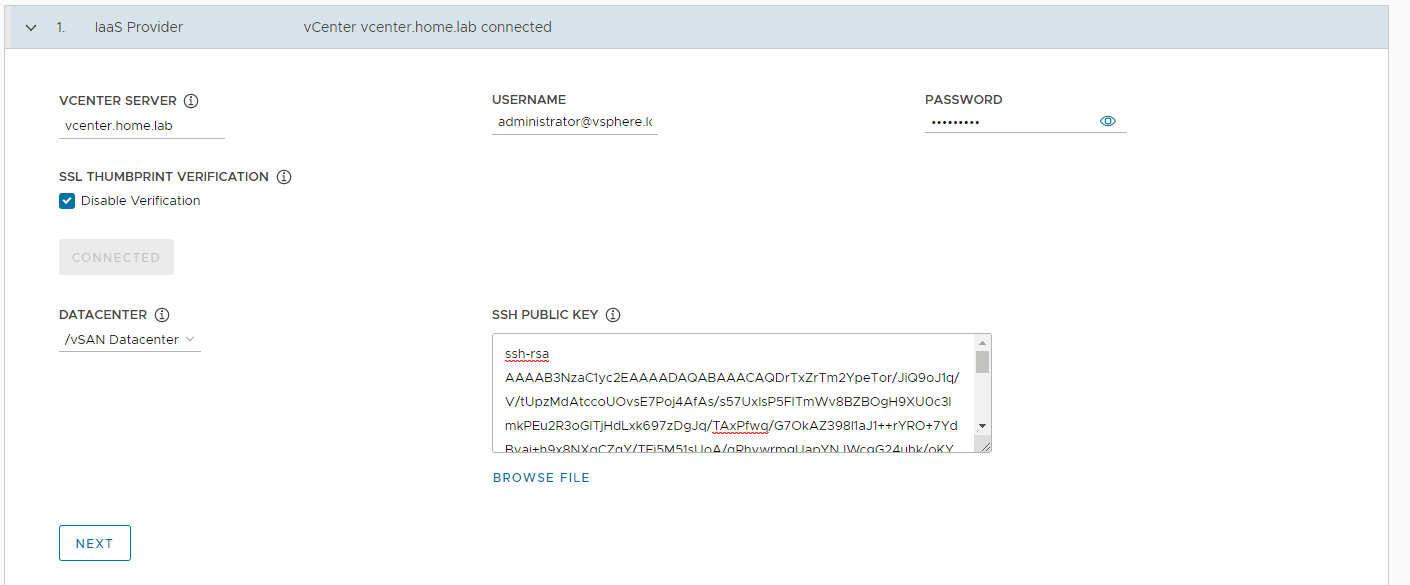
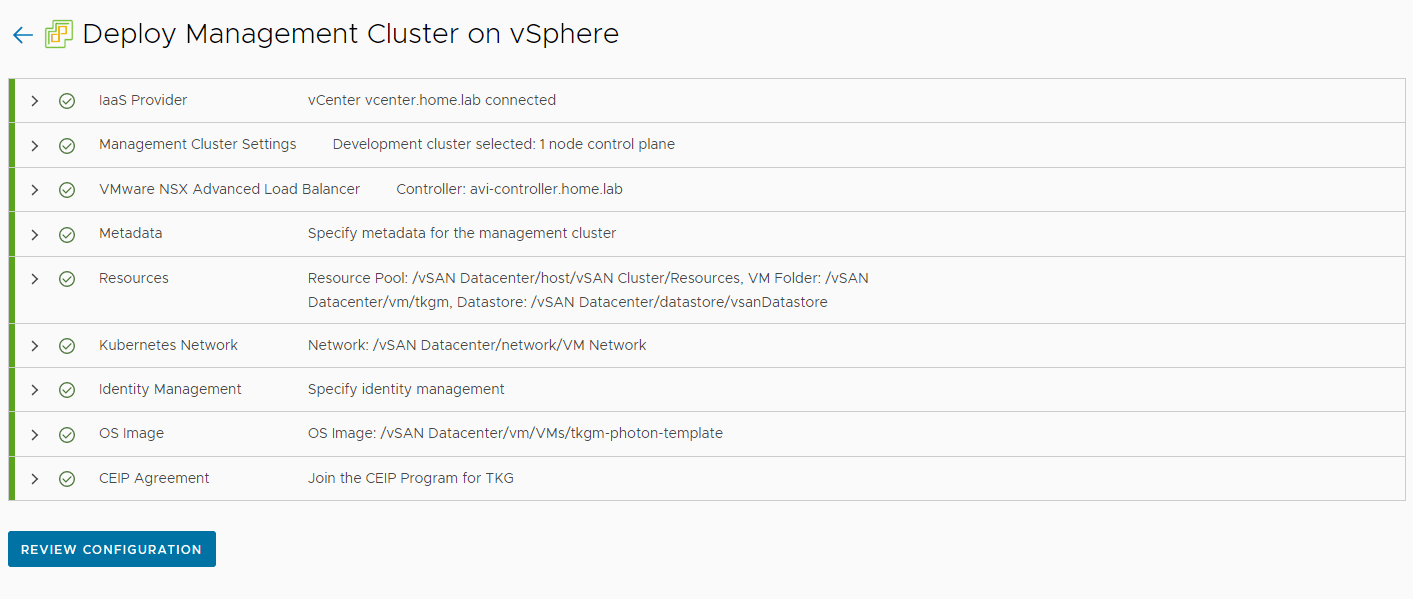
Iaas Provider
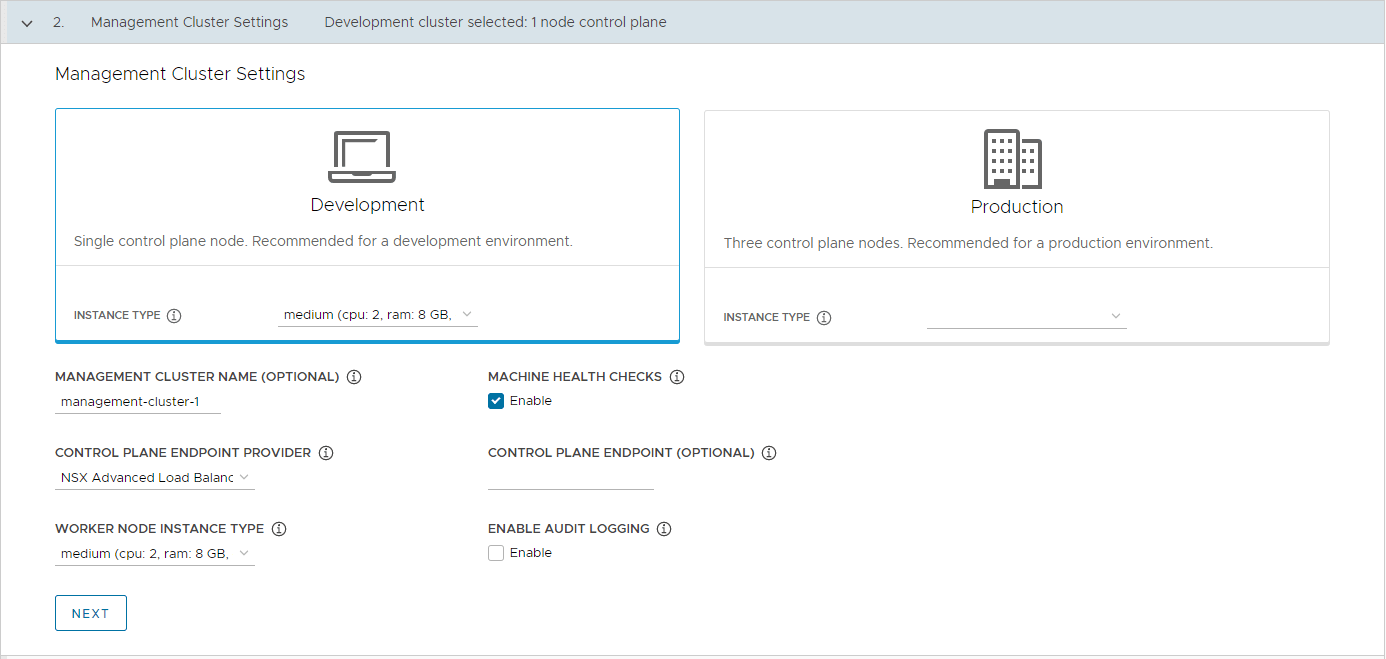
Management Cluster Settings
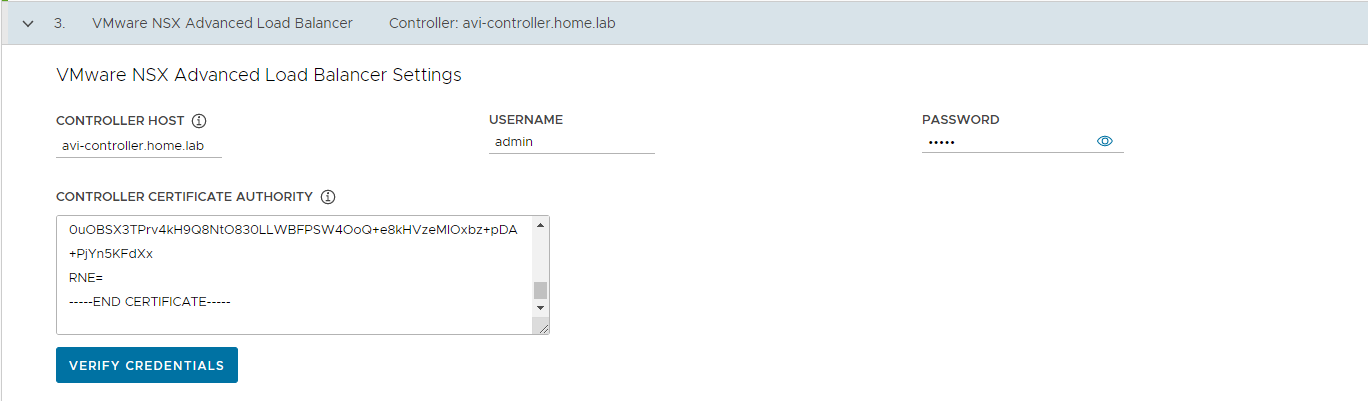
VMware NSX Advanced Load Balancer
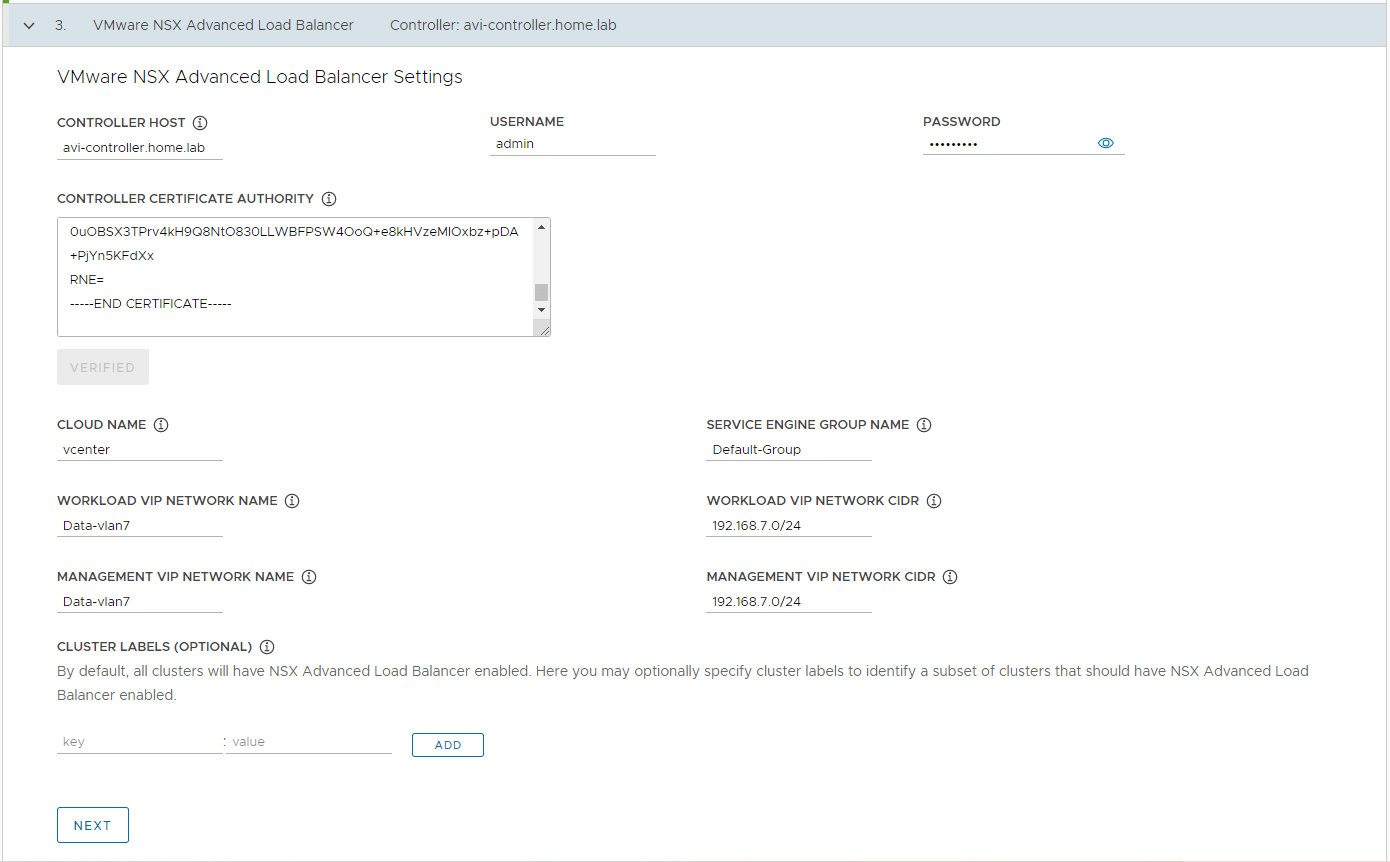
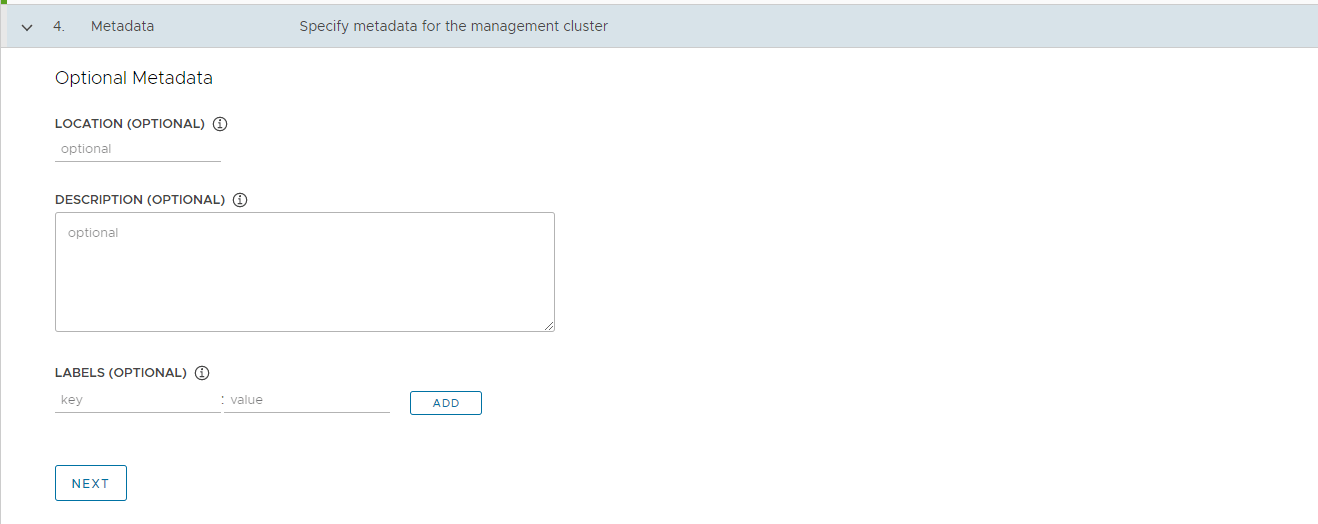
These labels are specifically regarding the deployment of the Avi Ingress Container called AKO. If you don’t have any labels set, then by default every guest cluster you create will have AKO installed so all new L4 and L7 services will get an IP address through Avi. If you want to do this manually then create a label here, and for each of your guest clusters, add that same label for the guest clusters that you want AKO automatically deployed. If you don’t want AKO deployed, then add a label here, and do not add that label when we create the guest cluster. To keep it simple, you can leave the labels blank.
Metadata
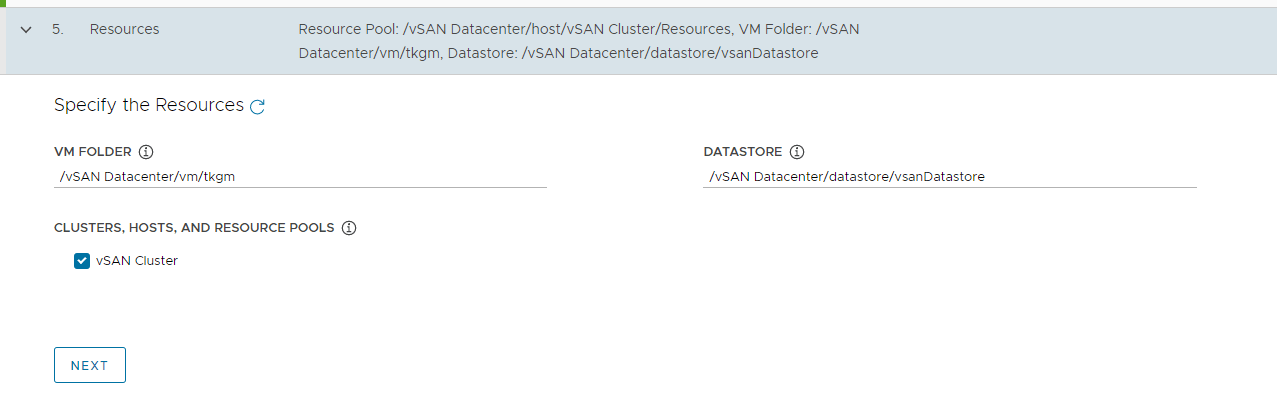
Resources
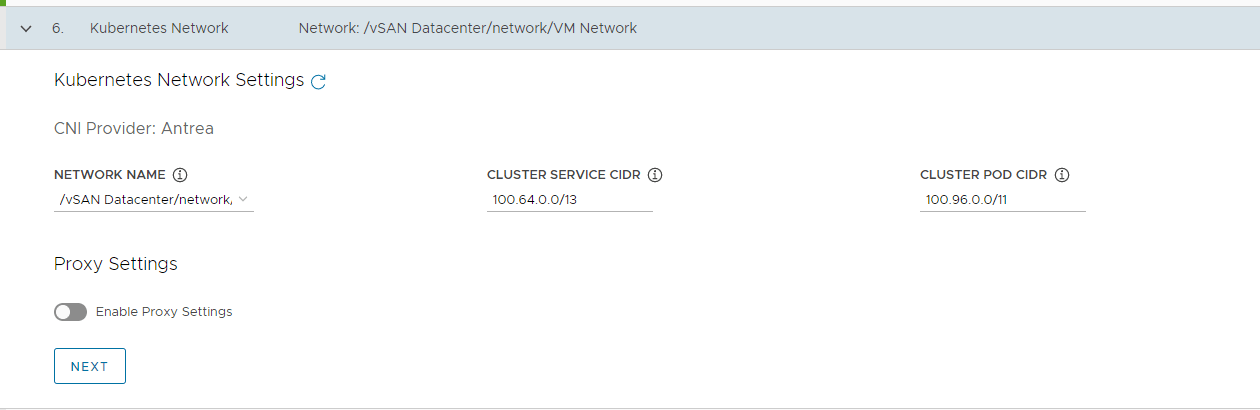
Kubernetes Network
Identity Management

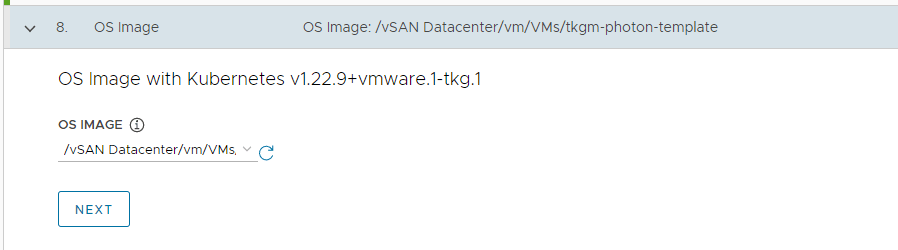
OS Image
CEIP Agreement

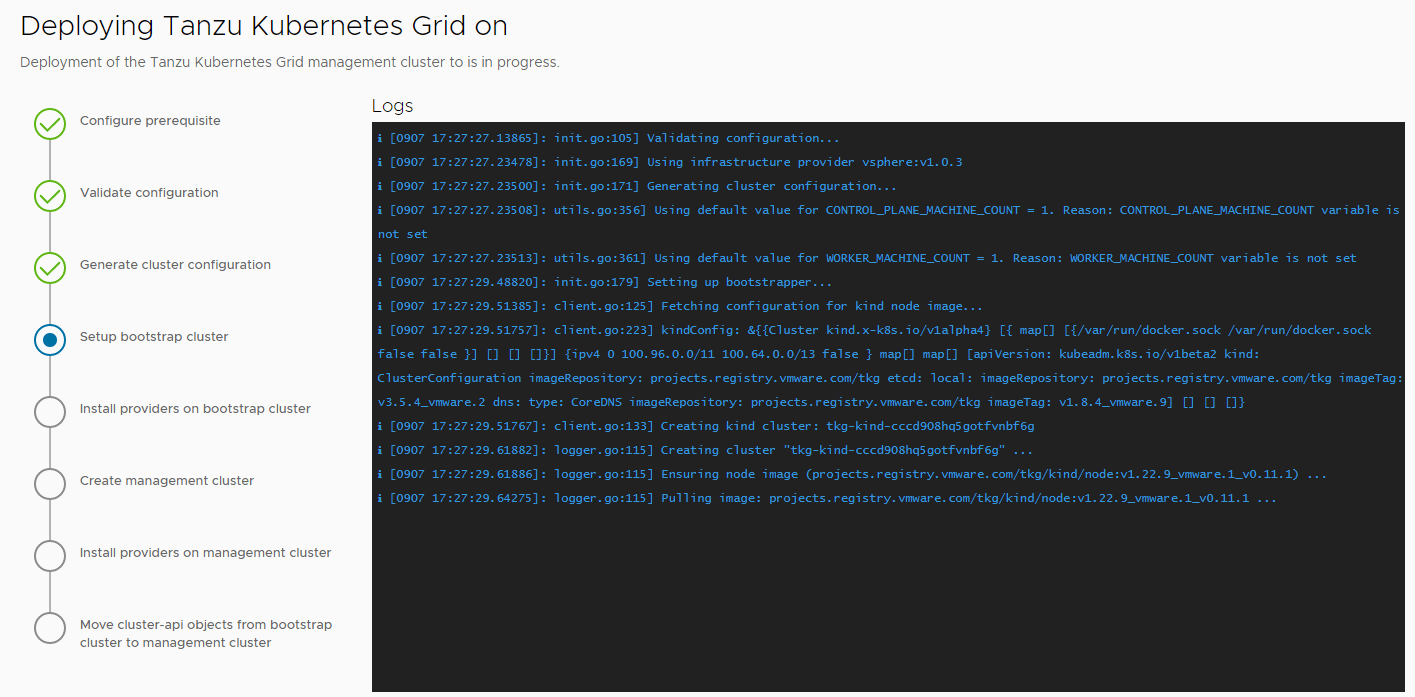
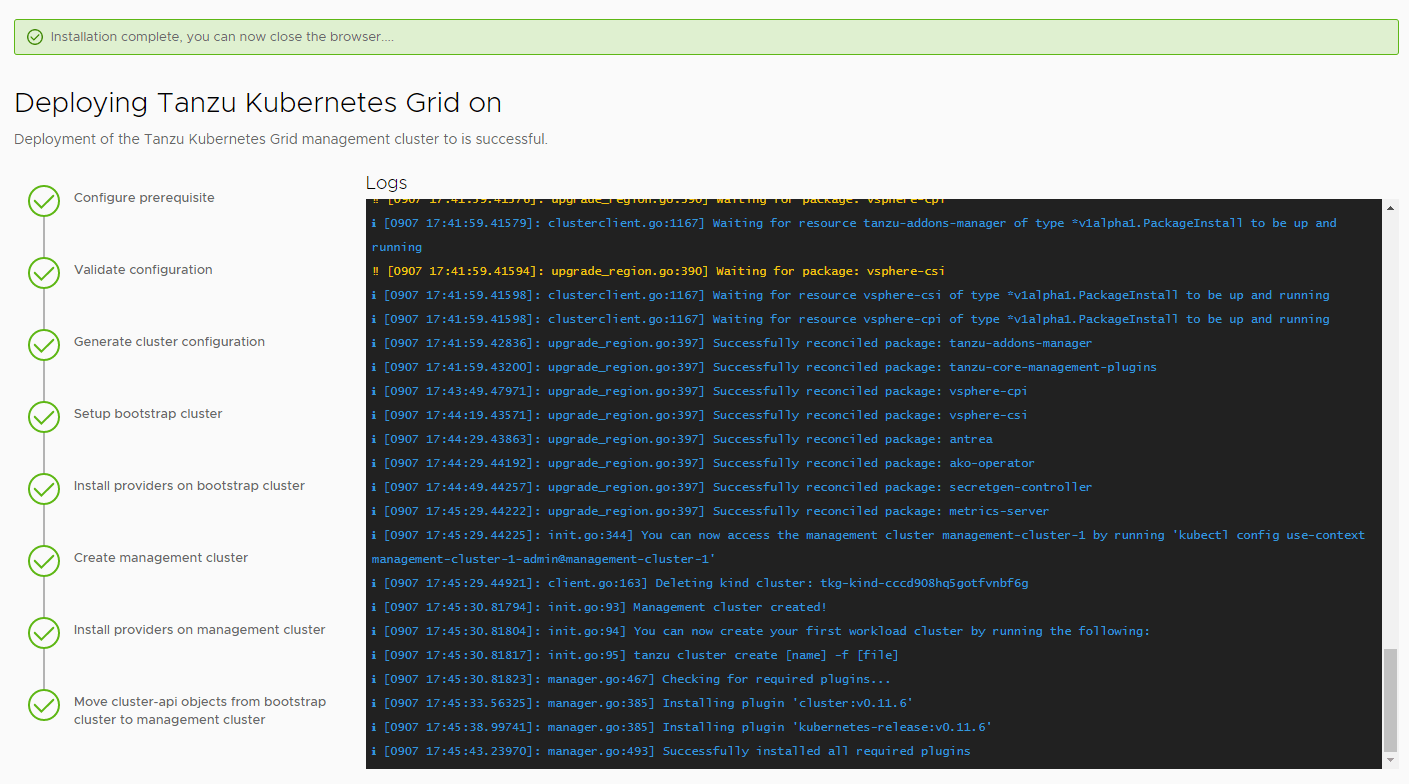
Deploy


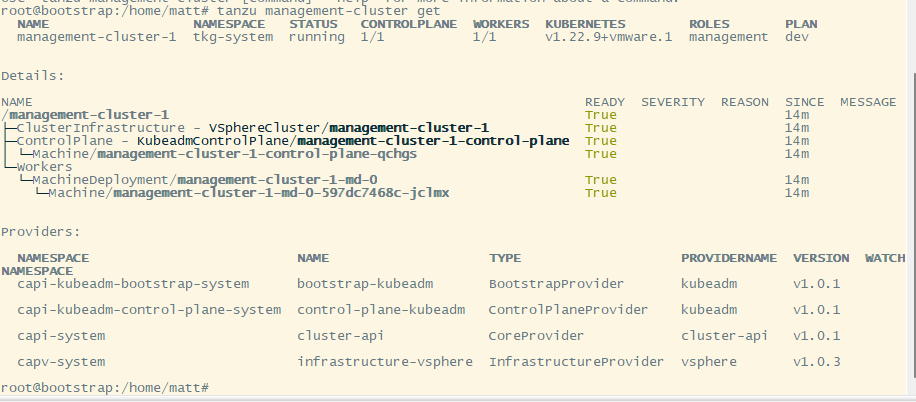
You can view some details about the management cluster by navigating back to the CLI, and running the following command:
tanzu management-cluster get

Deploy the Management Cluster via CLI
I would recommend everyone deploy at least once via the UI, so you can see the process. After that, it is way easier to just use the yaml file created from the above steps, and just deploy a management cluster.
Here is an example management cluster yaml file that works for me:
AVI_CA_DATA_B64: LS0tLS1CRU.............0tLS0tCg==
AVI_CLOUD_NAME: vcenter
AVI_CONTROL_PLANE_HA_PROVIDER: "true"
AVI_CONTROLLER: avi-controller.home.lab
AVI_DATA_NETWORK: Data-vlan7
AVI_DATA_NETWORK_CIDR: 192.168.7.0/24
AVI_ENABLE: "true"
AVI_LABELS: ""
AVI_MANAGEMENT_CLUSTER_VIP_NETWORK_CIDR: 192.168.7.0/24
AVI_MANAGEMENT_CLUSTER_VIP_NETWORK_NAME: Data-vlan7
AVI_PASSWORD: <encoded:TsdfsdfsdEh>
AVI_SERVICE_ENGINE_GROUP: Default-Group
AVI_USERNAME: admin
CLUSTER_CIDR: 100.96.0.0/11
CLUSTER_NAME: management-cluster-1
CLUSTER_PLAN: dev
ENABLE_AUDIT_LOGGING: "false"
ENABLE_CEIP_PARTICIPATION: "false"
ENABLE_MHC: "true"
IDENTITY_MANAGEMENT_TYPE: none
INFRASTRUCTURE_PROVIDER: vsphere
LDAP_BIND_DN: ""
LDAP_BIND_PASSWORD: ""
LDAP_GROUP_SEARCH_BASE_DN: ""
LDAP_GROUP_SEARCH_FILTER: ""
LDAP_GROUP_SEARCH_GROUP_ATTRIBUTE: ""
LDAP_GROUP_SEARCH_NAME_ATTRIBUTE: cn
LDAP_GROUP_SEARCH_USER_ATTRIBUTE: DN
LDAP_HOST: ""
LDAP_ROOT_CA_DATA_B64: ""
LDAP_USER_SEARCH_BASE_DN: ""
LDAP_USER_SEARCH_FILTER: ""
LDAP_USER_SEARCH_NAME_ATTRIBUTE: ""
LDAP_USER_SEARCH_USERNAME: userPrincipalName
OIDC_IDENTITY_PROVIDER_CLIENT_ID: ""
OIDC_IDENTITY_PROVIDER_CLIENT_SECRET: ""
OIDC_IDENTITY_PROVIDER_GROUPS_CLAIM: ""
OIDC_IDENTITY_PROVIDER_ISSUER_URL: ""
OIDC_IDENTITY_PROVIDER_NAME: ""
OIDC_IDENTITY_PROVIDER_SCOPES: ""
OIDC_IDENTITY_PROVIDER_USERNAME_CLAIM: ""
OS_ARCH: amd64
OS_NAME: photon
OS_VERSION: "3"
SERVICE_CIDR: 100.64.0.0/13
TKG_HTTP_PROXY_ENABLED: "false"
TKG_IP_FAMILY: ipv4
VSPHERE_CONTROL_PLANE_DISK_GIB: "40"
VSPHERE_CONTROL_PLANE_ENDPOINT: ""
VSPHERE_CONTROL_PLANE_MEM_MIB: "8192"
VSPHERE_CONTROL_PLANE_NUM_CPUS: "2"
VSPHERE_DATACENTER: /vSAN Datacenter
VSPHERE_DATASTORE: /vSAN Datacenter/datastore/vsanDatastore
VSPHERE_FOLDER: /vSAN Datacenter/vm/tkgm
VSPHERE_INSECURE: "true"
VSPHERE_NETWORK: /vSAN Datacenter/network/VM Network
VSPHERE_PASSWORD: <encoded:Tsdfswerwesdfsdf>
VSPHERE_RESOURCE_POOL: /vSAN Datacenter/host/vSAN Cluster/Resources
VSPHERE_SERVER: vcenter.home.lab
VSPHERE_SSH_AUTHORIZED_KEY: ssh-rsa AAAAB3Nza.............k3Slvw== admin@home.lab
VSPHERE_TLS_THUMBPRINT: ""
VSPHERE_USERNAME: administrator@vsphere.local
VSPHERE_WORKER_DISK_GIB: "40"
VSPHERE_WORKER_MEM_MIB: "8192"
VSPHERE_WORKER_NUM_CPUS: "2"
DEPLOY_TKG_ON_VSPHERE7: true
Review the above yaml (or your yaml created through the UI from the earlier step) and make any necessary changes.
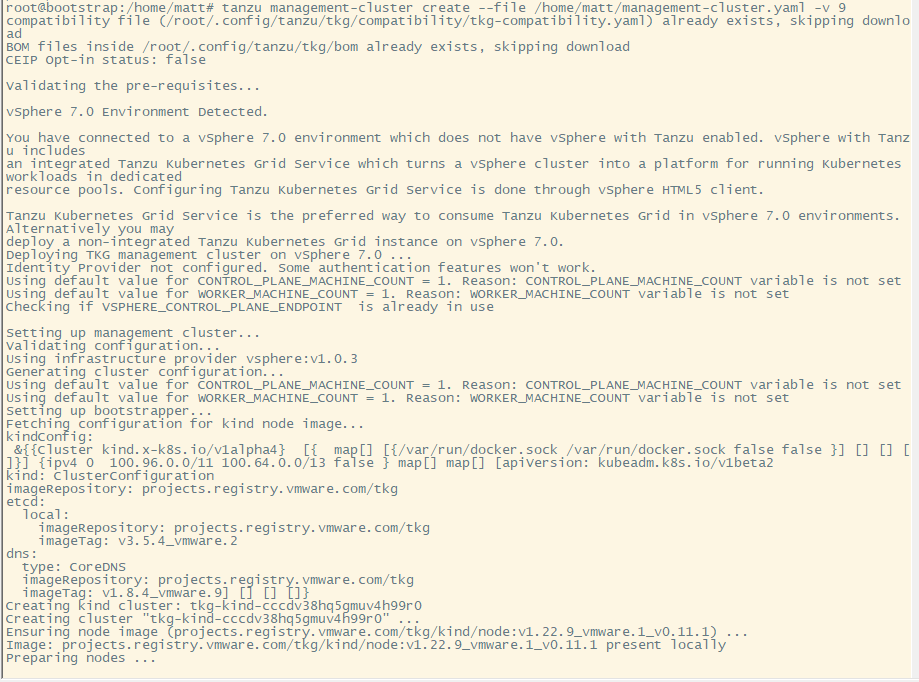
Then to create the Management cluster, run the following command:
tanzu management-cluster create --file /path/to/file/management-cluster.yaml -v 9
You can view some details about the management cluster by navigating back to the CLI, and running the following command:
tanzu management-cluster get