
As much as it is convenient to manage your home network from the comfort of your home, there are times that you may need to access the network while away from home. Perhaps you have always wished to have an encrypted connection to the Internet, particularly when using public Wi-Fi networks. Maybe you actually like doing fun tech projects at home, or perhaps you are just the type that enjoys engaging in interesting projects in the comfort of your home. Still, establishing a connection through an independent local network in a house is easier than people imagine.
In this guide, we will explain how to create a VPN in a home lab. So, you will not need a computer science degree or years of experience in IT to follow this guide. Just a little curiosity and a few basic tools.
What Is a VPN and Why Should You Care?
So, let us begin with the need to understand what an R script is before discussing the steps involved in creating one. VPN is an acronym for Virtual Private Network, which is a tool used in accessing home networks from any part of the world. It that provide you safe “channel” between your device and your home and nothing more, so your privacy is guaranteed online.
This would be very useful when one is in a café, on a business trip or simply if one wants to access files on a home server while at school or at work. For some, it is like having a part of the organisation’s network in their pocket.
What You’ll Need to Get Started
Fortunately, setting this up is not complicated, though a few things will be required first.
- A computer or a virtual one, which will serve as a server
- A stable internet connection
- A public IP address or a dynamic DNS service
- Basic knowledge of how to use the terminal or command prompt
Got those? Great. Now, let us proceed to the tool; the one that will be used in the entire process.
Why WireGuard Is a Great Option
Thus, there are different approaches to establishing this kind of network. Some of them choose OpenVPN or SoftEther. However, for ordinary home users, the WireGuard is comparatively easier and faster to use.
WireGuard is as lightweight and fast as it is easy to set up and highly secure. It is like the latest model of the older tools. Also, it is highly effective on Linux OS, macOS, and Windows, Android, as well as iOS devices. So, unless you are restricted by the limitations of your device, it means you can link from virtually any device.
Step 1: Set Up Your Server
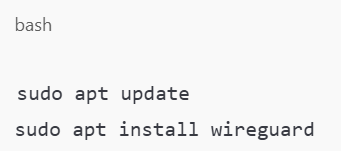
First of all, select one of the machines in your home lab to be a server. This will be the brain that controls your secure connection. If you have not done so, install a Linux-based operating system such as Ubuntu on your computer.
Next, to install WireGuard, use a few lines of a command line:
Next, create key pairs for your server so that they are ready and available for the operation you want to carry out using SSH. This part creates your unique “passwords” that the devices would establish to enjoy secure communication:

Save both keys somewhere safe.
Step 2: Configure the Server
In the next step, you will create the main configuration file, which specifies how the server should work. Open a new file named wg0.conf and type the following:
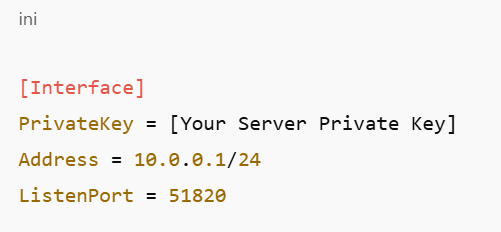
As it is well known, this file just proclaims, “I am here to accept connections on port 51820.” This port should also be forwarded with your router so any other outside traffic can gain access to your lab.
Step 3: Allow Traffic and Enable the Service
You will use your firewall tool (for instance, UFW) to open the port for Thielen of tables to accept IP forwarding.
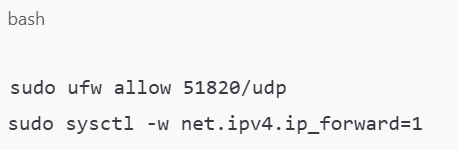
Then, start the WireGuard service:

Boom – instantaneously, your home server is all set and ready to respond to connection requests.
Step 4: Set Up the Client
The time has come to configure the devices you supplied to connect. This could be your own laptop, your own mobile phone or even another server. In that device, install WireGuard and generate another key pair for the second node.
Install the Software by following the mod point above, and create a config file like this:
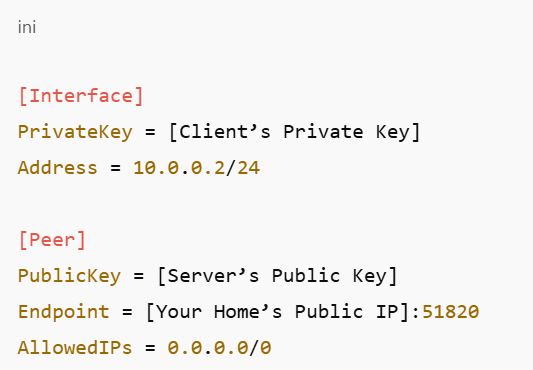
From this point, the client will be able to communicate with your home lab. Pretty cool, right?
Testing and Troubleshooting
To connect, attempt the following procedures when everything has been arranged properly. In case the receipt of something did not go smoothly, do not be too hasty and get worried about it. Turning to the system ports, one should verify keys on router, port forwarding settings, and files such as config. If anything, a small typo is enough to break a connection at times.
Still stuck? Look at the logs sudo journalctl -u [email protected] on the server to see what’s going wrong.
Bonus Tips for Extra Security
Now, if one wants to push it a notch higher, it is recommended to incorporate the following measures:
- Rotate your keys regularly.
- Both Windows and Linux operating system: use the command-line ICMP packet filtering to enable only the required IP addresses to get connected on the network.
- To further limit the communication attempt using the IP address, use a firewall.
- It is recommended that frequent updates of the server and the VPN software be performed.
This helps the lab remain secure to ensure there are no interferences and interconnections with other areas, such as the production line.
So, What’s Next?
So, having learned how to create a VPN in your home lab, what is next? It may be for accessing documents remotely, storing your personal files in an off-site server, or controlling your home automation gadgets safely from a distance.
The best part? This is because your learning is mainly through practical sessions as you continue to build your expertise.
Want to explore more home lab ideas or expand your setup? Check out the other tutorials on MattAdam.com for more tips and walkthroughs. We’re here to help you keep building, learning, and connecting.