
Have you ever wished that all your smart home devices had a single hub from which you don’t have to switch to other applications? You have smart lights, a smart thermostat, and a smart camera bumping around the house, making it uncoordinated. That is why a home assistant comes here. As the central hub of your smart home, it all comes together in a single, intuitive interface.
So rather than running this application on some repetitive platform, such as a Raspberry Pi, what if you run it on your home laboratory server? It also provides you with more power besides offering the system more power. Now let me explain how you might go about doing this and why it could be the most rewarding weekend you spend for weeks.
Why Use Your Home Lab Server?
Well, you already have a home lab server, and you probably have other fun things, for example, media servers and cloud backups. That could be made even more useful, I think, if automation were used. That is why, to start with, running this automation hub on your server has certain – let’s call them qualitative advantages.
- It is faster and more reliable than running on a small device.
- It can be used in parallel with other tools.
- There is no need to invest more money into the purchase of equipment.
If you would like to try smart home technology with some limitations, then this arrangement is perfect for you.
What You’ll Need
Let me start by outlining what one would require when undertaking the preparation of this assignment:
- A home lab server with at least 4GB of RAM and a few gigabytes of free storage.
- A stable network connection.
- For fundamental virtualization, Proxmox or any other virtualization software that appears on the market (or Docker can be incorporated).
- Basic command-line skills.
In fact, if you are already experienced in running a server at home, then you are halfway ahead.
Step 1: Choose Your Setup Method
There are two ways of installing a Home Assistant on a server. Of the two options, one of the most preferred is Docker containers, and another is a virtual machine (VM). It works well with both; it only depends on how the server for the webpage is designed.
Virtual Machine Method:
In the event that you have been using software such as Proxmox, it is possible to create a new virtual machine for the platform or use the existing one. This serves to prevent the mingling of the site contents and other services that you may be operating.
Docker Method:
Docker is especially useful if you are already running other services within containers. It is highly responsive, fast, and less time-consuming to update.
Not sure which way to go? If you are new to it, then perhaps starting with a VM would be somewhat less complex.
Step 2: Download the Software
Now, if you are opting for the virtual machine approach, let me tell you. First, you must download the latest virtual disk image on the Home Assistant website in one of the mentioned formats, VMDK or QCOW2, for your OS. Incontestably, this file contains all the application components necessary to deploy the system.
After downloading it, transfer it to your home lab server and include it in the virtualization application.
They can be used in tools like Docker – in this case, simply pull the image from the command line:

This will download the latest version and bring you to the point of executing it.
Step 3 – Create Your VM or Container
In the next step, open ordering creat a new virtual machine or a container and mount the disk image or Docker volume into it. In any case, ENI needs the assigned resources of at least 2 CPU cores and 2 gigabytes of RAM. Latent data can then be acquired and subsequently added to the tuples if necessary.
When installing the network settings, it is advisable that the system be given the correct IP address. That makes it convenient to locate the target URL in the context of the web page interface later on.
Finally, start the VM or the container, as the case may be. Give it a minute to boot up.
Step 4: Access the Web Interface
Now, the fun begins—the opening of your browser and visiting the following address:
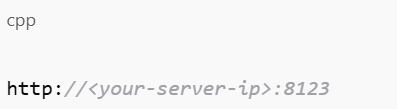
If everything goes as planned, this should bring up the setup screen. These are the procedures necessary for creating and naming an admin account for the smart home system.
This part is rather thrilling because it marks the construction of the entire concept that you’re constructing.
Step 5: Start Adding Devices
I have always liked the discovery process of Home Assistant, which does it on its own through the discovery of devices within a given network. Sometimes, you might react to the idea of your smart lights, plugs, or voice assistants as soon as they pop up.
More often, you can add them individually depending on what you are going to use. There are about 500 or more devices – starting from smart speakers to smart thermostats and sensors.
Do you have an old social tablet you are no longer in use? It is preferable to set it up as a wall-mounted dashboard. If you wish to control your home using your phone, here is a simple tutorial that relays the entire procedure in detail. To start with, the application is free and available for download in both Android and iOS operating systems.
Tips to Make It Even Better
There are still so many more steps that can be done once things are already a go:
- Examples of such automation include “Turn off all lights at midnight” or “Play music when I arrive home.”
- It is recommended to add Node-RED for higher-level processes.
- Take backups of your setups with the systems’ own built-in snapshots and backup utilities.
The more that is employed, the more one will develop ways and manners of employing it in the best way. So do not fret; there is an extensive community online in case something goes wrong.
Final Thoughts
Home Assistant on Home Lab Server is one of those projects that is fun to implement and can be useful at the same time. You will acquire some new skills, sort your home devices, and feel in control of your home environment.
This makes even a tech enthusiast’s life easier, not to mention someone who is frustrated with having 5 different applications for controlling a house.
So, are you ready to give your server a new function? Take it step by step: begin with one or two smart devices, try out something new, and progress toward a perfect smart home.