
Want to become a server geek and manage your own home-based server projects? Have you heard of Docker before now? Probably yes, but do you know that you can create a highly compact system with more than one computer right from your home lab? That is where building a Docker Swarm cluster in a home lab environment is advantageous and comes into the picture.
If you are new to this, let me help you get you to familiarize yourself with it by following the steps below. No complicated talk—just simple, practical tips. Let’s dive in.
What Is This All About?
The thing to always keep in mind before trying to plug in commands is that you’ve first to look at the big picture. When people address the Docker Swarm cluster in the context of the home lab, it is a set of machines, physical or virtual, that work as one system and can run apps within containers. Be mindful that containers are like miniature, lightweight vessels that embrace application and all components essential to run it.
Swarm is just Docker’s feature that allows the creation of these containers and orchestrates them across various hosts to work in an integrated manner. Why would you want that? Well, it is perfect for testing and even learning, as well as for hosting simple websites or services without paying money for cloud servers.
What Do You Need to Start?
To set up your at-home, you will find that there are several prerequisites that you’ll require:
- Two Computers, minimum or more: Raspberry PI, old laptops, or virtual machines.
- A Docker is installed on each one.
- A local network so would also entail designating a network for the purpose of having the different machines relay information to each other.
- A bit of time and curiosity
If you have some of these in your home, then you can try them immediately next time.
Step One: Pick Your Leader
Docker Swarm is the orchestrating tool in which one machine is set as the master, also referred to as the manager. Observe activity, inform the others (the workers) of what is happening, and instruct them.
First of all, open the terminal on the pc you want to become the manager and type this:

In this case, replace YOUR-MANAGER-IP with this computer’s actual IP address. This command will provide you with a special join command, which you have to type in on other machines.
Cool, right? Now, let us add some workers to assist with appointments.
Step Two: Add the Workers
In your second (and third or fourth) machine, you are going to use the output of the join command provided by the manager. It looks like this:

Copy that and simultaneously execute that in every new machine’s turning terminal. As stated herein, once they join, I shall return to my manager and type:

There, you will find a list of the machines available in your cluster. So, you are ready to play with Docker Swarm in the home lab with members working as one team!
Step Three: Launch Your First App
Now is the time to make the first real build of a real app – for example, the Nginx – an easy web server to start with. On your manager, type:

This informs Docker to run an Nginx container and make port 80 accessible to the outside world. You can even resize it to be run on more Servers like this;
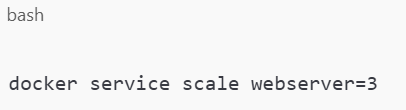
Boom. In this way, through creating a home cluster, your app is now already running on three different machines simultaneously.
Step Four: Keep It Safe and Smooth
Do you want your setup to be active even if a machine you are using becomes dysfunctional? That’s called high availability. To ensure the system stays online in case of anything, you can always promote another worker to a manager to try to remedy the situation.
For the new computer network on your main manager’s computer, use this:
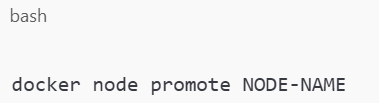
That is because it assigns more authority to another machine if the initial manager is offline.
You can also try to use different storage solutions, such as GlusterFS, and strengthen backups to secure your data. These steps assist in setting your home PC environment into something more dependable, like what business establishments have.
Step Five: Make It Pretty (Optional)
While the management of containers from the terminal is interesting, there are tools that are more convenient to watch. It is recommended to try the Portainer, where You will get a clear view in Your browser. It gives you an overview of all the containers, services, and networks.
Another critical feature is real-time system monitoring with the help of other tools, such as Grafana and Prometheus. A majority of these tools are very useful for learning and even monitoring your setup.
Why Bother With This?
You may be asking yourself right now: “Would it be worth it?” As for the response – the answer is yes – if you foster an interest in technology, wish to explore networking and business servers, or are constructing a side project.
A Docker Swarm cluster for a home lab is not just a state of practice. It enables you to handle live systems, allows you to test applications for free without necessarily requiring you to pay for cloud space, and allows complete control of your environment.
Also, once it is in this state, one is able to instantiate more apps, fiddle with settings, or host personal websites. The sky’s the limit.
Ready to Build Your Own?
Establishing a Docker Swarm cluster in a home lab may seem rather technical, but following these instructions, such an endeavor is quite possible. That’s a very prudent way of beginning, experimenting with the environment, and not being afraid to make things go boom – that’s how you get to grow.
Who knows? This could be the beginning of something great.