AWX is an open-source alternative to Red Hat Tower (Ansible Automation Platform). I’ve used both pretty extensively in the past, and since AWX is essentially free, I’ll be covering that product in the next few blogs.
AWX is very useful for automating application creation for load balancers. There are a few components that will be needed to automate app deployment, but this is definitely the first step. I’m going to publish a few blogs about automated app deployments using AWX and Avi.
Software Versions used in this demo
| Software | Version |
|---|---|
| OS | Ubuntu 24.04 LTS |
| AWX | 24.3.1 |
| VMware vCenter | 8.0.2 |
Deploy Ubuntu VM
In order to install AWX, we need to deploy a VM. We’ll be using the latest stable release for Ubuntu, which at the time of writing is Ubuntu 24.04. Navigate to ubuntu’s website and download the ISO.

In vCenter, navigate to the Content Libraries and create a new content library, if you don’t already have one.

Upload the ubuntu iso file to the content library.
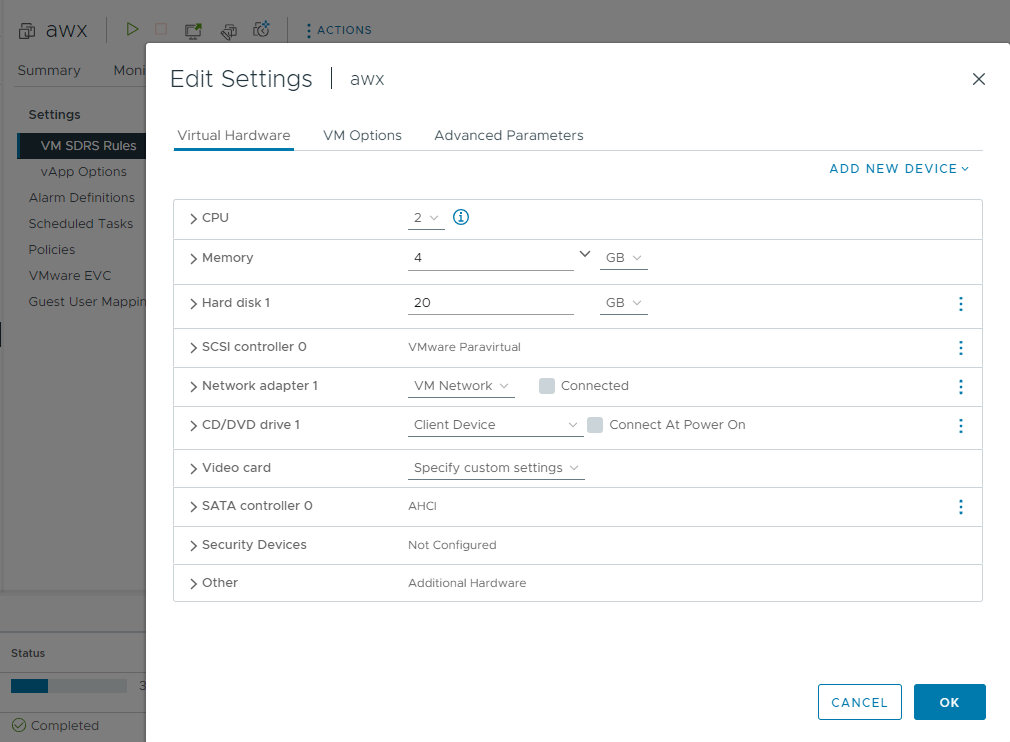
As the ubuntu iso is uploading to the content library, go ahead and deploy a new VM with the above specs.
- CPU: 2
- Memory: 4GB
- Disk: 20GB (20GB minimum, I would recommend 50GB)
- Network Adapter: a routable network, in my case VM Network.
– Disk Size –
I originally built this using a 20GB disk and it seemed to work for a few days. After logging back in about a week later, I was out of disk space. So I resized the VM and Ubuntu to 50GB and it seems things are working again. So I recommend over 20GB for this deployment.
When the VM is ready come back and select the CD/DVD drive as the ubuntu iso file. Make sure to check Connect at Power On.

Power on the VM
Install Ubuntu from ISO
After Ubuntu loads, we need to install the OS to the disk.
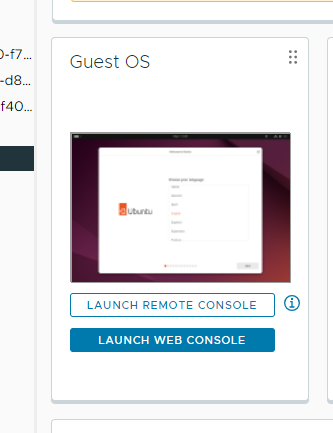
Click the image of Ubuntu to launce the remote console.
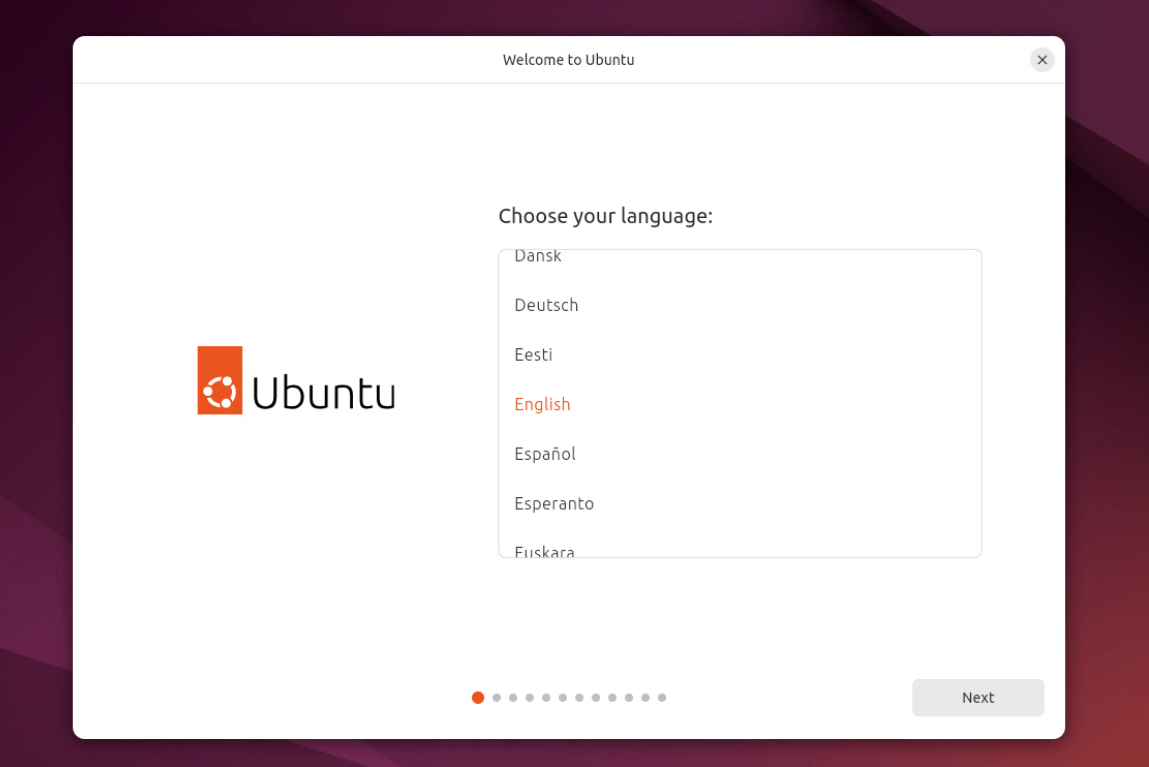
Navigate through the install steps, I’m not going to cover these since there are 1000s of guides on this topic, and it’s rather straightforward.
Once you’ve installed the OS, use the UI interface to set a static IP address (or just use the dhcp address).
Additionally, you will need to run a few commands to update and enable ssh.
sudo su
apt update
apt upgrade
apt-get install open-vm-tools-desktop -y
apt install git make -y
apt install ssh
systemctl enable ssh

You should be able to ssh into the ubuntu machine.
Install AWX on Ubuntu 24
Now that the base Ubuntu OS is ready to go, we can install any required packages and deploy AWX. First we’re going to install docker and prepare the environment to run minikube. Minikube will be used to deploy awx. I’m more or less following this guide here: https://www.linuxtechi.com/install-ansible-awx-on-ubuntu/#google_vignette
The docker install detailed steps can be found here: https://docs.docker.com/engine/install/ubuntu/
sudo apt-get update
sudo apt-get install ca-certificates curl
sudo install -m 0755 -d /etc/apt/keyrings
sudo curl -fsSL https://download.docker.com/linux/ubuntu/gpg -o /etc/apt/keyrings/docker.asc
sudo chmod a+r /etc/apt/keyrings/docker.asc

# Add the repository to Apt sources:
echo \
  "deb [arch=$(dpkg --print-architecture) signed-by=/etc/apt/keyrings/docker.asc] https://download.docker.com/linux/ubuntu \
  $(. /etc/os-release && echo "$VERSION_CODENAME") stable" | \
  sudo tee /etc/apt/sources.list.d/docker.list > /dev/null
sudo apt-get update

sudo apt-get install docker-ce docker-ce-cli containerd.io docker-buildx-plugin docker-compose-plugin
Next we need to install minikube. Very simple, just a few commands.
curl -LO https://storage.googleapis.com/minikube/releases/latest/minikube-linux-amd64
sudo install minikube-linux-amd64 /usr/local/bin/minikube && rm minikube-linux-amd64

# exit out of su and back into the user ubuntu
sudo usermod -aG docker $USER && newgrp docker
minikube start --vm-driver=docker --addons=ingress
Next we need to install kubectl, to interact with the K8s cluster
sudo su
curl -LO "https://dl.k8s.io/release/$(curl -L -s https://dl.k8s.io/release/stable.txt)/bin/linux/amd64/kubectl"
install -o root -g root -m 0755 kubectl /usr/local/bin/kubectl
Finally we can deploy the AWX container via awx-operator. Make sure you exit from su, and back into the ubuntu user.
git clone https://github.com/ansible/awx-operator.git
cd awx-operator/
git checkout 2.16.1 # Or whatever the latest version is
export NAMESPACE=ansible-awx
make deploy
kubectl create -f awx-demo.yml -n ansible-awx
You can verify your pods and services as shown below.
kubectl get pods -n ansible-awx
kubectl get svc -n ansible-awx


Lastly we need to open up awx to connections from outside of the ubuntu server.
minikube service awx-demo-service --url -n ansible-awx
kubectl port-forward service/awx-demo-service -n ansible-awx --address 0.0.0.0 10445:80 &
Navigate to your browser on the IP address and port shown above: http://192.168.3.23:10445/#/login

You should see the above screen. the username is “admin” and to get your password, run the command below.
kubectl get secret awx-demo-admin-password -o jsonpath="{.data.password}" -n ansible-awx | base64 --decode; echo

And that’s it.
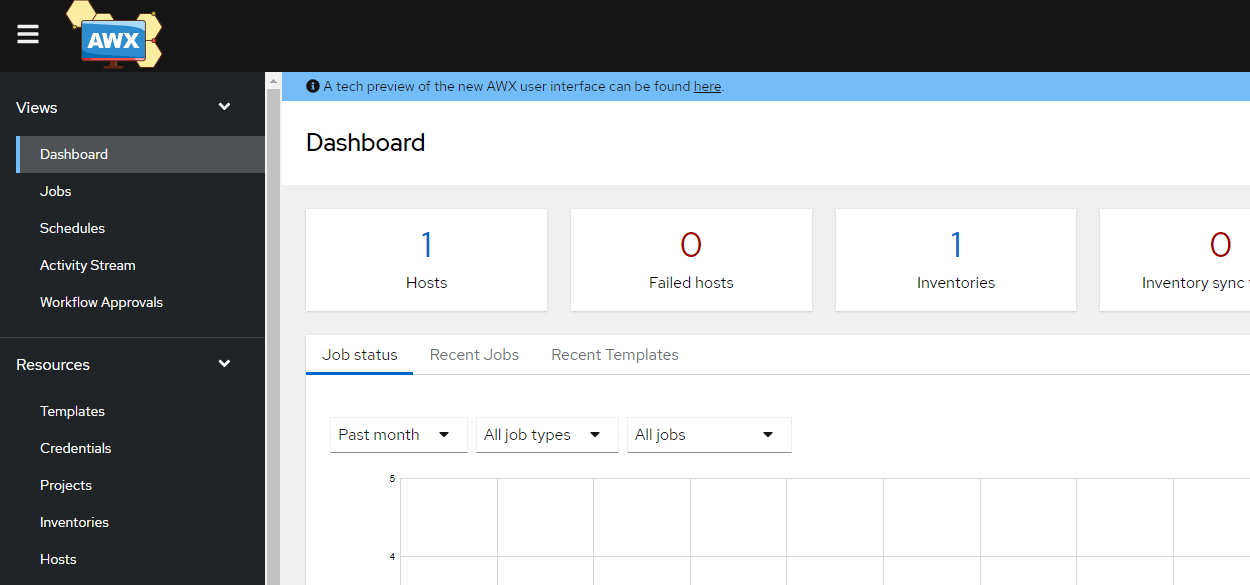
AWX is up and running and ready to start automating jobs!