
Are you fed up with those ads that appear on all the screens in your home? Think about how to close them all—the ones on your phone, your tablet, smart TV, and yes, even your game console—without the need to install an app on each of those. Sounds too good to be true? Now, let’s discuss a simple yet effective tool that works wonders and adds to its utility in a home lab when incorporated.
In this guide, you will learn about Pi-hole, what it is, and how to set it up on your network to block ads. It is easy, efficient, and quite informative on ways to extend your internet. But hold on, what is it exactly, and why should you even pay attention to it?
What Is Pi-hole and Why Should You Use It?
To its very essence it is an ad blocker for the network. The concept is different to blocking ads one browser at a time, instead, it is a middleman between your devices and the internet. Think of it like a filter. Whenever a device in your house attempts to send out information to a well-known ad server, this tool replies: “Sorry, you can’t do that.”
It is a beneficial tool for anybody who uses or is interested in any type of home lab, even if it is on the most rudimentary level. It omits undesirable elements, prevents the disclosure of your identity to various websites and other online spots, and can increase your connection speed in certain situations. Also, it is easy to set up and enjoyable as it provides the current activity that takes place on a network.
What You Need to Get Started
But before we go further with the installation, let us prepare the necessary gear. You’ll need:
- A Raspberry Pi (any model works, but the newer, the better)
- A microSD card (8GB or larger)
- Power supply and Ethernet cable
- Internet connection
- Access to your router’s settings
Do you have a home server or a mini PC with Linux as the preinstalled operating system? However, it is worth mentioning that you can install Pi-hole there as well. It is more versatile and can be used not only with Raspberry pi but with other systems as well.
Step 1: Install Your Operating System
The main requirement would be an operating system on your Raspberry Pi. If it is a brand new Micro SD Card, then download Raspberry Pi Imager and use it to write Raspberry Pi OS on it, if you do not require a graphical interface, then use the Lite version.
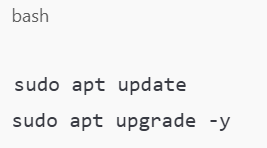
To do this, proceed to flash the SD card, plug the SD card into the device, connect the keyboard, mouse, and monitor, and then power on the device. After getting into the system, the following options should be used to update the system or fix some errors:
You must be excited to come here as you will be able to get straight into the information needed for your assignment shortly.
Step 2: Install Pi-hole
This is the place where the dream comes to reality! Installation of the software is relatively simple, as most programs are available on the market these days. All you need is one command:
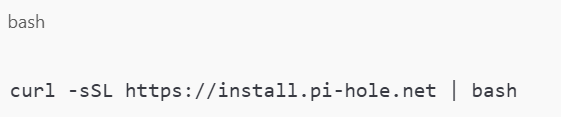
After executing it, the setup will guide the user through a variety of options including obtaining a DNS provider, selecting blocks with default lists, and installing the web console (which is recommended).
Ensure if any admin password is provided while conducting any of the above processes, then it is recorded appropriately. It will also be useful for that purpose when we need it in the next lesson.
Step 3: Give It a Static IP Address
Another important thing concerning the functioning of your new ad blocker is the necessity to assign the static IP address. It can be done during the installation step or it can also be done separately only by configuring your router.
This step is critical as the alteration of the IP may mean that the traffic is routed to the wrong place. If that occurs, advertising will begin to surface once more.
Step 4: Change DNS Settings on Your Router
To make this tool work for all your devices at once, they are ready. Navigate to the settings page of your router and try to find the DNS settings. Enter the correct IP address of the Pi-hole device to compete with the old DNS server’s stored IP.
Once that’s saved, your new DNS will be implemented on each device that connects to the Wi-Fi connection that you are using at the moment. That means all your phones, your laptops – there are devices which will be beneficial by ad-blocking at once, even your smart fridges.
Pretty cool, right?
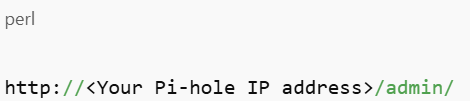
Step 5: Customize and Monitor
Once everything is established, go to the administration area at:
You will get such things as the number of ads blocked by it, the sites visited most often, and a lot of other things. From here, you can:
- Add more blocklists
- Whitelist or blacklist certain websites
- The best solution to implement is to ascertain which devices are generating the most traffic.
As you know, you have much more control over your own network than ever before.
Building on Your Home Lab
If you like to customize things, you’ll be happy to find out what else you can do with these settings. This is used in combination with a VPN as this allows him/her to engage an ad-blocker anywhere without any worry. Some people also include Unbound, a valid recursive DNS server, to further increase its privacy and security.
The more you fool around with it, the more you will learn, not only about the stable-PI hole but also about DNS, privacy, and how the internet operates. And that is the great advantage of having a good home lab to work at.
Final Thoughts
Yes, installing Pi-hole is one of the most intelligent things you can do in your home that is rather easy to accomplish. This improves your internet experience in terms of smoothness, safety, and speed without the need of introducing new apps to every piece of equipment you use.
The home lab doesn’t take a lot of time and work to become more of a privacy solution. And the best part? No longer being interrupted by video advertisements before one’s choice clips on the YouTube application. No more pop-ups on your news sites. Just a clean, peaceful internet.