Since our lab will be running NSX, we’ll need to deploy the NSX Manager and do some configuration. Then we’ll deploy one NSX Edge, and test connectivity to a segment.
Download the ISO file from VMware, should see a file like this: nsx-unified-appliance-3.2.1.0.0.19801963.ova
Login to VMware and find the VMware NSX-T Data Center and click View Download ComponentsI’m downloading the Enterprise Plus version, but any version you download will be fine.And finally download the NSX Manager unified appliance. nsx-unified-appliance-3.2.1.0.0.19801963.ova
Deploy the NSX-T Manager OVA
Standard process for deploying an ova. I deployed this directly on my physical ESXi host.
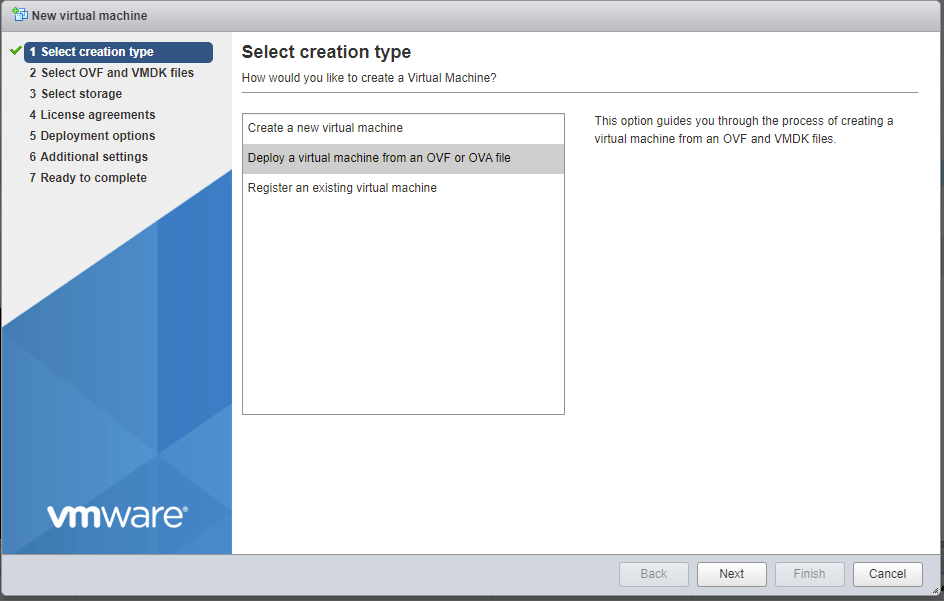
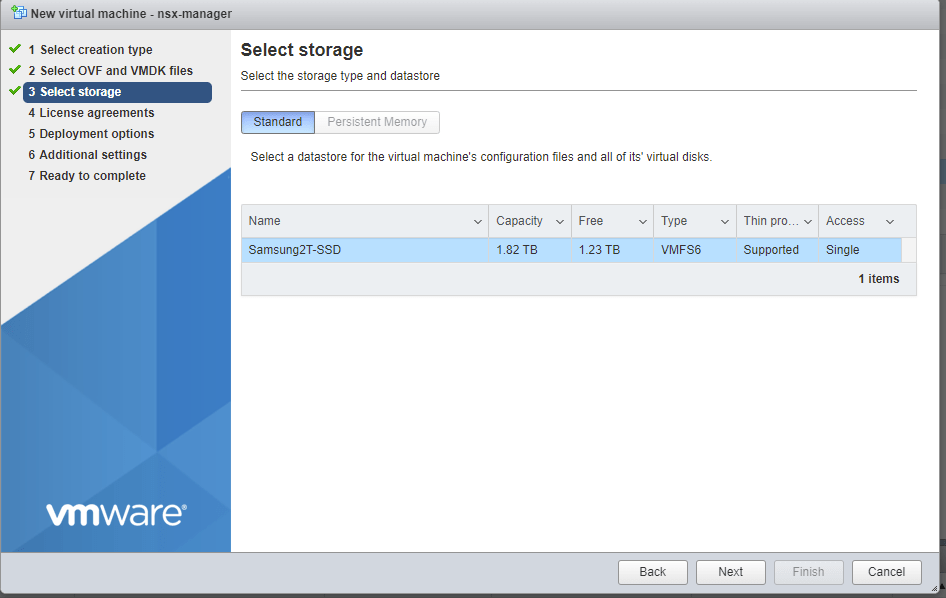
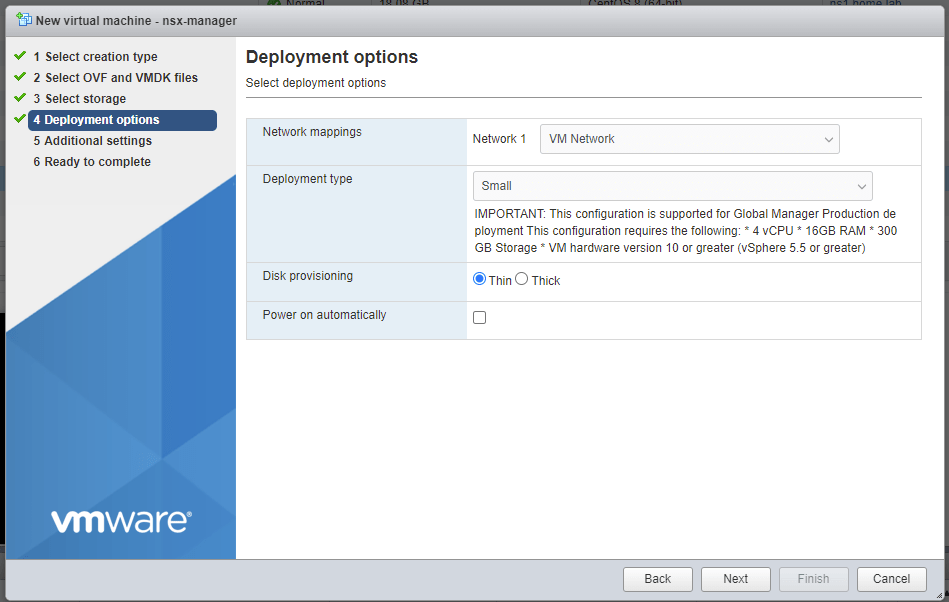
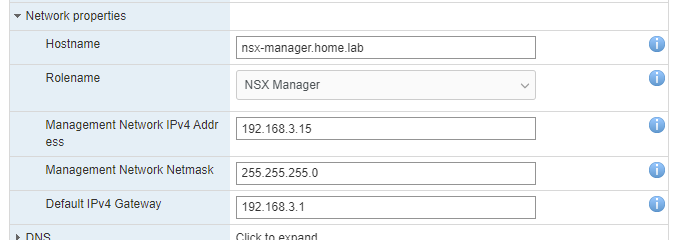
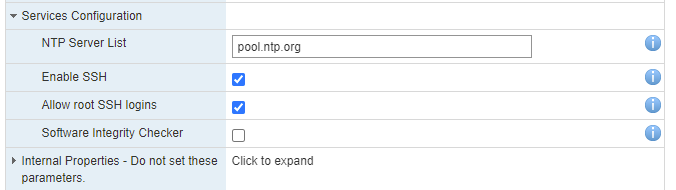
Deploy a VM and select Deploy a virtual machine from an oVF or OVA fileTitle this vm: nsx-manager and select the ova from file explorer.Select the SSDSelect the VM Network and the type as Small. Disk provisioning should be thin, and uncheck the power on automatically.Now we configure the settings. Under Application, fill in all the password fields.Under Network properties, add the fqdn hostname, ipv4 and mask and gateway.Set dns server and search domain.Set ntp server and enable ssh and root ssh logins.Select finish and wait for the vm to be created.
Once the VM deploys, you can power it on. It takes about 5-10 minutes for the system processes to load, but eventually you can hit the UI: https://nsx-mgr.home.lab/
Configure NSX-T Manager
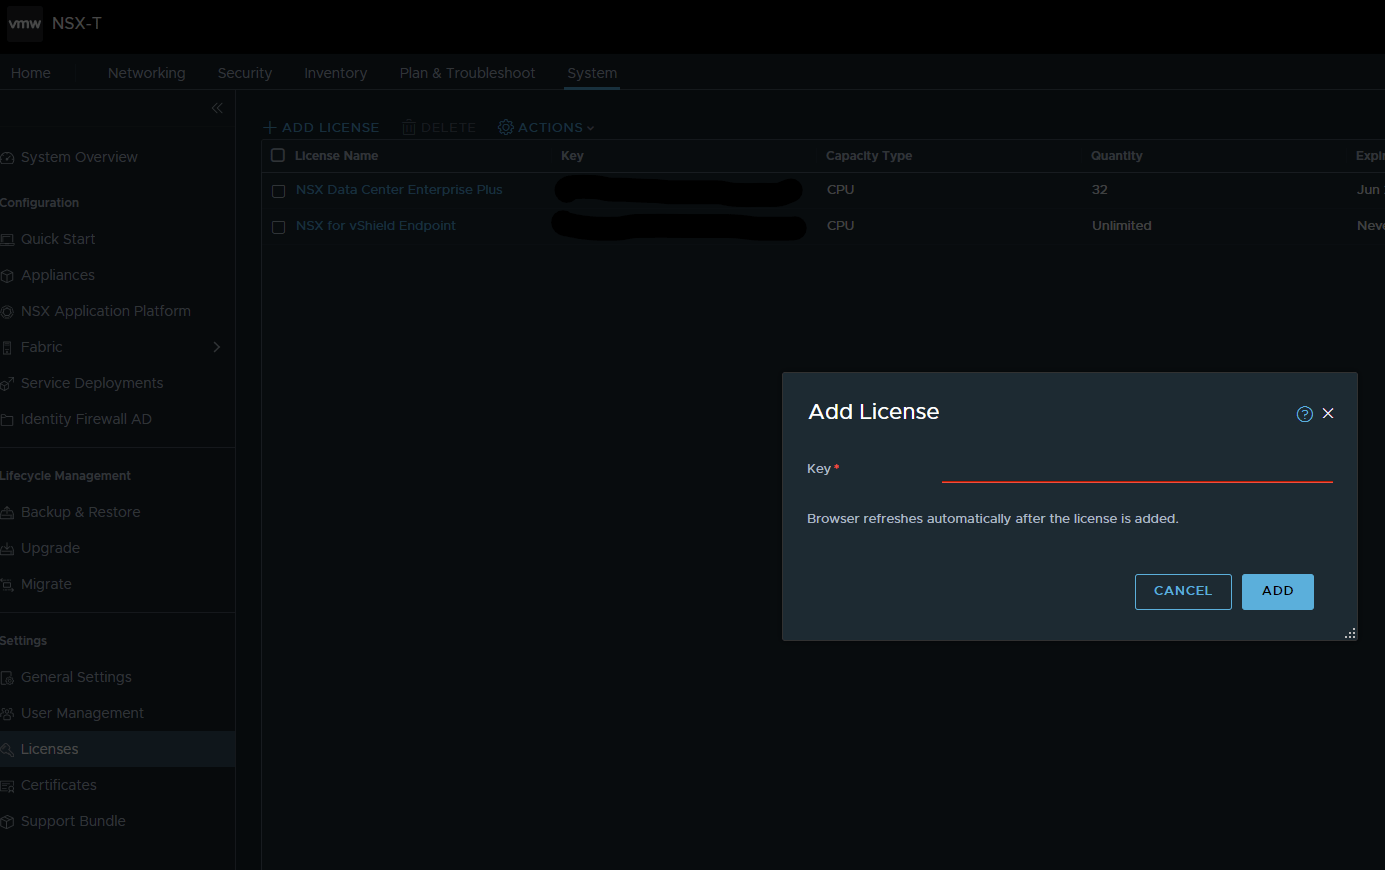
Add License
Login to the UI and navigate to System -> Settings -> Licenses. Then Add a license
Deploy a Compute Manager
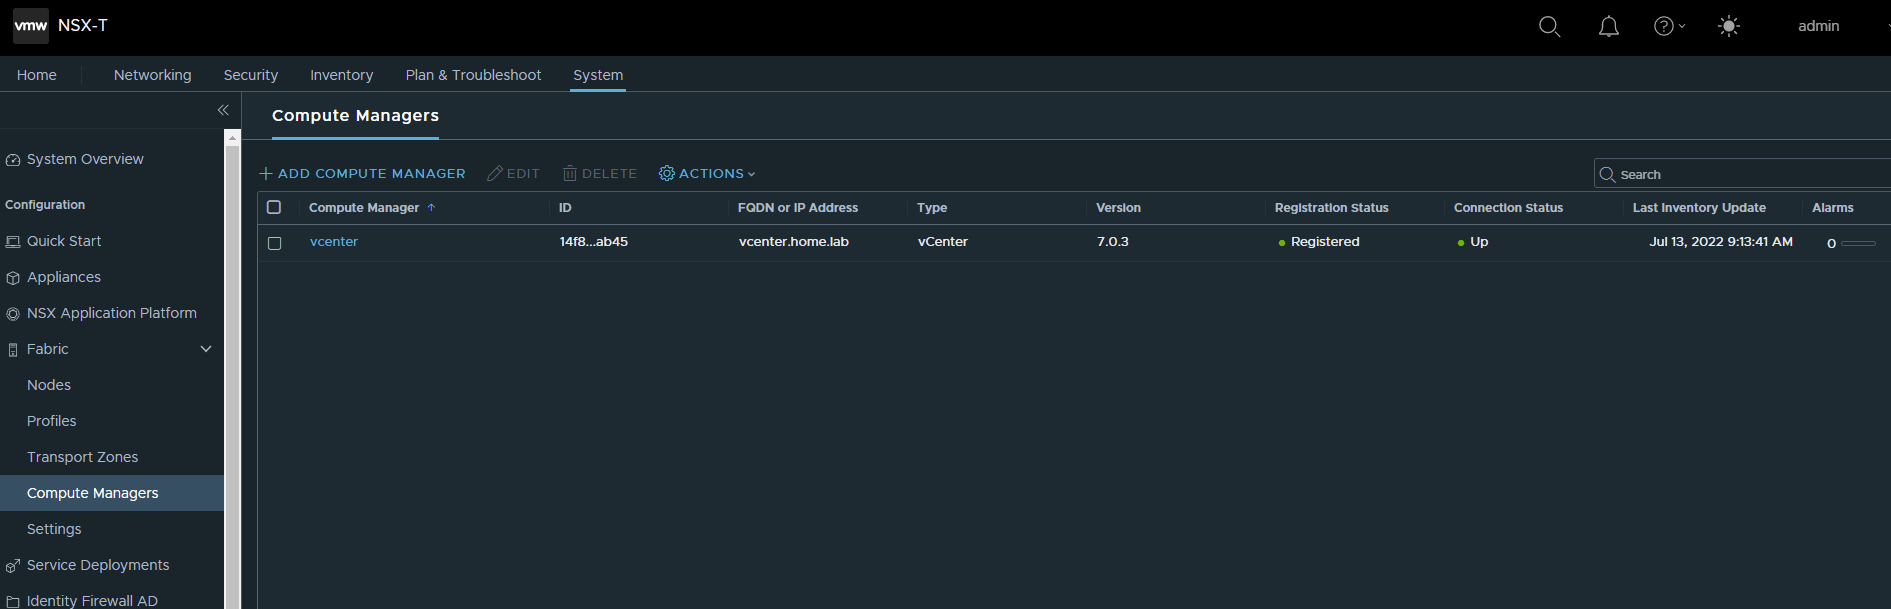
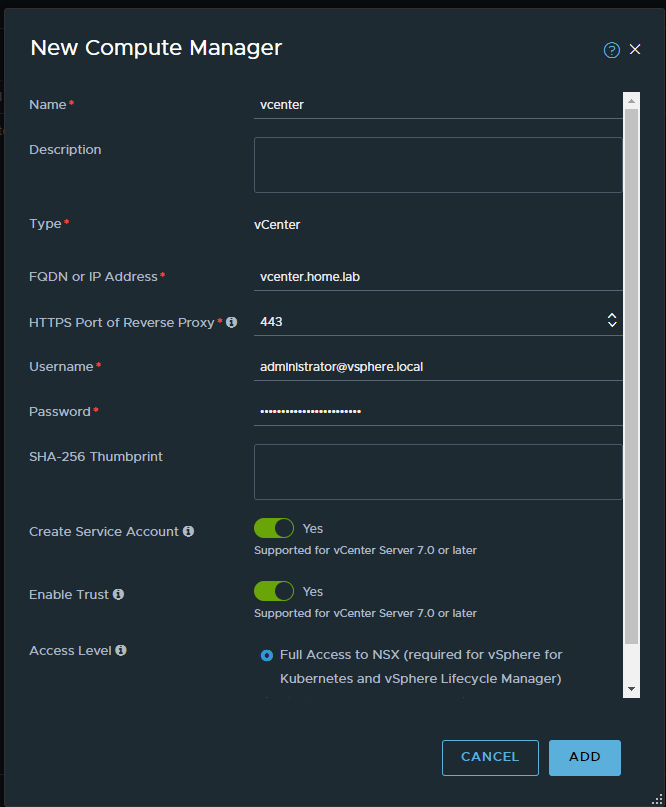
A compute manager allows us to connect into vCenter and manage VMs, networks, etc.
Navigate to System -> Configuration -> Fabric -> Compute ManagersClick Add Compute Manager and set the details as shown above. Make sure to check Enable Trust.After adding it you should see the status as Registered and connection Status Up.
Create a Tep IP Address Pool
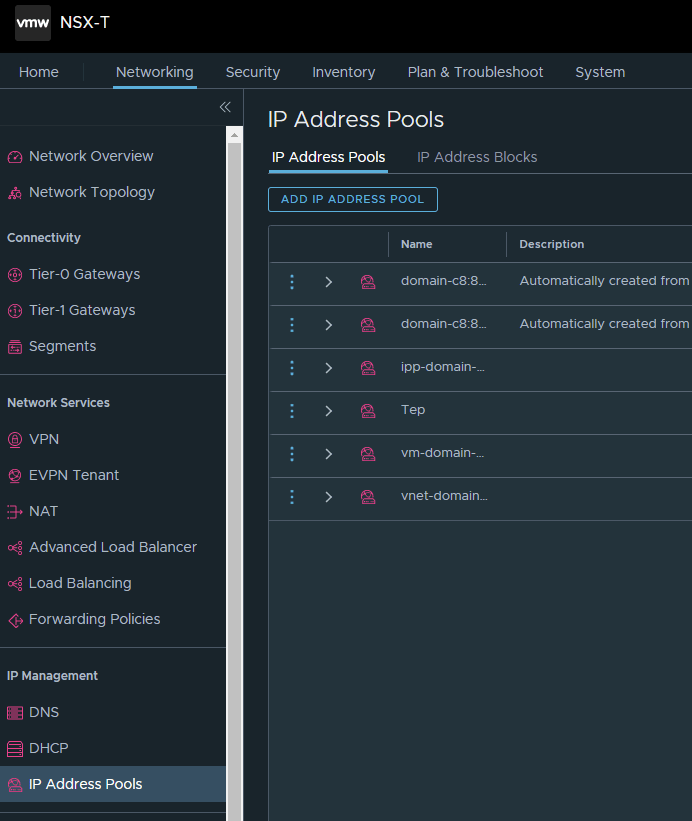
Tunnel Endpoint (TEP) allows the nested esxi hosts to talk to each other. We’re going to create a pool of IP addresses for them to use for the overlay network.
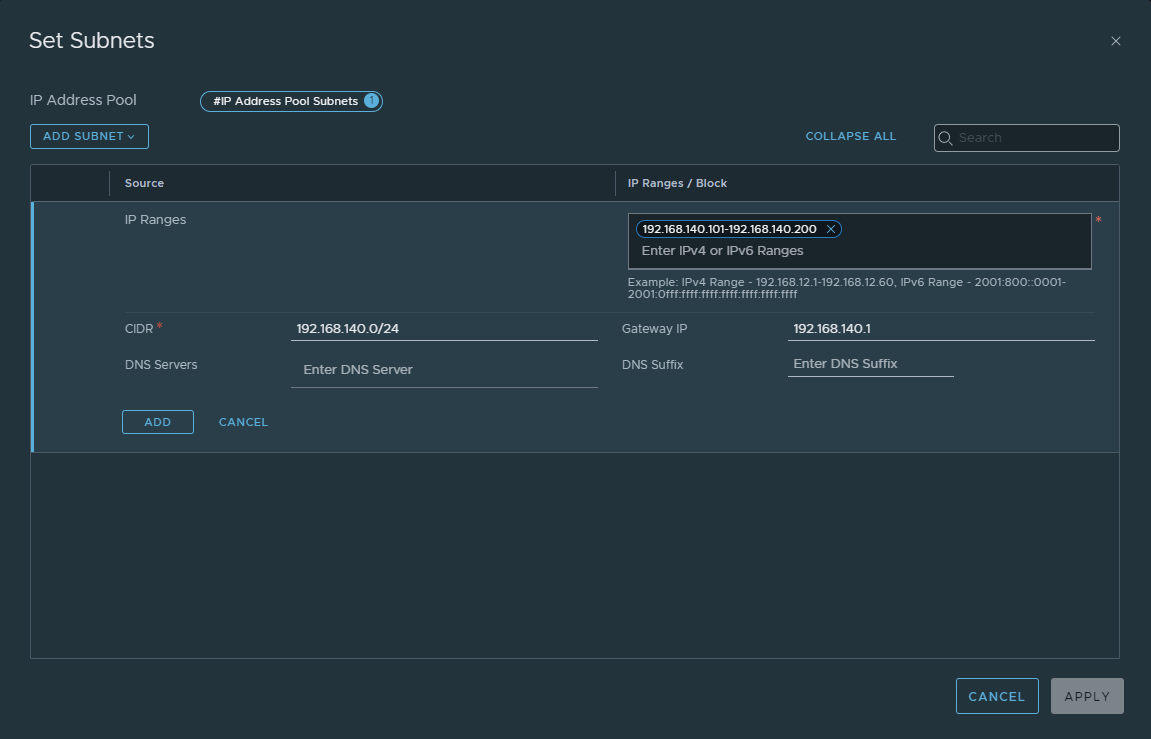
Navigate to Networking -> IP Management -> IP Address PoolsClick Add IP Address Pool and name it “Tep”Click “Set” under Subnets and add a subnet using the above info. Add the CIDR, Ranges, and GW. Hit Save and Save the pool.All finished
Create a Transport Node Profile
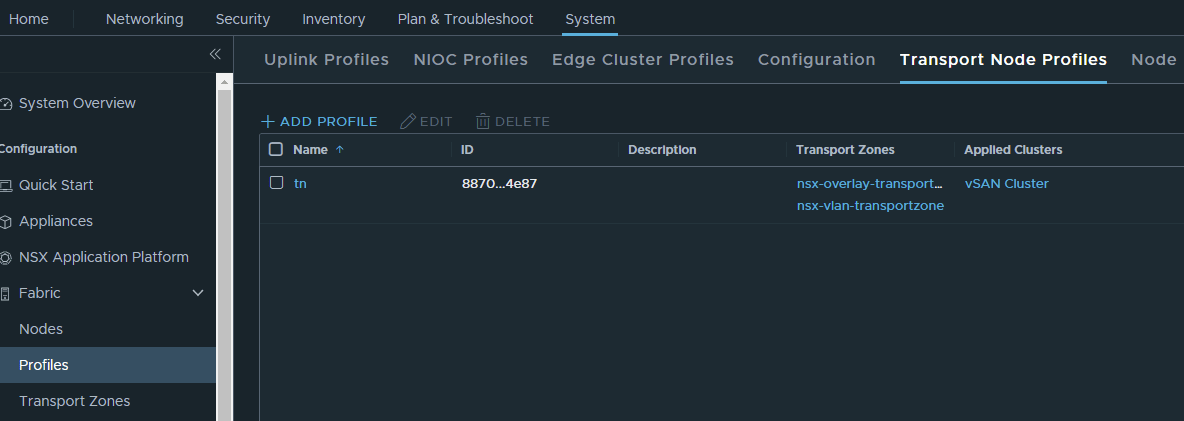
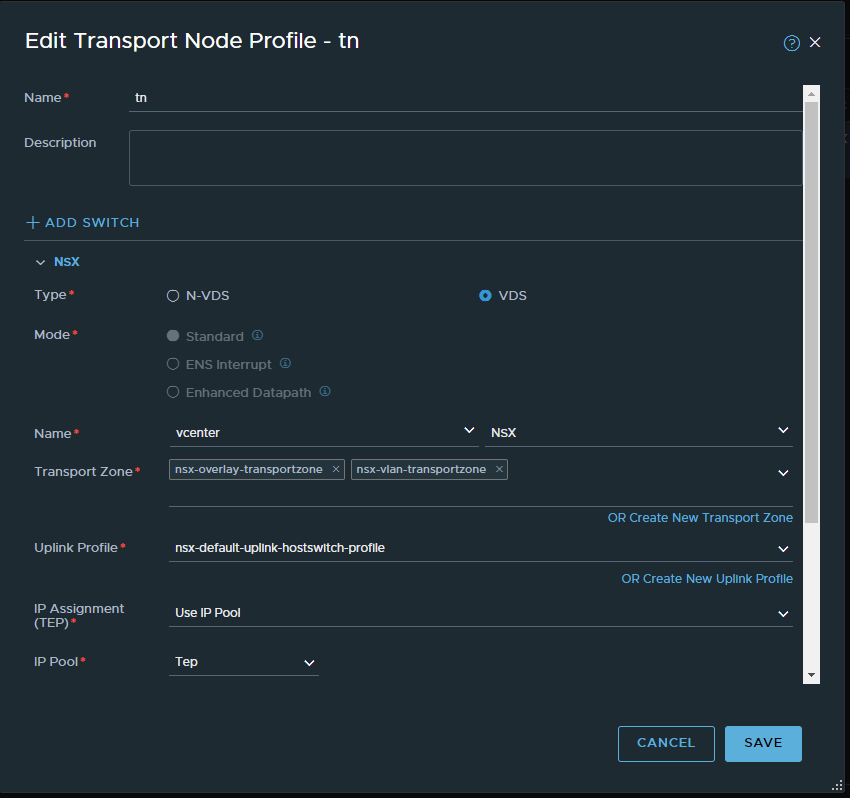
From VMW: A transport node profile is a template to define configuration that is applied to a cluster. It is not applied to prepare standalone hosts. Prepare vCenter Server cluster hosts as transport nodes by applying a transport node profile. Transport node profiles define transport zones, member hosts, N-VDS switch configuration including uplink profile, IP assignment, mapping of physical NICs to uplink virtual interfaces and so on.
From Me: Profile that gets applied to all the TEPs (nested esxi hosts) and tells them how to communicate with each other and what NICs to use.
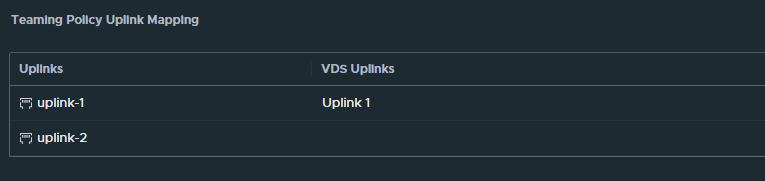
Navigate to System -> Configuration -> Fabric -> Profiles -> Transport Node ProfilesAdd a new Profile and name it “tn”. Select VDS and then add the vCenter and the Distributed Switch that was created. Select both overlay and vlan for TZ. And set the IP Pool Tep.Select Uplink 1 and click Save
Create an Edge Transport Node
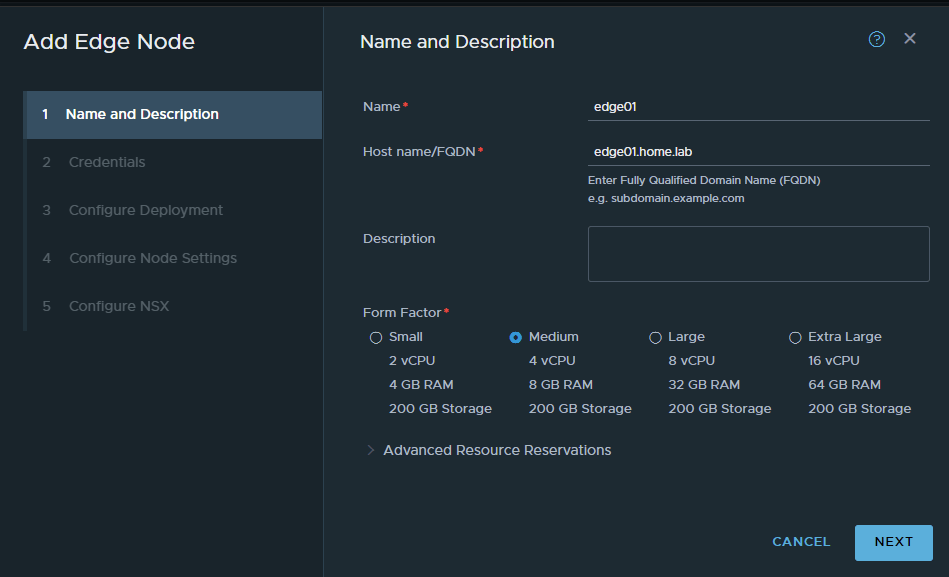
The edge is a vm that is deployed in our vCenter that handles most of the NSX-T networking.
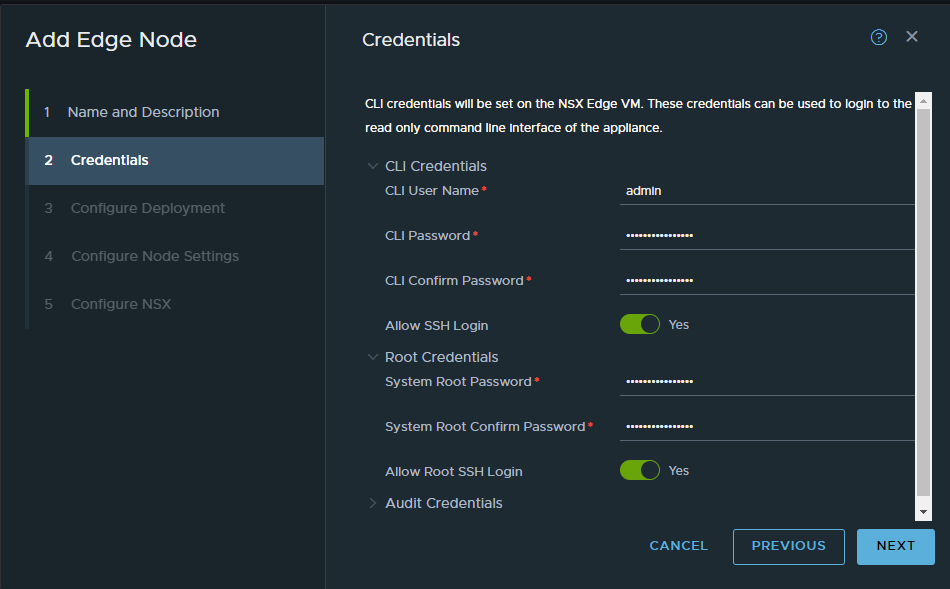
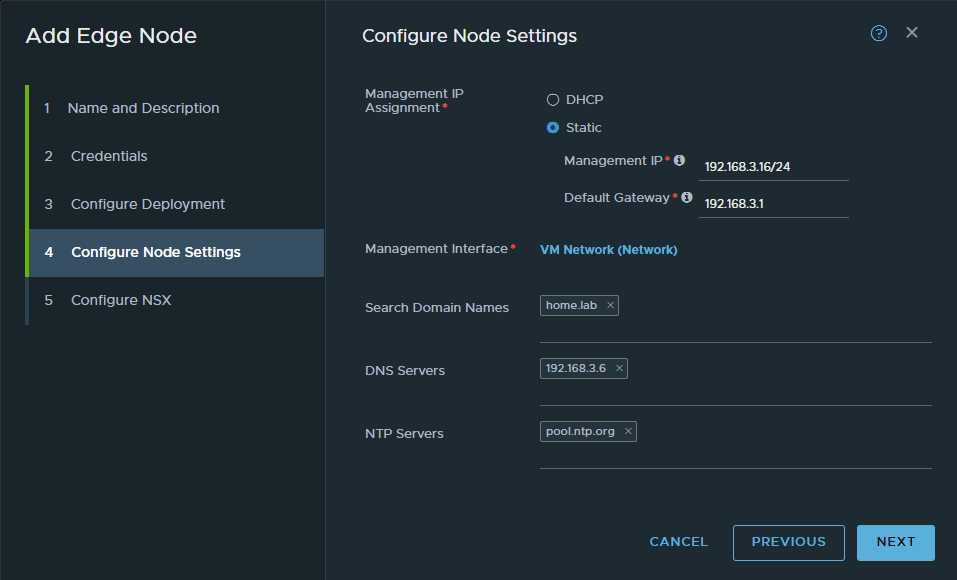
Navigate to System -> Configuration -> Fabric -> Nodes -> Edge Transport NodesClick Add Edge Node and name it “edge01”. Add the hostname and select Medium as the form factor.Set the credentials here and allow ssh and root (for troubleshooting)For the Compute Manager select the vcenter that we created, the vSAN Cluster and the Datastore vsanDatastore.Set a static IP address and default gateway and set the Management Interface as VM Network. Additionally I would recommend setting search domain, dns server and ntp servers.Lastly, add both the vlan and overlay TZ and set the uplink profile. Add our Tep pool and finally select the VM Network as Uplink 1.Eventually you should see the state Successful. You will not see Tunnels, or Logical Routers.
Configure the Edge Cluster
The edge cluster is a grouping of all the edges. We only have 1 edge in the lab, but still we need a cluster.
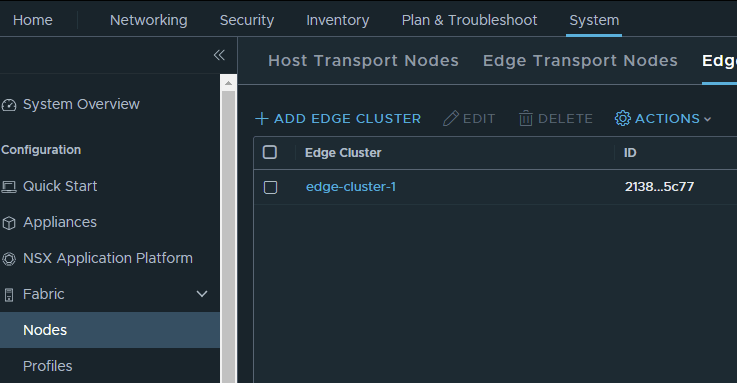
Navigate to System -> Configuration -> Fabric -> Nodes -> Edge ClustersAdd a new Edge Cluster and name it “edge-cluster-1” and move the edge01 from Available to Selected. Also set the cluster profile.
Configure NSX on the Host Transport Nodes
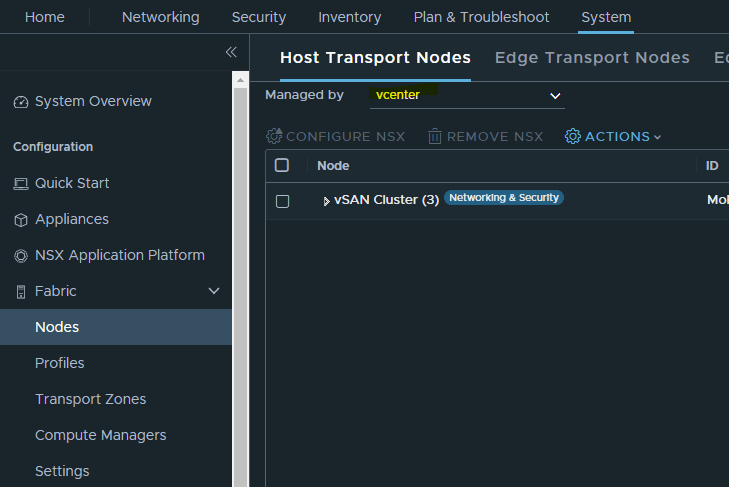
Navigate to System -> Configuration -> Fabric -> Nodes -> Host Transport Nodes and make sure that you select “vcenter” under the Managed by dropdown.Expand the cluster and you should see all the nested esxi hosts. Again you will not see the Tunnels here until we create a segment and a Tier 0 router.Installing NSX is as simple as selecting the vSan Cluster and clicking “Configure NSX”. It will popup this window and you select the “tn” Transport Node Profile we created earlier.
This process usually takes a few minutes, give everything 5-10 minutes to create and settle down.
Configure NSX-T Routing
Now we get to the fun part, actually setting up the routing for NSX. It’s also the final test to make sure everything is configured correctly from above.
Create the Uplink Segment
The uplink segment allows NSX to bridge into our home network. We’re going to do this via BGP using a vyos router.
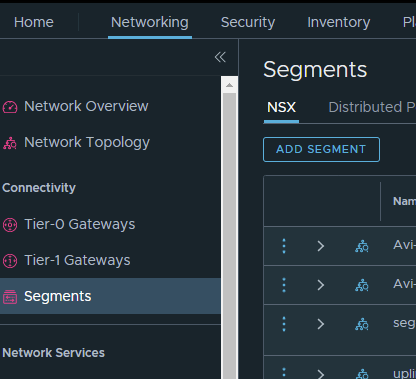
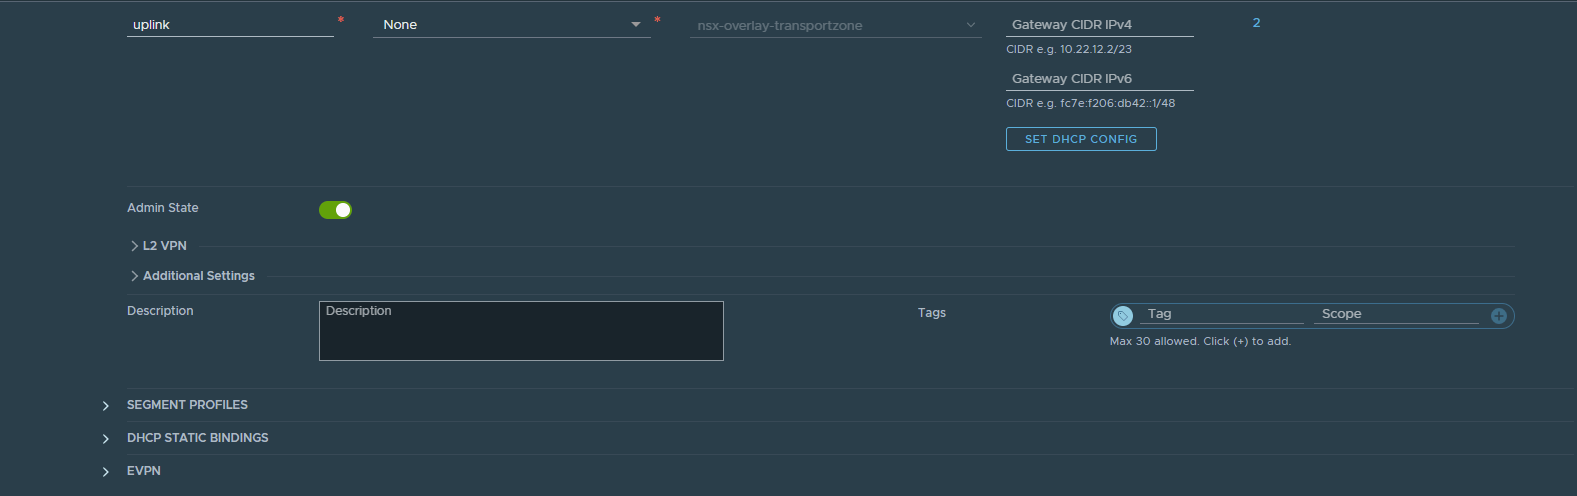
Navigate to Networking-> Connectivity -> SegmentsClick Add Segment and call it “uplink” and set the Transport Zone as nsx-overlay-transportzone. Everything else default, save. And click No to further editing.
Create a Tier-0 Gateway
T0 gateway routes between your home network 192.168.3.0/24 and any nested networks that we will create.
Navigate to Networking -> Connectivity -> Tier-0 Gateways
Set the name as “T0-1” and set the HA mode to Active Standby. Also the Edge cluster to edge-cluster-1. Click Save, and click Yes to continue editing.
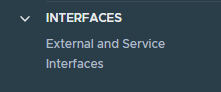
Click Interfaces and add an interface
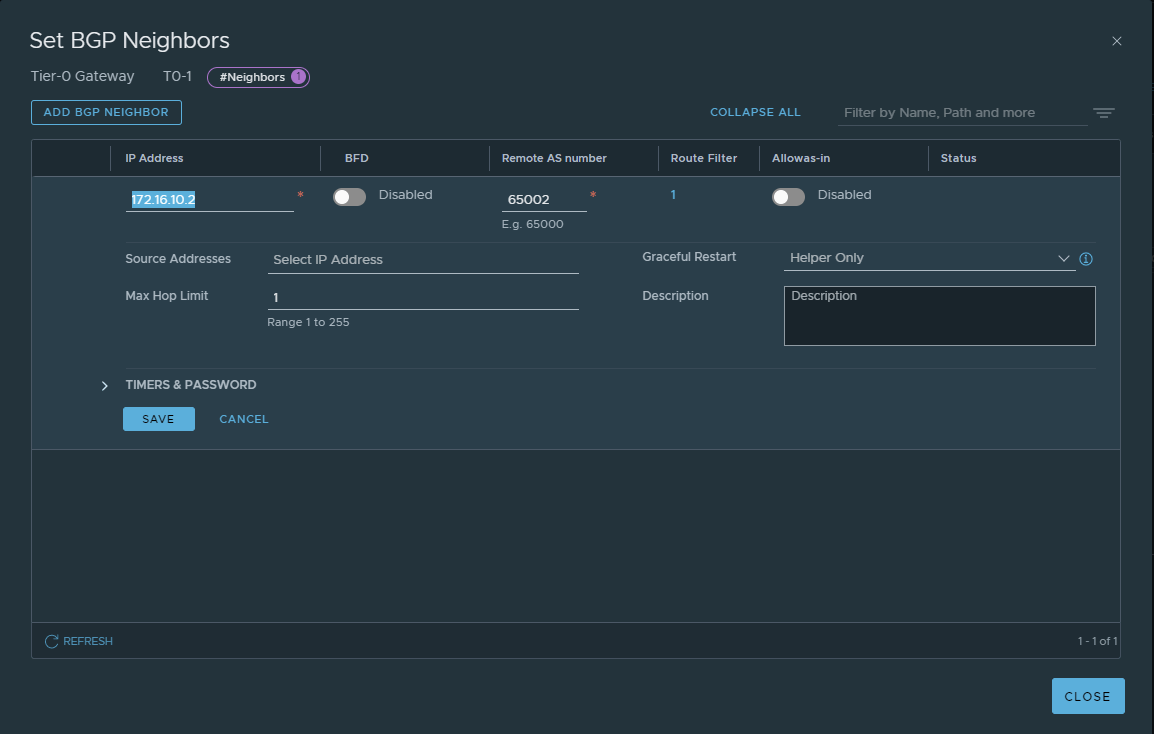
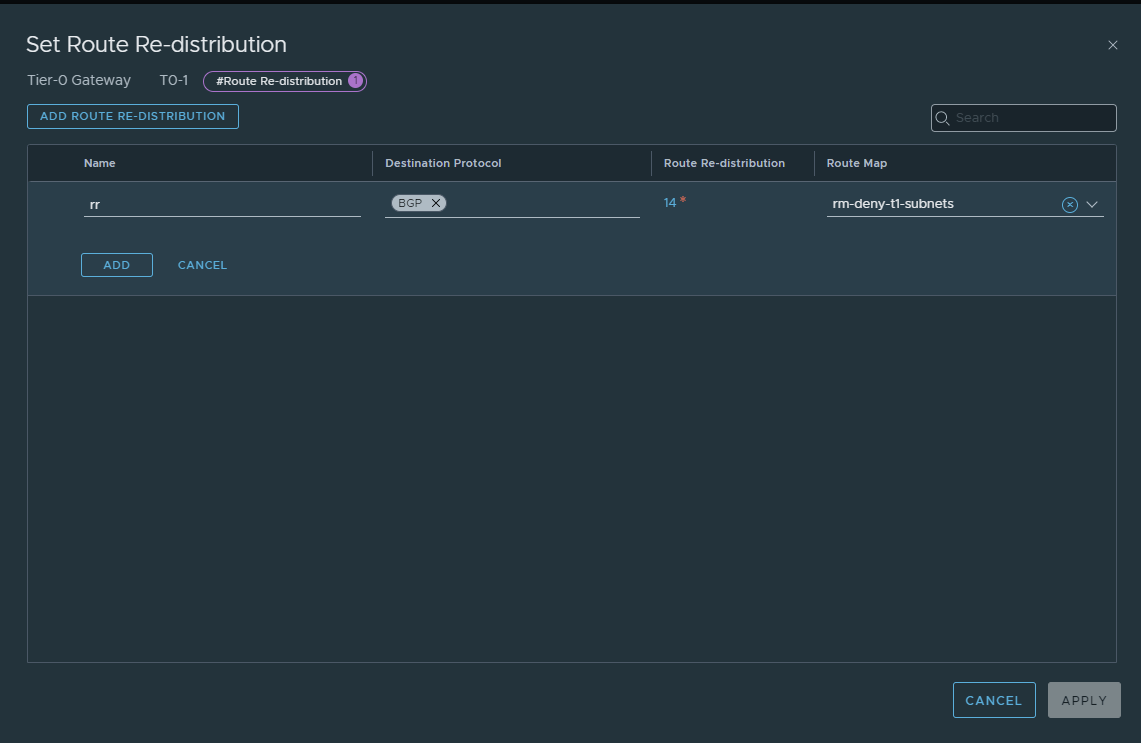
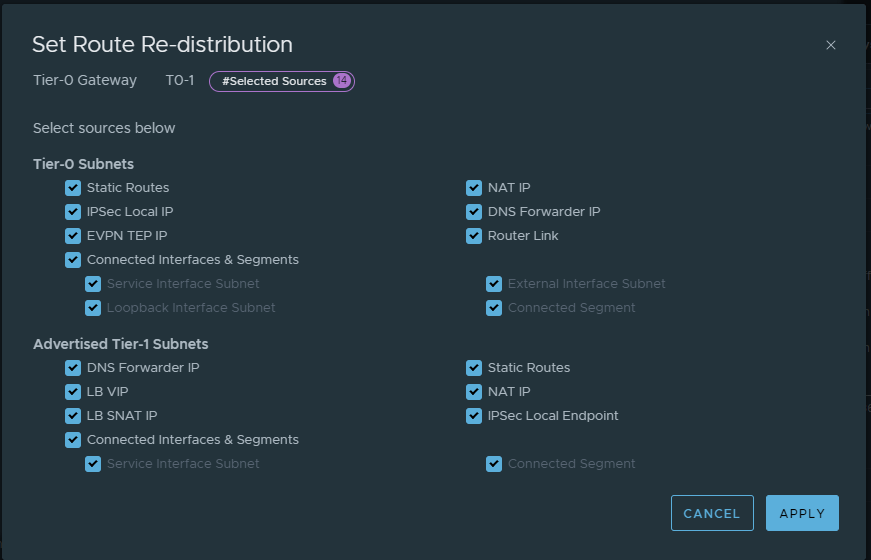
Add the interface and name it “uplink”. Set the IP address and mask same as above, the edge node as edge01 and the MTU as 9000. All else leave default. SaveClick BGP and on the bottom right, click BGP Neighbors. Yours will show 0.Add the bgp neighbor as shown above. IP Address, Remote AS. SaveGoto Route Re-Distribution and click Route Re-Distribution 0. Yours will show 0.Create a new Route Re-Distribution and call it “rr”. Click Route Re-Distribution, again yours will show 0.Select everything and Apply. Then save all the way through the Tier 0 router.You should see this now.
Create a Tier-1 Gateway
Tier-1 gateways connect to the T0 and down to the actual subnets (called segments)
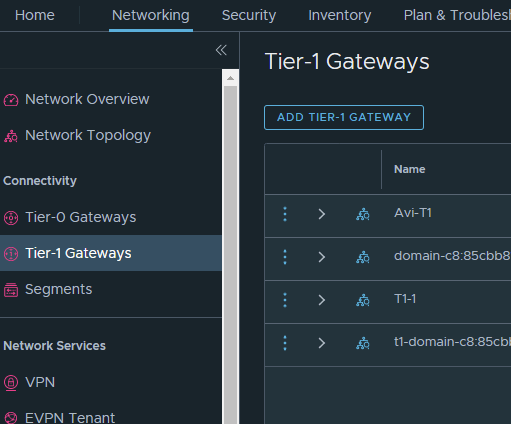
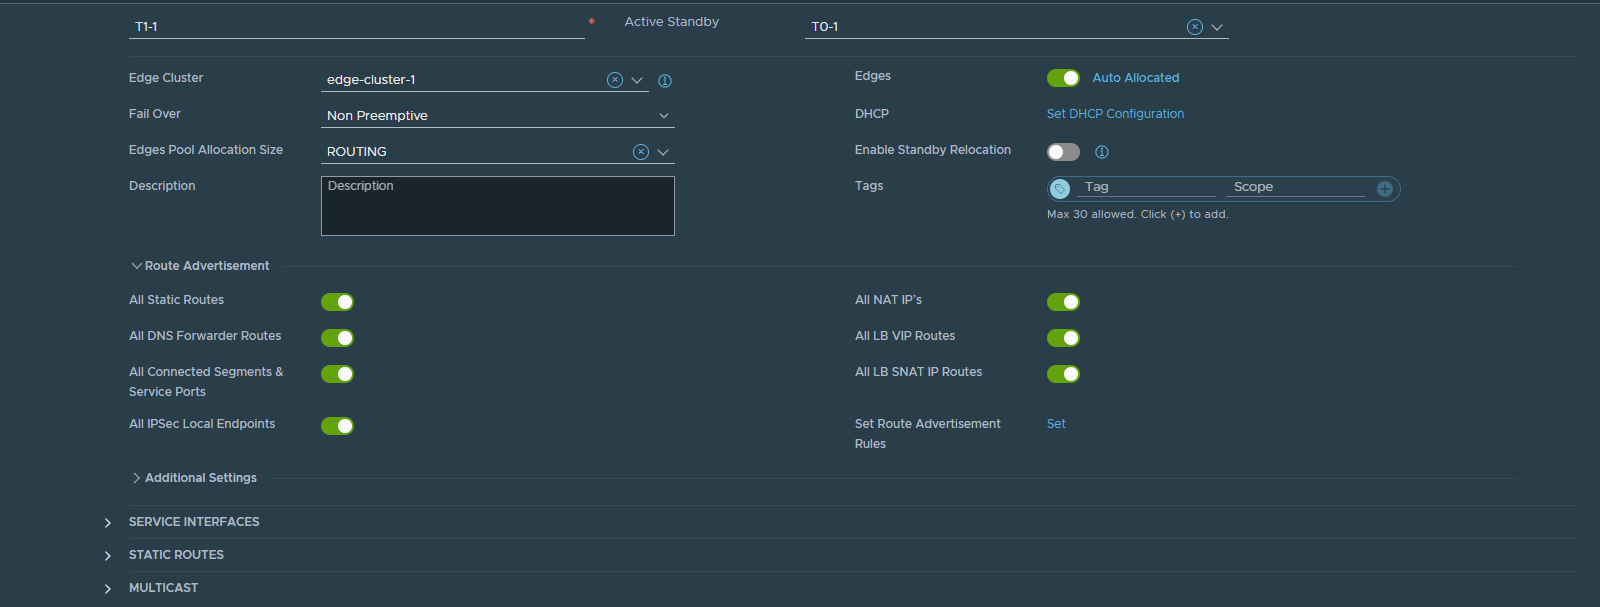
Navigate to Networking -> Connectivity -> Tier-1 Gateways and select Add Tier-1 GatewayCreate the Tier 1 and call it “T1-1” Set the edge cluster, and the Tier-0 Gateway. Then under Route Advertisements, select all of them. Everything else default. Save
Create a Segment
Segments allow us to create isolated subnets. These will auto create portgroups in vCenter and can be assigned to VMs.
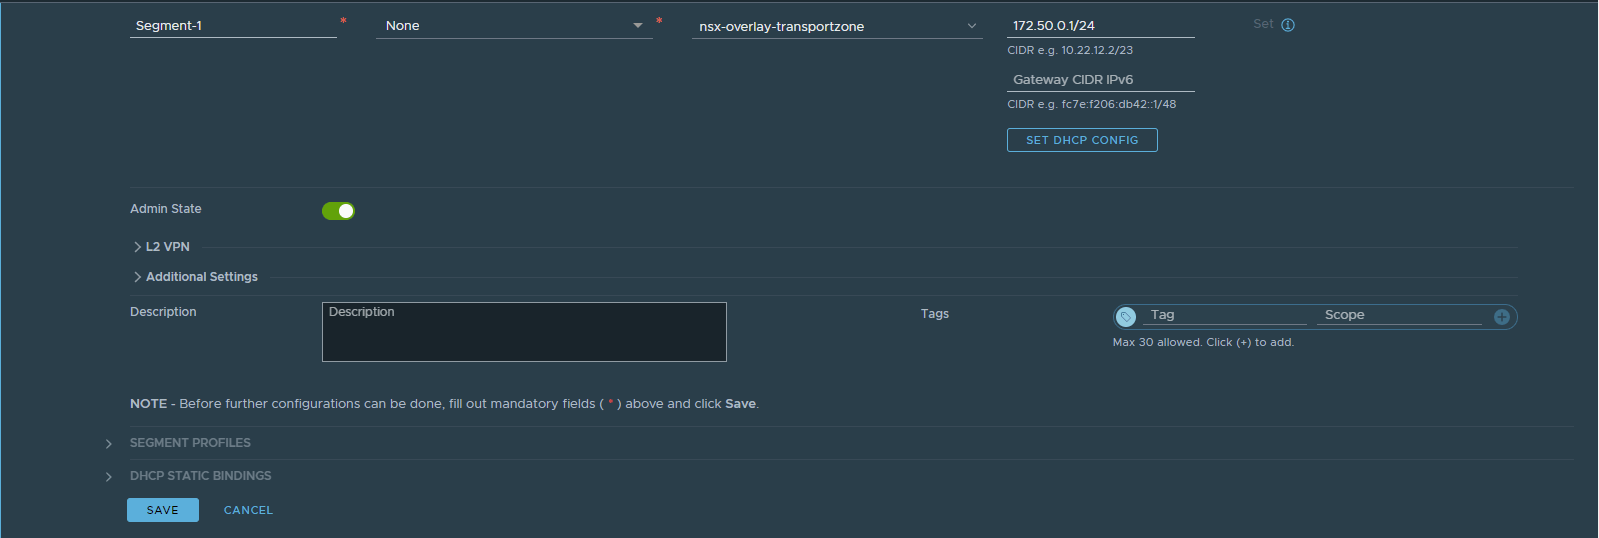
Navigate to Networking -> Connectivity -> Segments and select Add SegmentSet the name, nsx-overlay-transportzone, and set an IP subnet. This IP will essentially be the default gateway. All else default and Save.
Finish BGP and Test
Add the uplink portgroup to the vyos router.
Now that NSX-T is configured, and the Tier-0 router is ready for BGP, we need to add the uplink segment to the vyos router.
Edit the VM details for vyos, and under the network adapter 2, select the newly created uplink.
Verify BGP
You can verify this 2 ways
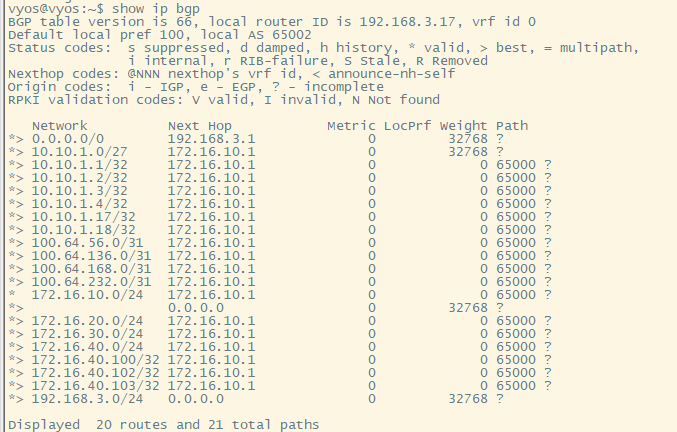
Directly in NSX-T. If you see successful, the pairing was successful.And of course directly in vyos. show ip bgp. I have a few more routes that you will see.
8 thoughts on “Home Lab – Deploy NSX-T Manager and Edge”
Hi Matt,
FWIW, what you’ve set up in this demo is ebgp, aka “BGP”. For your purposes here the effective differences are negligible, but when the local AS and remote AS are different numbers it’s exterior gateway routing.
good to know! Thank you sir. I’ll correct that.
Sure thing – still working my way through you guides here 🙂
I’m basically a NOC monkey trying to “learn vmware” for a position I was recruited for. I figured, sure, some virts, route/switch/firewall, storage, etc – not all that much to it, right? Uh, yeah. I’m working with a great team but I feel like I’m about 3 fork-fulls into eating an elephant…
FWIW, looking forward to your Lab 3 info. I need to wrap my head around VCF – that was pretty much the end goal of this lab. We’ve had some “opportunities” with our VCF environment. We seem to expose a lot of bugs. Exposing bugs is almost universally met with “upgrade to the current version.” With VCF. :-/
Thank you! I’m just getting started with my own vcf lab, and will have the blogs out soon. Within the next month, that’s the goal. It’s definitely a different beast, lots of requirements 🙂
Hi Matt,
I was going back through a few of the blogs I used to kickstart my own home lab (yours especially – thanks a bunch :-)) and I noticed that you’re using an overlay segment for your uplink here rather than a VLAN uplink. Was there a specific reason for this or was it more of a simplicity thing? Based on the docs, I’ve been using VLAN segments for uplinks, but I’m always interested to learn why folks do things differently.
Thanks!
Great question, and I don’t know the answer 🙂
Most likely because the blog or doc I used to setup my own overlay used both overlay and vlan, and so I just added both as well. It seemed to work, but now that NSX 4.x is out I really need to do a new series on upgrading.
I have followed the steps mentioned in the blog and deployed vyos 1.5 along with NSX-T 4.2.0.1, but my T0 router status is down, its states BGP and routing down, has somebody managed to deploy with the above mentioned version and get the setup working


Hi Matt,
FWIW, what you’ve set up in this demo is ebgp, aka “BGP”. For your purposes here the effective differences are negligible, but when the local AS and remote AS are different numbers it’s exterior gateway routing.
good to know! Thank you sir. I’ll correct that.
Sure thing – still working my way through you guides here 🙂
I’m basically a NOC monkey trying to “learn vmware” for a position I was recruited for. I figured, sure, some virts, route/switch/firewall, storage, etc – not all that much to it, right? Uh, yeah. I’m working with a great team but I feel like I’m about 3 fork-fulls into eating an elephant…
FWIW, looking forward to your Lab 3 info. I need to wrap my head around VCF – that was pretty much the end goal of this lab. We’ve had some “opportunities” with our VCF environment. We seem to expose a lot of bugs. Exposing bugs is almost universally met with “upgrade to the current version.” With VCF. :-/
Thank you! I’m just getting started with my own vcf lab, and will have the blogs out soon. Within the next month, that’s the goal. It’s definitely a different beast, lots of requirements 🙂
Hi Matt,
I was going back through a few of the blogs I used to kickstart my own home lab (yours especially – thanks a bunch :-)) and I noticed that you’re using an overlay segment for your uplink here rather than a VLAN uplink. Was there a specific reason for this or was it more of a simplicity thing? Based on the docs, I’ve been using VLAN segments for uplinks, but I’m always interested to learn why folks do things differently.
Thanks!
Great question, and I don’t know the answer 🙂
Most likely because the blog or doc I used to setup my own overlay used both overlay and vlan, and so I just added both as well. It seemed to work, but now that NSX 4.x is out I really need to do a new series on upgrading.
I have followed the steps mentioned in the blog and deployed vyos 1.5 along with NSX-T 4.2.0.1, but my T0 router status is down, its states BGP and routing down, has somebody managed to deploy with the above mentioned version and get the setup working