Long title, but basically this is a guide to deploy L7 ingress on top of your WCP and NSX-T setup. If you’ve followed my previous guides, you should have NSX and WCP configured, and a supervisor cluster and guest cluster already configured. We will need to add a little bit more config to NSX-T and then spin up an Avi Controller and service engines. Finally we will deploy AKO and configure L7 ingress.
NSX Networking
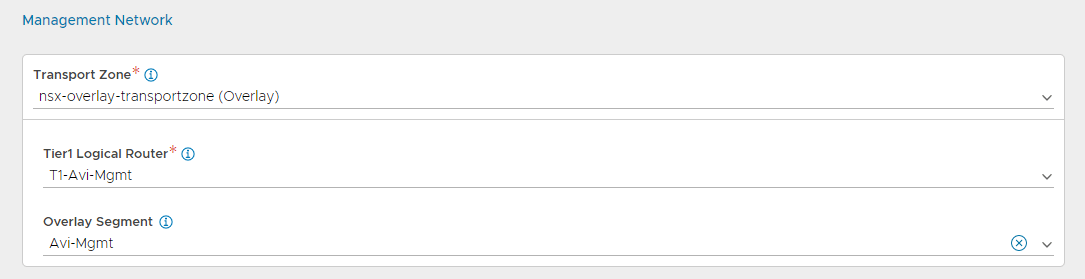
Create Avi Tier-1 in NSX
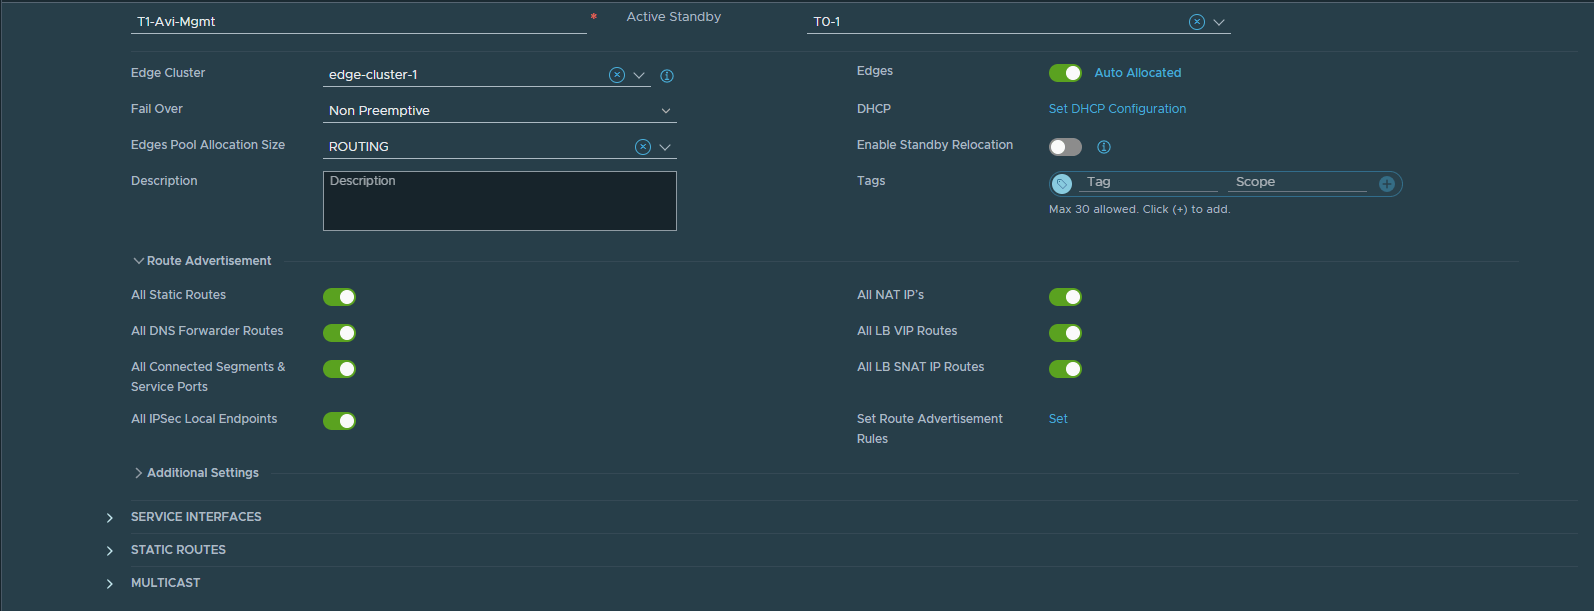
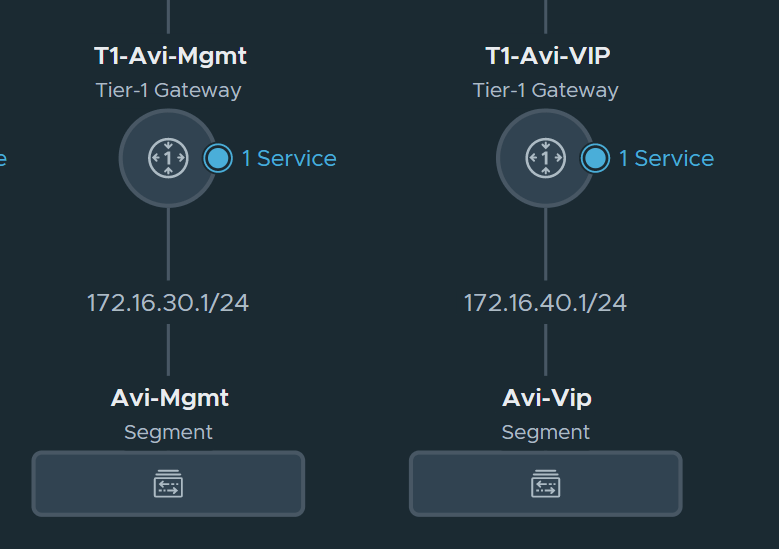
By this point we’ve created a few T1 gateways so the process is the same for these ones. Create 2 T1s: 1 for management, and the other for VS network. I named them T1-Avi-Mgmt and T1-Avi-VIP and under Route Advertisements make sure to check them all.
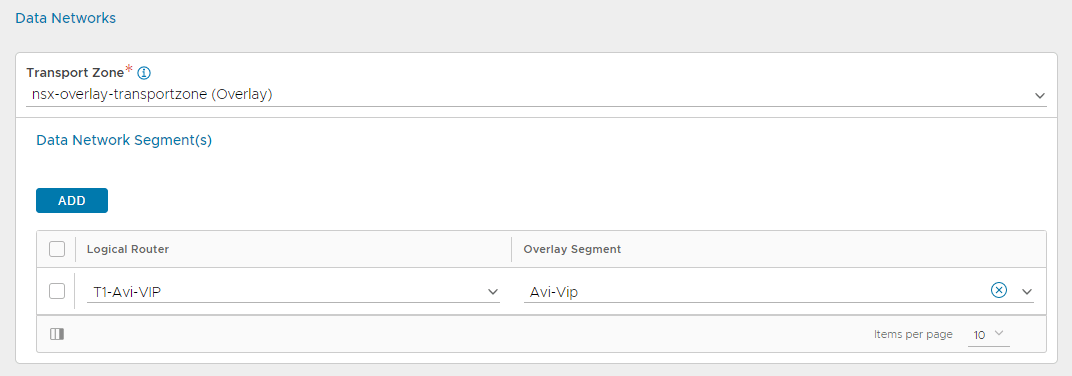
Create Avi Segments under the the T1 gateways
Deploy and Configure Avi (NSX Advanced Load Balancer)
In the interest of not duplicating work, see this guide: https://mattadam.com/2021/10/12/tanzu-kubernetes-on-vcenter-7-deploy-avi-controller-and-service-engines/ Stop at the Configure Cloud section, and that is where this guide will start.
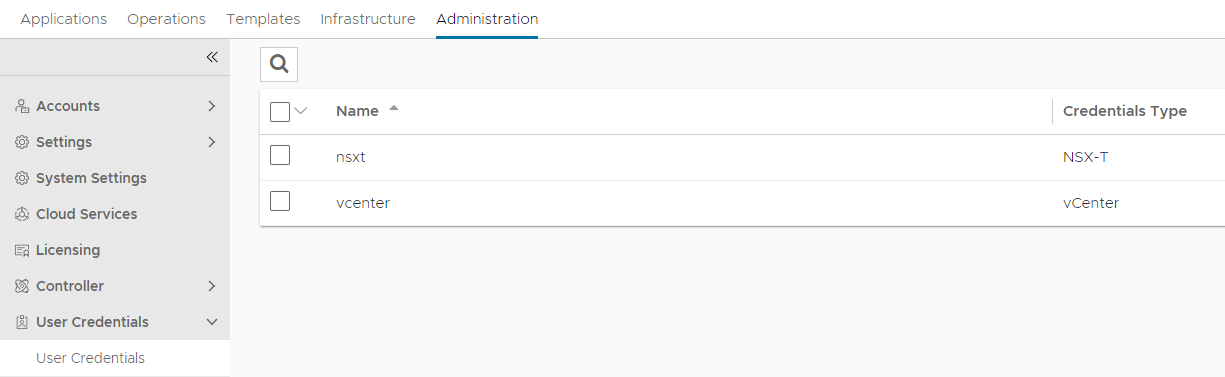
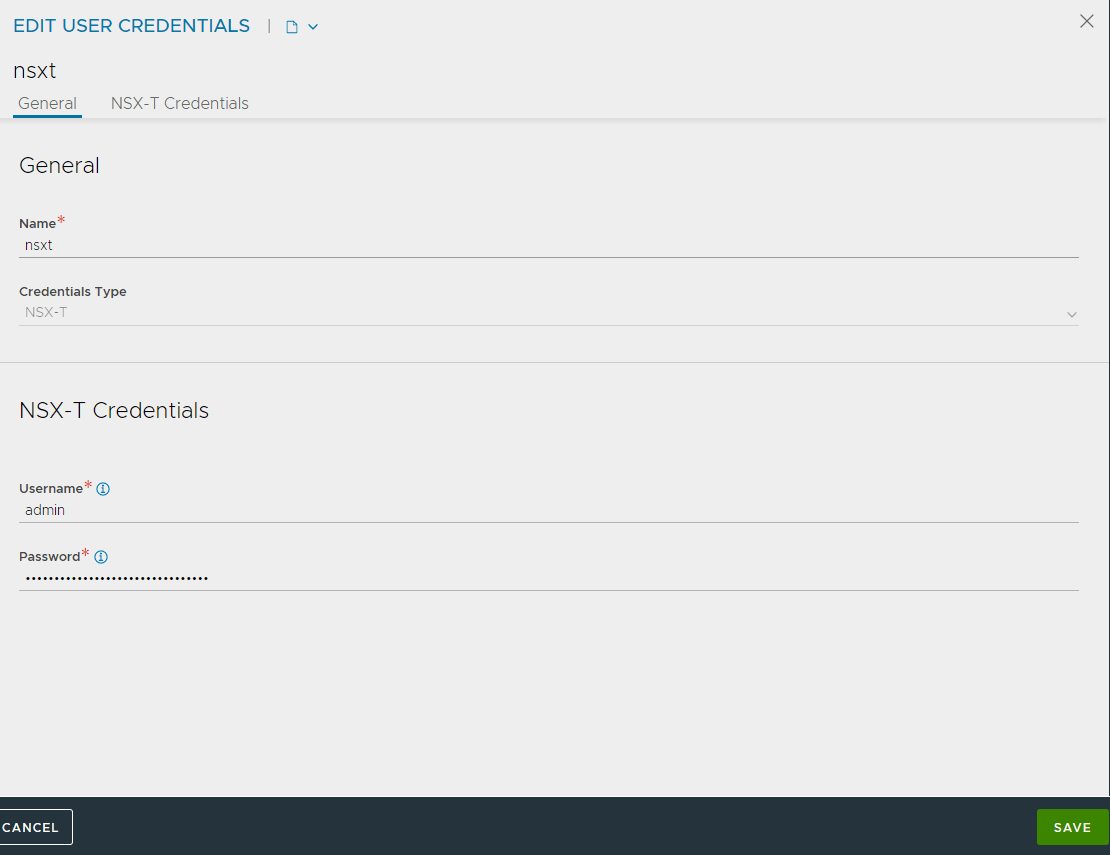
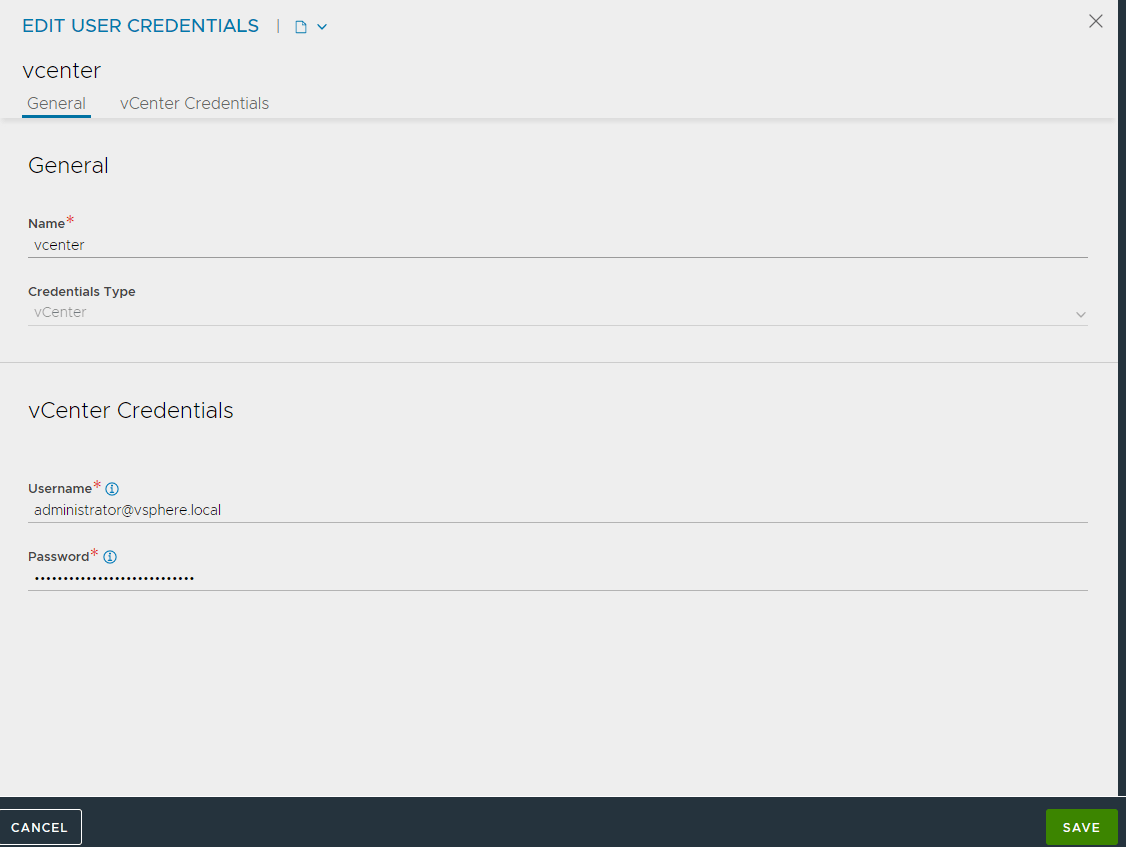
Create Credentials
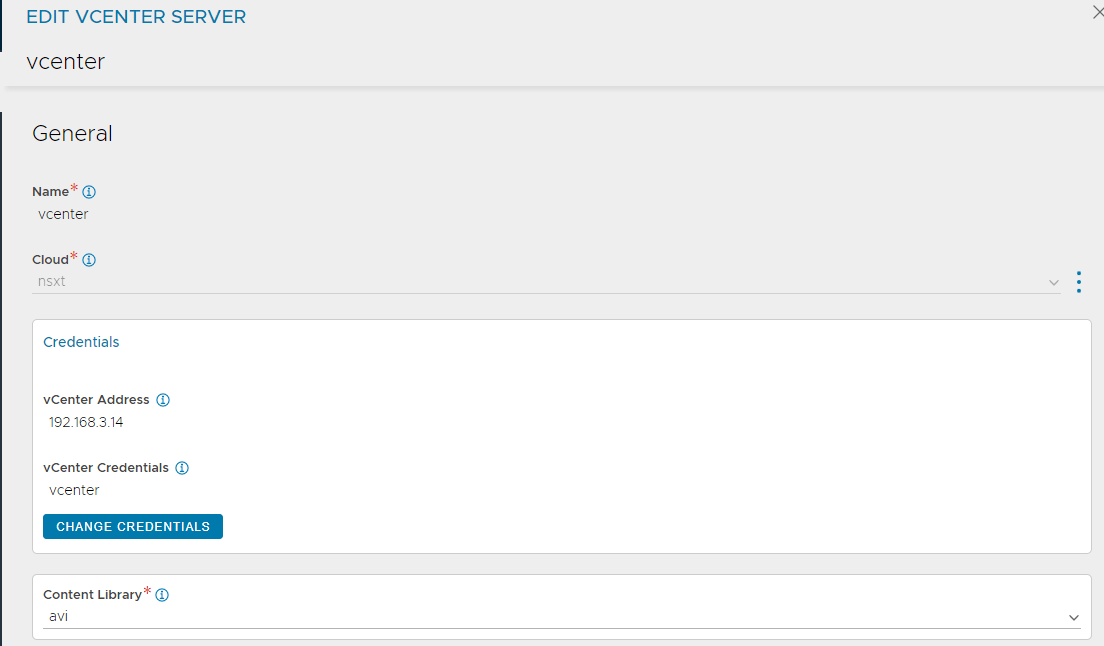
We need to create the nsx manager and vcenter credentials, for use in the cloud.
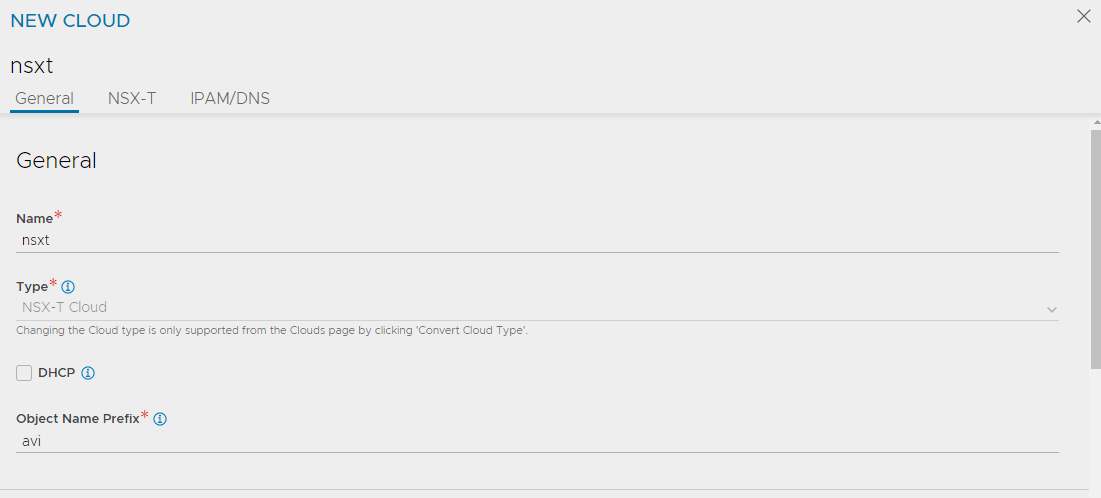
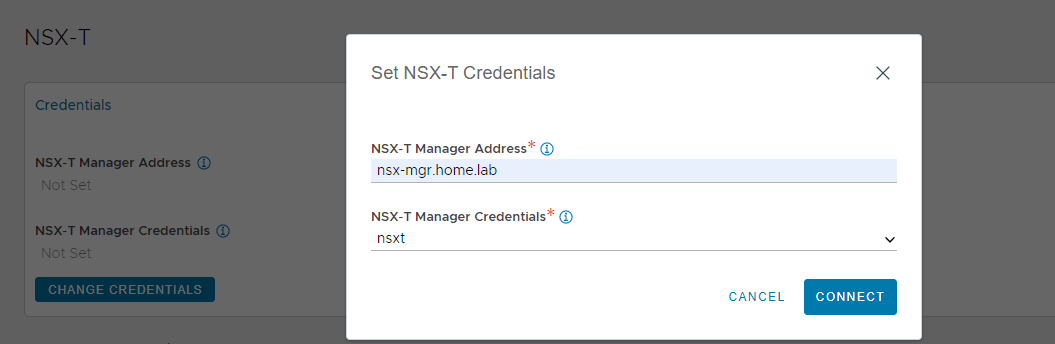
Configure NSX-T Cloud
After the Avi controller is deployed, log in and navigate to Infrastructure -> Clouds. Then select Create NSX-T Cloud.

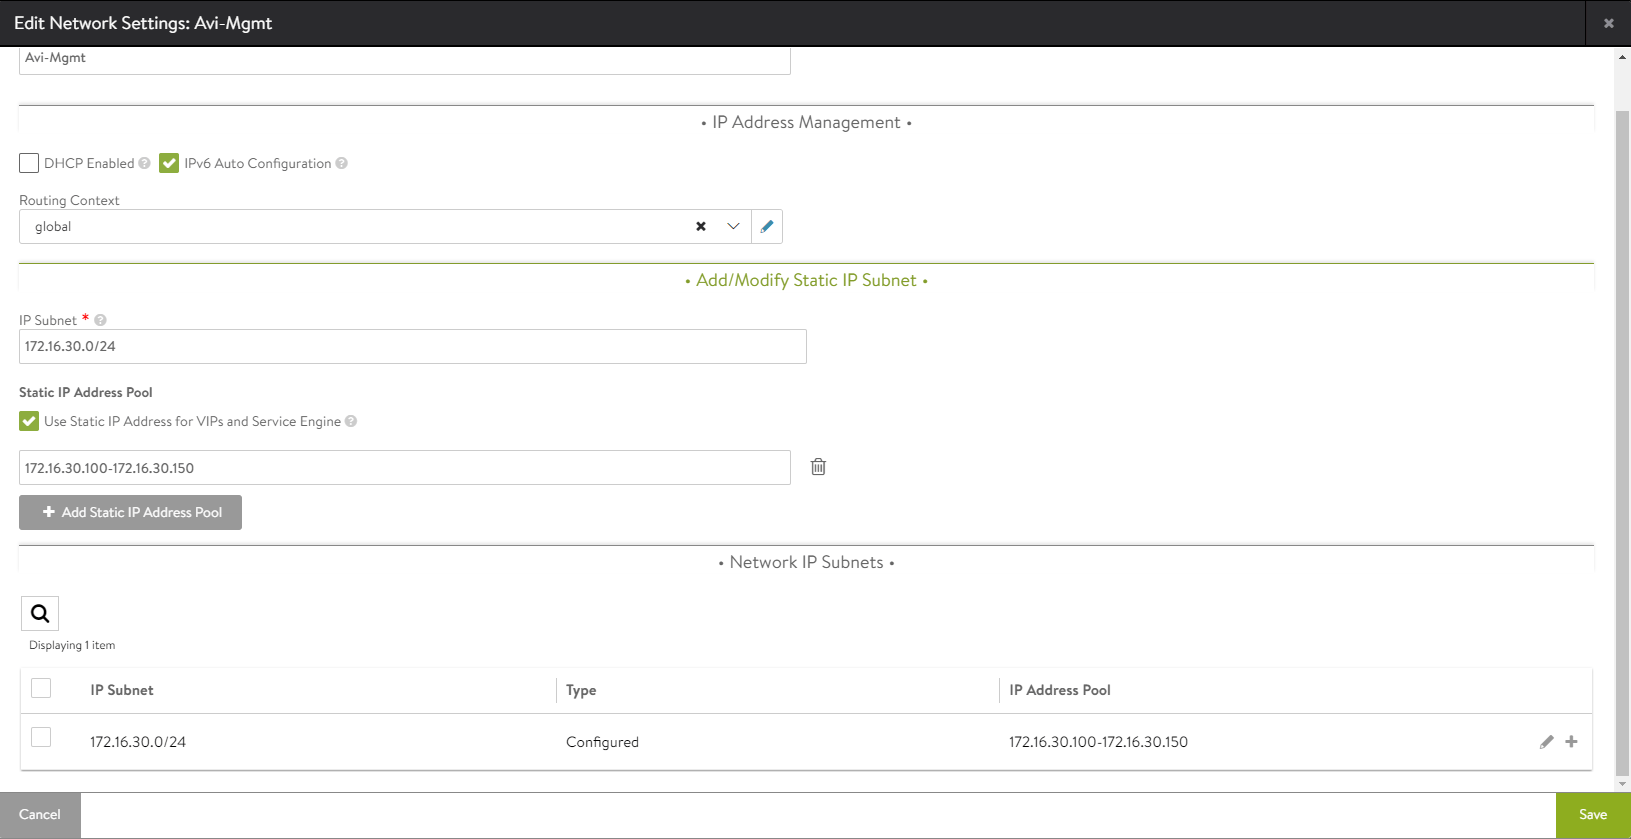
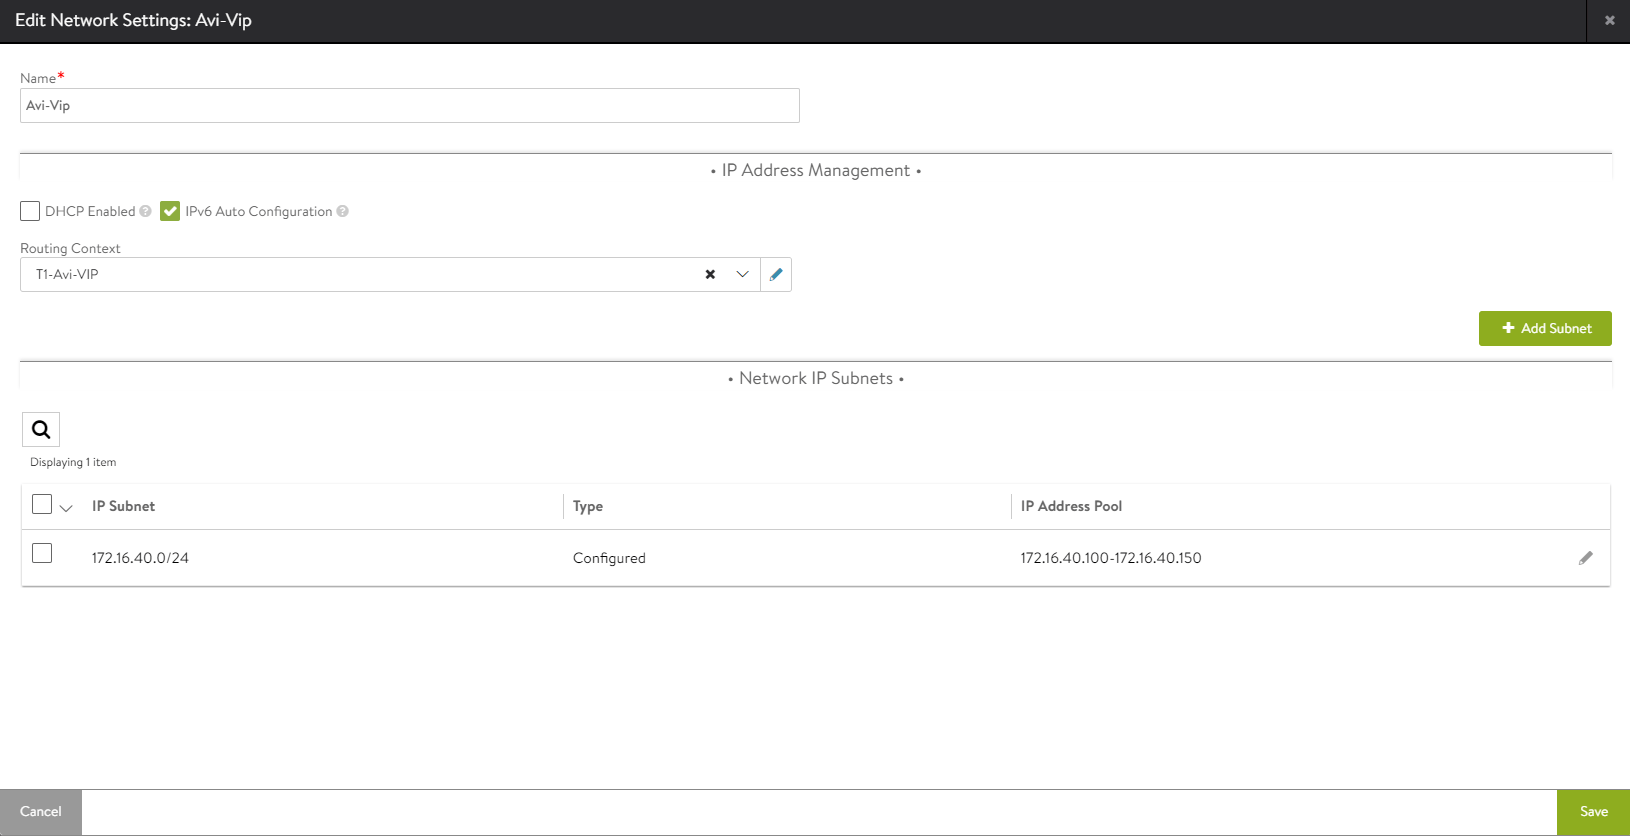
Set static IP Ranges (Optional)
If you have a dhcp range configured in your networks, you likely can skip this step. Just verify that the networks have been discovered by Avi. Navigate to Infrastructure -> Cloud Resources -> Networks and select the “nsxt” cloud


Set static routes for Vip and management subnets
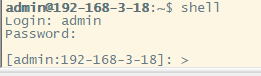
This is done in the avi cli.
#Exact commands used:
shell #login to the avi shell with credentials
switchto cloud nsxt
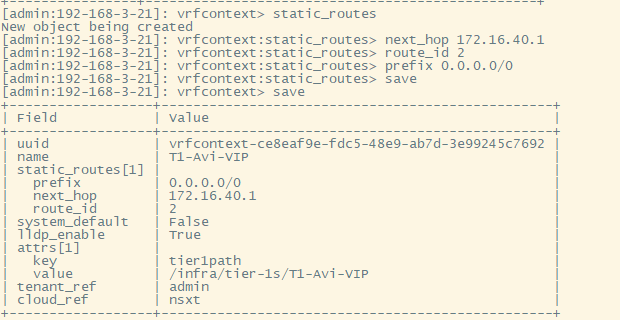
configure vrfcontext T1-Avi-VIP #Enter submode
static_routes #Enter submode
next_hop 172.16.40.1
route_id 2
prefix 0.0.0.0/0
save
save
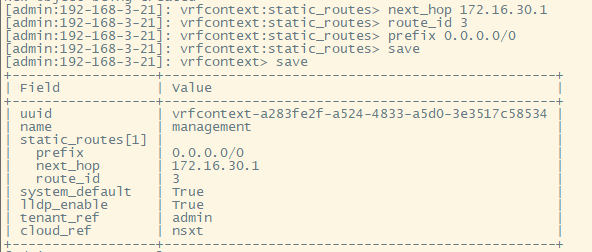
configure vrfcontext management #Enter submode
static_routes #Enter submode
next_hop 172.16.30.1
route_id 3
prefix 0.0.0.0/0
save
save

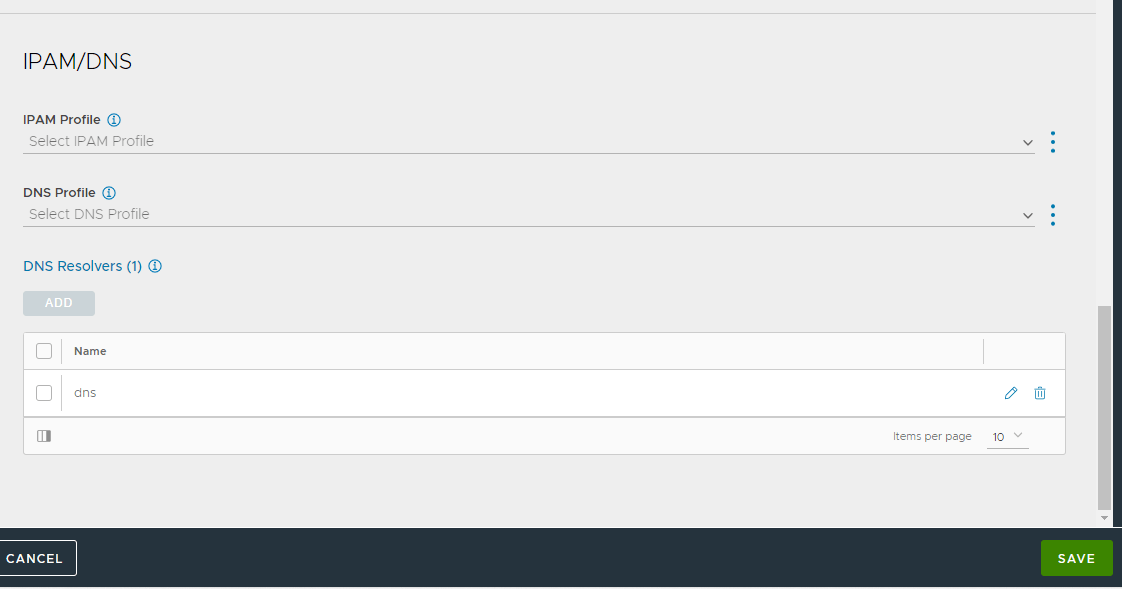
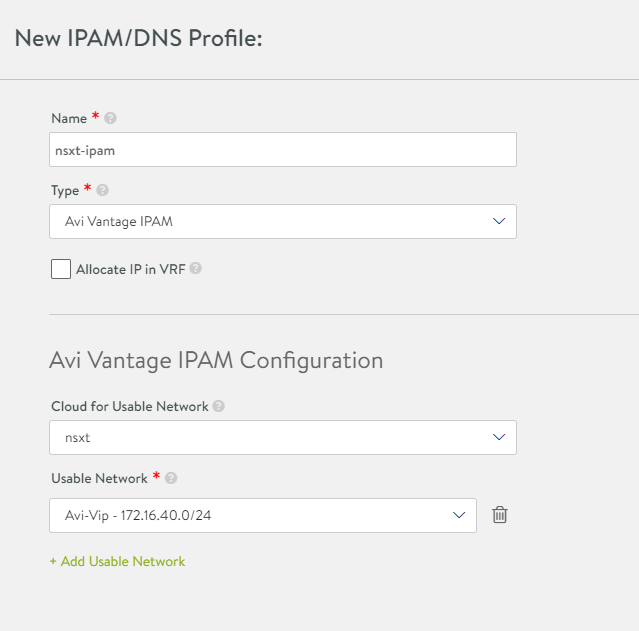
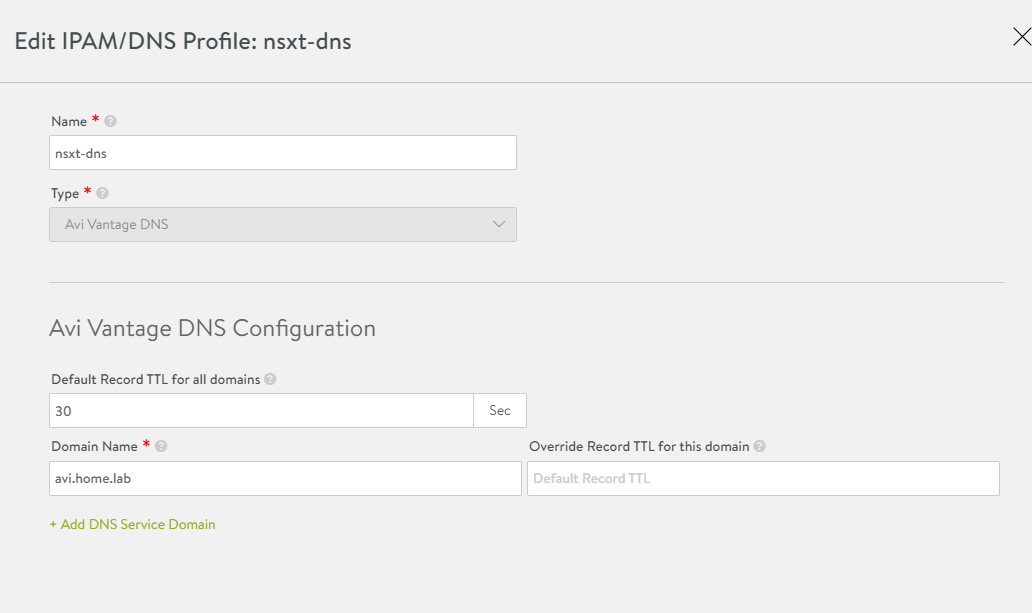
Create a DNS and IPAM profile.
Navigate to Templates -> Profiles -> IPAM/DNS Profiles


Install AKO on K8s Cluster
In this step we’ll deploy AKO and a test deployment with an ingress to ensure everything is working.
Exact Commands:
#login to cluster
kubectl vsphere login --vsphere-username administrator@vsphere.local --server=https://10.10.1.2 --insecure-skip-tls-verify --tanzu-kubernetes-cluster-namespace=dev --tanzu-kubernetes-cluster-name=tkg-cluster-01
kubectl config use-context tkg-cluster-01

#Helm Setup
kubectl create ns avi-system
helm repo add ako https://projects.registry.vmware.com/chartrepo/ako
helm show values ako/ako --version 1.7.1 > values.yaml
nano values.yaml
#Example values.yaml file edits

clusterName: my-cluster #Change the name here
layer7Only: true #Set this to true. NSX will handle L4. Avi will handle L7.
nsxtT1LR: '/infra/tier-1s/Avi-T1' #Set this to the Avi T1 from NSX.

vipNetworkList: [] - Comment out this line and replace it with the following:
  vipNetworkList:
   - networkName: Avi-Vip
     cidr: 172.16.40.0/24

serviceType: NodePort #I am using NodePort for my lab.
shardVSSize: SMALL #Small will create a small number of VS for sharding.

ControllerSettings:
  serviceEngineGroupName: Default-Group
  controllerVersion: '21.1.4'
  cloudName: nsxt
  controllerHost: 'avi-controller.home.lab'
  tenantName: admin

avicredentials:
  username: "admin"
  password: "password123"
After saving the values.yaml file, the following commands are used to install AKO.
helm install ako/ako --generate-name --version 1.7.1 -f /ako/values.yaml namespace=avi-system
Hello Matt,
first thank you for the blog very helpful, i have a small question why do we need to add the static routes on the VRF, it should not be automated ?
Without a default gateway, the nodes wouldn’t know how to reach any other network. So you must set the DG in the management vrf as well as the vip/data vrf.
Hi Matt,
I guess we can deploy different AKO instances on different Guest Clusters and by using different values.yaml file differentiate VIP networks according to PODs. Is this correct?
The idea would be to have different VIPs for different Clusters.
If the answer is “yes” (as I believe) my ask is for L4 services. Can something similar be done for L4 LB (different VIPs for different Clusters) – I see an issue here, since there would be no AKO yaml file where to define the VIP network.
Yes, for each guest cluster you can deploy a new AKO and associate a different network for L7.
Unfortunately you cannot with L4 in TKGs. The AKO for L4 in TKGs actually runs in the supervisor cluster, and cannot be changed. It’s a design limitation, and may or may not be addressed in the future. You could consider using TKGm instead. TKGm provides a great deal more flexibility for L4 and L7, and the AKO is deployed in the guest cluster, instead of the supervisor clusters. You can check out my install guide for TKGm here: https://mattadam.com/tanzu-tkg-tkgm/
Hi Matt,
I have followed your guide to install AKO on vSphere with Tanzu with NSX-T, the deployment of AKO is successful (I installed it with ServiceType NodePort) but when I go to expose an application (e.g. NGINX) the Service Engines in ALB fail to contact the TKGs node network (10.244.0.81/28).
the Segment for the Data Network of the Service Engines is in the same Tier1 as the TKGs, but it cannot contact the TKGs nodes because I noticed that there is a rule in the DFW for TKGs node IPs that denies incoming traffic from any network.
I can’t figure out how I can get the Service Engines Data Network to talk to the TKGs nodes network, do you have any ideas?
Thank you very much.
Well I would set a DFW rule allowing everything, just to remove that variable from the equation. If it still fails, try moving the tkgs workload to a different T1.
Hi Matt,
thanks for the reply, I tried to add a rule that allowed communication between Data Network segment and TKGs node segment, but still nothing changed. What do you mean by changing T1? Can I change the T1 that created the vSphere with Tanzu when you create a new Namespace on Workload Management and in case it still remains supported?
thank you very much
I’ll send you a DM, and we can TS this.