In this tutorial we’ll walk through what is required to deploy and configure the bootstrap VM and install an OpenShift Kubernetes cluster. It’s relatively easy to do. We’ll start with setting up the bootstrap VM, downloading any necessary packages/binaries, then the OpenShift install.
Software Versions used in this demo
| Software | Version |
|---|---|
| Avi Controller & Service Engines | 22.1.2 |
| AKO | 1.8.1 |
| Kubernetes Cluster – OpenShift | 4.11.13 |
DNS
DNS is required to deploy OpenShift. If you haven’t deployed a DNS server yet, here is a guide I wrote on creating a very simple bind server: Create a DNS Server
Example forward zone records
;Name Server Information
@       IN  NS      dns01.openshift.lab.

;A - Record HostName To Ip Address
dns01       IN  A       10.79.173.237

api.openshift-cluster-1       IN  A       10.79.173.236
api-int.openshift-cluster-1       IN  A       10.79.173.236
*.apps.openshift-cluster-1       IN  A       10.79.173.235
Edit Bootstrap NameServer
See below for additional details about the OpenShift bootstrap server. This section here is just for setting the dns server on the bootstrap vm.
# Steps for centos 8
nmcli device status | grep -i ethernet
# Example output: ens192  ethernet  connected               ens192

# Set the NameServer
sudo nmcli connection modify "ens192" ipv4.ignore-auto-dns yes
sudo nmcli connection modify "ens192" ipv4.dns "10.79.173.237"
sudo nmcli connection down "ens192"
sudo nmcli connection up "ens192"
Download the OpenShift installer and CLI
Two files are required to install OpenShift, and manage it via CLI. (Optionally you could manage it via GUI)
The first file is the OpenShift-installer, the second is the binary for oc.
Navigate to RedHat and create an account or login
https://www.redhat.com/en/technologies/cloud-computing/openshift


Navigate to the OpenShift product, or click this link: https://access.redhat.com/products/red-hat-openshift-container-platform/
Click Download Latest

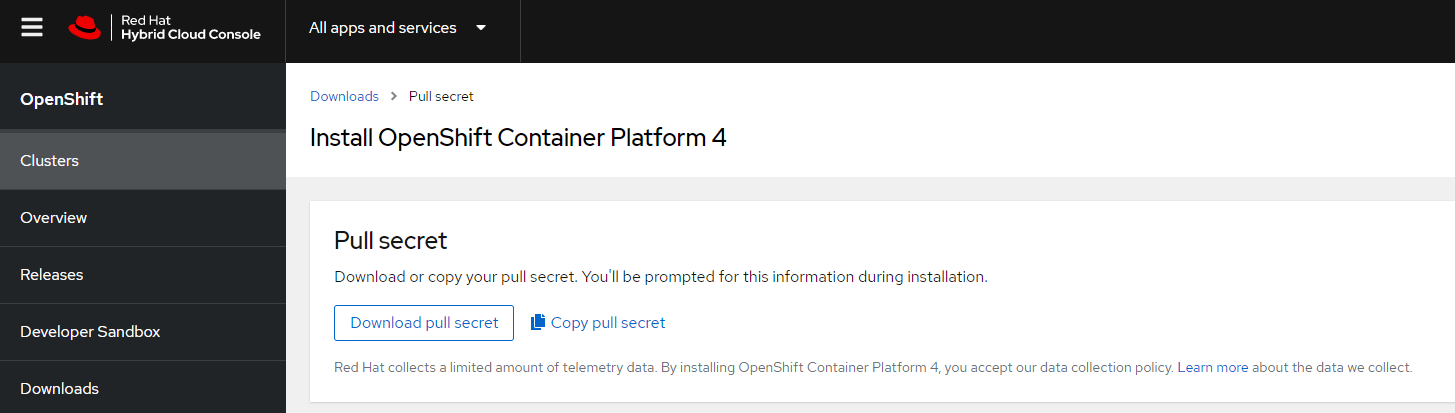
Generate an OpenShift pull secret
In order to download all the required packages for the OpenShift installation, you will need a pull secret.
Navigate to: https://console.redhat.com/openshift/install/pull-secret
Deploy a Centos VM
I’m using Centos 8 in my lab. You could use ubuntu, or any other flavor of linux (or windows). The bash commands I’ll paste below will be for centos though, so if you’re using ubuntu you’ll need to modify them slightly.
Create a VM in vCenter, or wherever you want to host the bootstrap. I did a manual install from the centos 8 stream ISO. Took about 10 minutes to configure and download all the updates.
Configure Bootstrap VM
Now that we have the bootstrap VM, we need to configure it and load the OpenShift binaries.
# Update all the packages
sudo su
yum update -y

# Download the vCenter certificates so the vCenter TLS can be trusted.
wget https://vcenter.home.lab/certs/download.zip  --no-check-certificate -P /tmp/

# Unzip the certs and add them to the CA Trust
unzip /tmp/download.zip -d /tmp/
for f in /tmp/certs/lin/* ; do mv -- "$f" "$f.crt" ; done
sudo cp /tmp/certs/lin/*.0.crt /etc/pki/ca-trust/source/anchors/
sudo update-ca-trust

# Cleanup temp files
sudo rm -rf /tmp/certs
sudo rm -f /tmp/download.zip

# Generate a ssh certificate
ssh-keygen -t rsa -b 4096 -N "" -f ~/.ssh/id_rsa
eval "$(ssh-agent -s)"
ssh-add ~/.ssh/id_rsa

# SCTP the 2 files to the /tmp directory
# File 1: OpenShift installer
# File 2: OpenShift CLI

# Untar the binaries
tar -xvf /tmp/openshift-install-linux.tar.gz -C /tmp/
tar -xvf /tmp/oc-4.11.13-linux.tar.gz -C /tmp/

# Move the binaries to your executable path (Mine is /usr/bin)
mv /tmp/openshift-install /usr/bin
mv /tmp/oc /usr/bin
mv /tmp/kubectl /usr/bin

# Test the binaries
openshift-install version
oc version
kubectl version

# Make the OpenShift Install Directory
mkdir /opt/openshift-cluster-1

Install OpenShift with the Installer
Ok, now that the bootstrap server is ready, we need to create an install-config.yaml file. This example file below is very basic. It has some parameters about vcenter, information on master and worker count, vm sizes, etc.
Create a file called install-config.yaml in the /opt/openshift-cluster-1 directory
apiVersion: v1
baseDomain: openshift.lab
compute:
- name: worker
  replicas: 3
  platform:
    vsphere:
      cpus: 4
      # coresPerSocket: 2
      memoryMB: 16384
      osDisk:
        diskSizeGB: 120
controlPlane:
  hyperthreading: Enabled
  name: master
  replicas: 3
  platform:
    vsphere:
      cpus: 4
      # coresPerSocket: 2
      memoryMB: 16384
      osDisk:
        diskSizeGB: 120
metadata:
  name: openshift-cluster-1
platform:
  vsphere:
    vcenter: vcenter.home.lab
    username: USERNAME
    password: "PASSWORD"
    datacenter: "vSAN Datacenter"
    defaultDatastore: vsanDatastore
    folder: /vSAN Datacenter/vm/openshift
    network: Data-vlan7
    cluster: "vSAN Cluster"
    apiVIP: 192.168.7.55
    ingressVIP: 192.168.7.56
fips: false
pullSecret: '{"auths":{"cloud.openshift.com":{"auth":"b.......BLUg==","email":"email@company.com"},"quay.io":{"auth":"b3........Ug==","email":"email@company.com"},"registry.connect.redhat.com":{"auth":"f.......4Zw==","email":"email@company.com"},"registry.redhat.io":{"auth":"fH..........4Zw==","email":"email@company.com"}}}'
sshKey: |
  ssh-rsa AAA.........Qw== root@openshift-bootstrap
# Create the install-config.yaml file
touch /opt/openshift-cluster-1/install-config.yaml
nano /opt/openshift-cluster-1/install-config.yaml # Paste the text from above and edit

# Install OpenShift
openshift-install create cluster --dir /opt/openshift-cluster-1 --log-level=info

This process will take a while. Usually takes me about 20-30 minutes. After the installation is successful we can move on to install AKO.

Validate the OpenShift Cluster
Let’s validate the OpenShift cluster before installing Avi. Start with running “kubectl get pods -A”

So the first step is to copy over the config file from the OpenShift install folder, into our ~/.kube/config file.
# Create the ~/.kube directory and copy the config file
mkdir ~/.kube/ && cp /opt/openshift-cluster-1/auth/kubeconfig ~/.kube/config

Additionally you can validate the cluster using some native OpenShift cli commands
oc status
oc get all

Delete the OpenShift Cluster
When you’re ready to delete the cluster, you can run the following command.
openshift-install destroy cluster --dir /opt/openshift-cluster-1 --log-level=info