In this blog I’ll walk through what is required to deploy an application in Avi, using ansible.
Ansible is pretty flexible, and a great tool to start automating your network stack.
There are a number of ways to use ansible to create an application in Avi:
- Deploy an Avi application using vmware.alb collection and tasks
- Simplest, but not as neat as the below.
- Deploy an Avi application using vmware.alb collection and roles with tasks
- Similar to the above, but a little neater. This is the example shown in this blog post
- Deploy an Avi application using vmware.alb collection and the aviconfig role
- More like a declarative model. You specify a few variables about the application and let the aviconfig role do the rest. Very simple, but not as flexible.
- Deploy an Avi application using vmware.alb collection and the avi api_session
- This is basically a REST api call, except that api_session handles the Avi session for you
- Deploy an Avi application using vmware builtin rest module, ansible.builtin.uri.
- This is the most complex solution and uses the least amount of automation since you will be doing rest calls against the Avi controller for each object created, as well as handling your own session cookies and headers.
Software Versions used in this demo
| Software | Version |
|---|---|
| Bootstrap VM | Ubuntu 22.04.3 LTS |
| Ansible | 2.15.9 |
| Ansible Python | 3.10.12 |
| Ansible Collection: vmware.alb | 30.1.1 |
| Github Repo | avi_create_app |
| Avi Controller & SEs | 22.1.3 |
Deploy an Avi controller and SEs
If you don’t already have some type of Avi controller in your environment, you’ll need to do this as a first step. The script below is designed for an Avi controller running in vCenter. So if you have a public cloud environment, the script will need to be modified slightly.
See my blog post on deploying an Avi controller
Prepping a bootstrap VM for Ansible
You need some type of server/host to run ansible playbooks. This can be an ubuntu or centos VM, it could even be your PC or MAC if you find a way to install ansible from there. In my case I’ve deployed a VM in vcenter, and installed Ubuntu 22.
Update Ubuntu
sudo su
apt update && sudo apt full-upgrade -y
reboot # I like to reboot after a large upgrade like this
Install Ansible and the vmware.alb collection
sudo su
apt install ansible
ansible-galaxy collection install vmware.alb
Install Git
sudo su
apt install git
Clone the ansible repo
mkdir /home/ubuntu/ansible
cd /home/ubuntu/ansible
git clone https://github.com/canad1an/avi_ansible_examples.git
cd avi_ansible_examples/avi_create_app/
Configuring the ansible playbook
Now that we’ve setup the ubuntu bootstrap VM, let’s configure some variables in the ansible playbook and we can run the playbook.
The only configuration file in this playbook is /vars/creds.yaml
The Applications list is a list of all the applications you would like to create in Avi, it can be 1 or many. And the avi_controller_info has details on where to deploy the applications.
applications: # A list of the applications to deploy
  - app_name: app-1 # Name of the application
    app_port: 80 # VirtualService Port
    app_http_profile: "System-HTTP"
    app_network_profile: "System-TCP-Proxy"
    app_health_monitor: "System-TCP"
    app_pool_members: # List of pool members, can be 1 or many
      - ip_address: "10.10.10.10"
        port: 80
        enabled: true #Enable or disable the pool member by default
      - ip_address: "10.10.10.11"
        port: 80
        enabled: true
    state: present
  - app_name: app-2
    app_port: 80
    app_http_profile: "System-HTTP"
    app_network_profile: "System-TCP-Proxy"
    app_health_monitor: "System-TCP"
    app_pool_members:
      - ip_address: "10.10.10.10"
        port: 80
        enabled: true
      - ip_address: "10.10.10.11"
        port: 80
        enabled: true
    state: present
avi_controller_info:
  avi_credentials:
    controller: "10.225.6.35" # Avi controller IP or fqdn
    username: "admin"
    password: "password123"
    api_version: "22.1.3"
  avi_cloud: "vcenter-cloud" # Avi cloud to deploy the VS
  tenant: "admin"
  network: "vip-traffic" # Network for the VIPs
Run the ansible playbook and create the applications
After you’ve edited the above config file, now we can run the ansible script.
cd avi_ansible_examples/avi_create_app #Navigate back to this directory, since this is where the main.yaml file exists
export ANSIBLE_HOST_KEY_CHECKING=False; ansible-playbook main.yaml
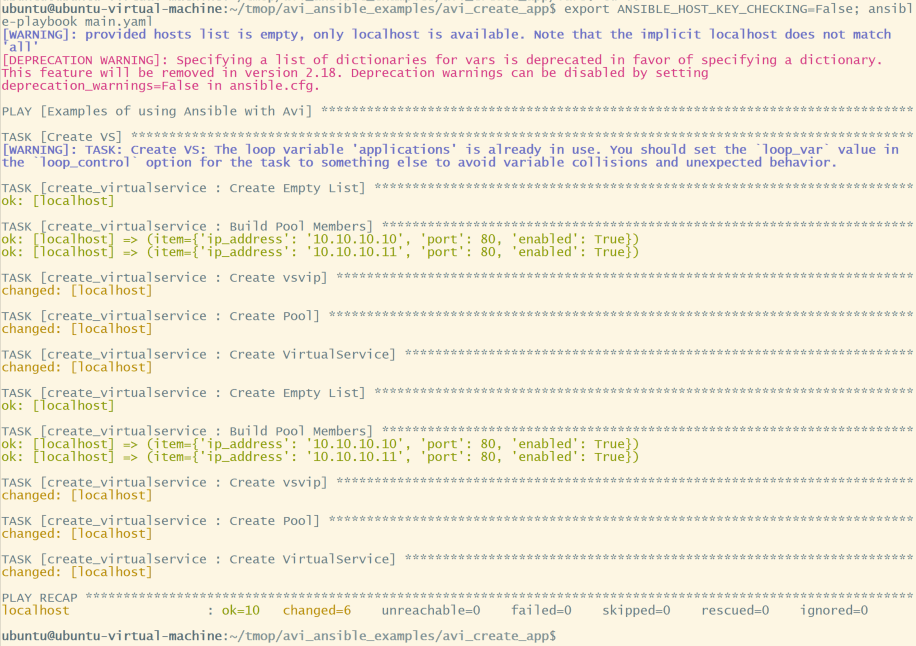

As you can see the 2 applications have been created in Avi, VirtualService, vsvip, and pool. They’re marked red since the pool members are failing health check.
Feel free to customize this script as needed, for your use case.
Hi Matt,
Hope you’re well.
Question, is there a way to remove servers at a node level?
In other words, can I disable a server from all pools at once?
Regards,
MK
So That is one area where Avi and F5 differ.
F5 has the concept of a node where you define an IP address. And the pool member will have the node (IP Address) and the port.
In Avi, we don’t have that extra layer of abstraction. You have a pool member, and that pool member will have the IP and port. (You can inherit a default port from the pool instead of manually assigning ports)
So, that means that there is not a native way in the UI to disable a single server across all of the pools in Avi. However, Avi is built for automation. The platform runs on 100% APIs. Full support for Ansible, Terraform, Python, etc. And because of that, doing a task like this would be very easy to do in python, for example.
If I wanted to accomplish this task, I would first hit the API to get a list of pools from Avi and look at their pool members for matches on the server IP address that you would like to disable. Then run PATCH jobs against all the pools that have that server IP to disable the pool member.