Ever wish your online browsing were more private or that you could visit your home network from anywhere in the world? If so, you may want to try your hand at self-hosting a VPN within a home lab. Scares you a bit, huh? Don’t worry—We’re going to take you through it step-by-step.
Once you have finished reading this article, you will know why individuals prefer to create their own personal network, what equipment they will require, and how to begin even if they have no experience.
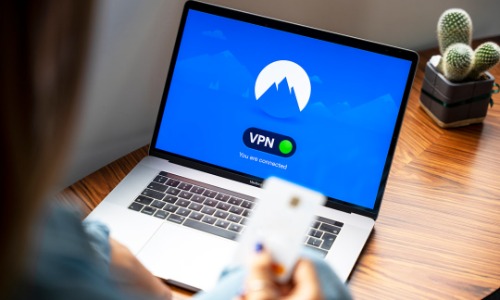
What Is a VPN and Why Should You Care
A Virtual Private Network, or VPN, is really just a tunnel that renders your web activity unseen. What you should know is that if you’re surfing the web or accessing an app, your traffic gets routed through this tunnel so others can’t spy on your activity. Most individuals utilize commercial VPNs for that purpose, but they cost money monthly and give you limited control.
That’s where self-hosting a VPN in a home lab. Rather than paying for another person’s server, you create your own system that does the same thing. The best part? You’re in control. You get to determine how it works, what it protects, and when to update it.
What You Need to Make One
Before we get started with setup directions, what you should know, okay? Don’t worry—it’s not as much as you’ll think.
- A mini-server or a computer: It may be a used laptop, a Raspberry Pi, or a desktop computer.
- A good internet connection: Preferably a static IP address or a dynamic DNS service.
- VPN software: OpenVPN and WireGuard are both great options. They’re both free and work really well.
- Basic networking tutorial: You don’t have to be an expert, but some knowledge of IP addresses and port forwarding will definitely prove useful.
Once you’ve finished setting up, you’ll begin to see how a self-hosting VPN within a home lab gives you full control of your virtual space.
Why Build Your Own Instead of a Paid Service?
You might ask yourself, “Why go through all of this when I can just buy a VPN?” Great question. Here are some reasons:
- Privacy – When you host your own, nobody but you ever sees your data.
- Remote Access – You can access your home network remotely from anywhere.
- Learning – It’s a great means to gain further knowledge regarding servers and networks.
- Cost-Effective – Once installed for the first time, it’s basically free.
All these make self-hosting a VPN in a home lab a smart option for those who have some knowledge of tech or even those interested in more online privacy.
Choosing the Right VPN Software
Now, let’s discuss software. You have choices, but here are two of the most used:
- OpenVPN: Rock is solid and secure, but comes with slightly higher installation complexity.
- WireGuard: Fast, modern, and simple to configure. Ideal for new users.
Both of these devices will help you host a secure network in the home. If you want something simple to manage with good performance, WireGuard is a good option. Either way, using one of these devices is the key to a successful self-hosted VPN in a home lab setup.
Step-by-Step Installation Guide
This is the brief version of what you must do:
1. Choose Your Hardware
Select an appliance that is always connected to your home network. A Raspberry Pi would be perfect if you don’t mind having a tiny power-saving appliance.
2. Install the Operating System
Most individuals utilize Linux for this. Ubuntu Server is a good place to begin because it’s easy to use and well-documented.
3. Install Your VPN Software
Either use the OpenVPN or the WireGuard tutorial. You will have to create keys or certificates, set up users, and make the server run when you boot your computer.
4. Configure Your Router
Log in to your home router and forward the VPN port to your server so you can access it from outside your home.
5. Test the Connection
Try to connect your new VPN to your laptop or mobile via mobile data. If you managed to do so, you just successfully self-hosted a VPN in your home lab.
Keeping It Secure
After you’re out jogging, your second concern is safety. These are the steps to remain safe:
- Use strong passwords.
- Keep your applications updated.
- Monitor logs to look for unusual activity.
- Restrict who can join by controlling keys or usernames.
These steps all help to protect your system and keep your private network private.
What Can You Do With Your Own VPN?
Now that it’s installed and running, what do you really do with it? Here are some practical and entertaining ideas:
- Share your home computer with school or work.
- Stream local content from abroad.
- Make your internet safe while using public Wi-Fi.
- Try self-hosting other software, like home automation or cloud storage.
Short and sweet, hosting a VPN in a home lab can open a world of possibilities. You’re not merely creating a secure tunnel—you’re opening new doors to possibilities for leveraging your home network.
Common Problems and How to Resolve Them
It’s to be expected that you’ll have some setbacks along the way. Here are some alternatives: Can’t connect? Check your port settings and firewall. Slow speeds? Make sure your device is connected, and your internet plan supports high-speed uploads. Lost connections? Utilize a dynamic DNS service to prevent issues with dynamic IP addresses. All of this is learning, and the more that you do it, the better you will be.
Final Thoughts
Setting up a self-hosting VPN in a home lab will probably seem scary to begin with, but it is one of the greatest ways to secure your information and become more familiar with networks. And you’ll save money and feel good about making something worthwhile yourself. So, are you ready to take digital privacy to the next level? Test it out—you may be surprised at what you can do.