Purpose
This lab is an addition to my first lab. I’m calling it the Lab 2022 edition, but it’s basically the same lab as before, with 1 additional SuperMicro server. I wanted to add NSX-T and a few other components to my overall lab, and I needed the extra pCPUs.
I built out this setup with a vmware home lab in mind. I wanted to run esxi 7 on my baremetal server, then nest everything from there. I need it to be beefy enough to handle multiple nested environments, NSXT, Avi (NSX Advanced Load Balancer), Tanzu kubernetes Grid (tkg), and any other small things that I want to run. Also, I did not want to have anything that was too loud, or used too much electricity, or had a requirement to be rack mounted. Honestly, I think dollar for dollar, you can get more out of your system if you pick a traditional rack mounted server… but it will be noisier and use more electricity and require a rack, obviously 🙂
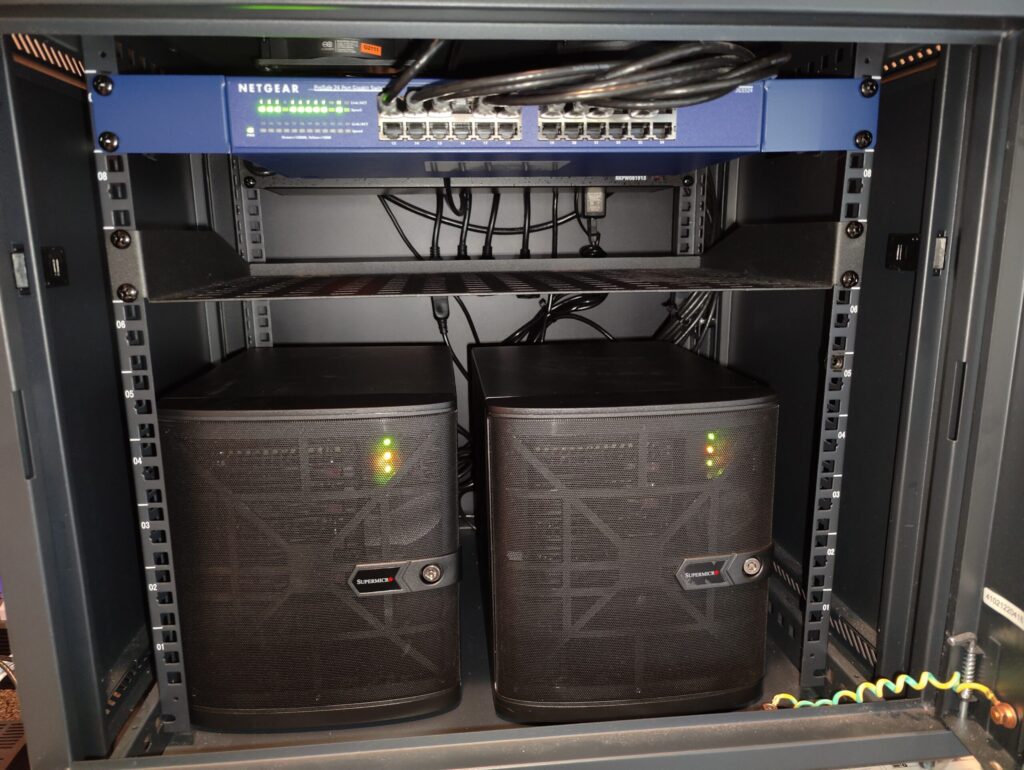
My setup is simple, everything fits into a mini tower, which takes up about 6u worth of space. You can actually get 2 of them in a rack for about 6u total.. I purchased and setup the SuperMicro initially without the rack enclosure. And if you’re following these guides to setup your own environment, you definitely don’t need to do the rack setup. I just found that in the end, it looked a little neater, since most of the wires can be hidden in the back of the box.
Lab Specs
- 2 SuperMicro
- 8c – 16 Threaded each
- 256 GB Memory & 128 GB Memory
- 4 TB SSD Storage each
- Total Lab Capacity
- 16c – 32 Threaded
- 384 GB Memory
- 8 TB SSD Storage
Interested in building your home lab?
Check out these tutorials on how to install/setup each of the components.
- Home Lab Component List – List of parts to buy for this home lab setup.
- Network Diagram – This should give you a pretty good idea of the nested setup
Step by Step Guide to build your home lab
- Build the SuperMicro Server – Some pictures of the build process
- Installing ESXi on SuperMicro – This is the old guide, but it’s the exact same. Just a newer version of code. Use the newest version available.
- Configure NTP on the ESXi Hosts – Configure it on all physical and nested esxi hosts/vms.
- Configuring the BareMetal ESXi7 – Network settings, storage, etc..
- Deploy a DNS Server – I’m using a simple bind/named dns server running on Centos8
- Configuring nested ESXi VMs – Deploy the 3 nested ESXI vms
- Deploying vCenter and vSAN on nested ESXi – Deploy the vCenter appliance and configure vSAN
- Create NSX Distributed Switch – Create Distributed switch in vCenter.
- Deploy vyos router – For iBGP between home network and overlay network
- Deploy NSX-T – Deploy and configure NSX Manager and Edge
- Troubleshooting NSX-T
- Upgrading to 10Gb Links – From 1Gb to 10Gb between the Physical SuperMicro hosts